Common Garage Door Problems and How to Fix Them
Your garage door is like the unsung hero of your home - it dutifully safeguards your prized possessions, shelters your car from the elements, and serves as a secure gateway to your sanctuary. Yet, all too often, we tend to take it for granted, until one day, it decides to throw a fit.
In this guide, we're diving deep into the world of garage door woes and the triumphant fixes that will have your door gliding smoothly once more. From the annoying ruckus of a creaky door to that heart-stopping moment when it refuses to budge, we'll unravel the mysteries behind these common garage door problems and arm you with the knowledge you need to restore peace, convenience, and security to your everyday life.
So, if you've ever wondered why your garage door seems to have a mind of its own, stick around. We're about to demystify those quirks and put you back in control of your garage door destiny.
Safety Precautions
Your safety should always come first, especially when dealing with heavy machinery like a garage door. Before you roll up your sleeves and get to work, let's talk about some essential safety precautions.
1. Prioritize Safety Always
Your garage door, while it may not seem like it, functions as a substantial and potent machine. Prioritizing safety is crucial when dealing with it. Avoid risking accidents or injuries when working on your garage door.
2. Safety Gear
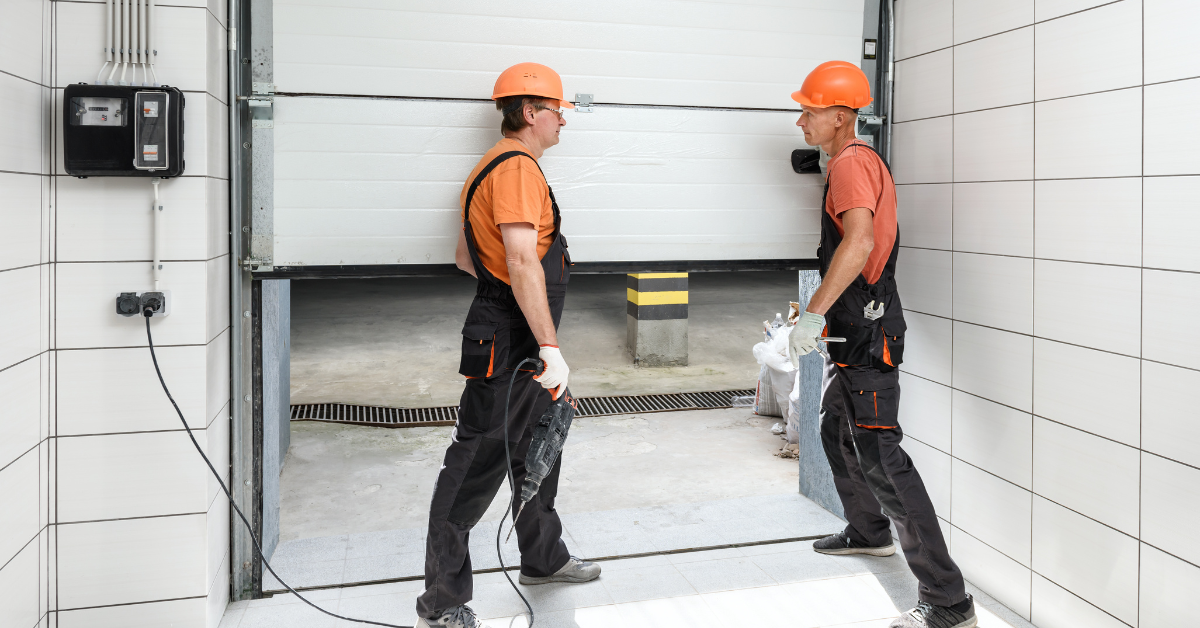
Think of safety gear as your superhero costume. It's what keeps you protected while you battle garage door issues. Here are some must-haves:
Safety Glasses: These protect your eyes from any flying debris or dirt while you work.
Gloves: Good gloves give you a good grip and keep your hands safe.
Closed-Toe Shoes: Protect your toes from falling objects.
3. Turn Off the Power
Your garage door is typically powered by electricity. The last thing you want is for it to suddenly spring to life while you're working on it. So, disconnect the power. Usually, there's a switch or a cord you can pull to cut the electricity to your garage door opener.
4. Read the Manual
Remember that manual you probably tossed aside when you first got your garage door opener? Well, it's time to dust it off. Different brands and models can have unique quirks, so the manual is like your trusty treasure map to navigate any potential dangers.
5. When to Call a Pro
Not all garage door problems can be solved by your DIY prowess. Some issues are like puzzles that need an expert's touch. If you're ever unsure about what you're doing, or if the problem seems too big to handle, don't hesitate to call in a professional. It might cost a bit, but it's a small price to pay for safety.
Common Garage Door Problems
Your garage door, like any other part of your home, can sometimes act up. But fear not; most of these issues have straightforward solutions.
A. Noisy Garage Door
Your garage door might sound like it's auditioning for a horror movie, but there are good reasons for the noise:
1. Lack of Lubrication: Just like your bike needs oil on its chain, your garage door needs some lubrication to move quietly. Without it, those metal parts can start to squeal. Grab some garage door lubricant and apply it to all the moving parts: hinges, rollers, springs, and tracks. Be generous but not excessive.
2. Worn-Out Parts: Over time, the bits and pieces of your garage door can wear down. Worn rollers, hinges, or springs can create a lot of noise. If you notice that some parts are damaged or worn, it's best to replace them. This will not only quiet things down but also keep your door running smoothly.
3. Loose Hardware: If things get loose, they tend to make noise. Check for any loose nuts, bolts, or screws. Use a wrench or screwdriver to make sure all the nuts, bolts, and screws are snug.
Remember, a well-lubricated and maintained garage door can sneakily open and close without causing a fuss.
B. Garage Door Won't Open or Close
Why is your garage door being so stubborn? It can be super frustrating when your garage door refuses to budge. Here are some common reasons for this grumpy behavior:
- Your garage door has safety sensors near the bottom. If they're not aligned properly, the door thinks there's an obstacle and won't move. Ensure that the sensors on both sides of the door are aligned and clean. Sometimes, a bit of dirt can cause them to malfunction.
- Sometimes, it's as simple as a remote with a dying battery or an opener that needs reprogramming. Replace the remote's battery and see if that does the trick. If not, reprogram it according to your garage door opener's instructions.
- Something might be blocking the garage door's tracks, preventing it from moving. Make sure nothing is blocking the tracks. It could be a stray toy or a pile of leaves.
- If all else fails, look for a manual release cord hanging from the opener. Gently pull it to disengage the door from the opener, allowing you to manually open or close it. Be cautious when doing this, as the door can be heavy.
If these steps don't do the trick, it might be time to call in a professional to diagnose and fix the issue. They have the tools and expertise to handle more complex problems. By addressing these common garage door problems, you can enjoy a quieter, more cooperative entrance to your home.
C. Sagging Garage Door
Why is your garage door slouching? Imagine if you were carrying something heavy for years; you might start to slouch too. Well, your garage door can do the same for a few reasons:
1. Aging Springs: Garage doors use tension springs to help them move smoothly. Over time, these springs can lose their tension, causing the door to sag.
2. Worn-out Rollers or Hinges: Just like rusty joints can make us less flexible, worn-out rollers or hinges can make your door less aligned.
3. Poor Installation: Sometimes, it all comes down to the initial installation. If your garage door wasn't installed correctly, it may start sagging sooner.
The risks and inconveniences of a sagging door:
- A sagging door might not be as stable as it should be, posing safety risks.
- It can become hard to open and close the door, causing inconvenience.
- A sagging door may create gaps, leading to energy loss and increased utility bills.
Steps to lift up and strengthen your door:
- If the springs are the issue, consider adjusting the tension. This can be a tricky job, so it's often best left to a professional.
- Replace any worn-out rollers or hinges. This can often make a huge difference in your door's alignment.
- Sometimes, it's necessary to reinforce the supports holding your garage door. This might require adding struts or brackets.
D. Stuck Garage Door
A stuck garage door can be a real head-scratcher, but it usually boils down to a few common culprits:
1. Track Obstruction: Something might be blocking the tracks that guide the door's movement. Check for any debris or objects blocking the tracks. Take care to remove anything you might find.
2. Damaged Rollers or Tracks: Over time, rollers or tracks can wear out or get damaged, preventing smooth movement. Examine the rollers, tracks, and other parts for damage. If you find any, they may need to be repaired or replaced. Reduce friction by lubricating the tracks and rollers with silicone-based lubricant.
3. Frozen Weather: Extremely cold weather can cause parts of your garage door system to freeze, leading to sticking.
4. Safety Release: Most garage door openers have a manual release. Pull it to disengage the opener, allowing you to manually open or close the door.
5. Seek Professional Help: If these steps don't work or you're unsure about what's causing the issue, it's wise to call a professional for a more thorough inspection and repair.
E. Remote Control Problems
Remote control issues can be incredibly frustrating. Here are some common reasons for remote control problems:
- The battery in your remote control might be dead or low on power.
- Other electronic devices or even your neighbor's remote could interfere with your garage door signal.
- Sometimes, the remote itself might be faulty.
Troubleshooting tips and battery replacement instructions:
Start by replacing the battery in your remote control. This often solves the problem.
- Remove any potential sources of interference, like electronic devices near the garage door opener.
- If your remote still doesn't work, try realigning the sensors on the garage door opener and the remote control. Consult your opener's manual for instructions.
- If necessary, reprogram your remote according to the manufacturer's instructions.
- If none of these steps work, you might need to purchase a new remote control.
Repairing these aspects of your garage door will guarantee its continued, trouble-free, and secure operation.
Regular Maintenance
Regular maintenance for your garage door is akin to a health regimen for your body. Its importance cannot be overstated, as it serves to keep everything running smoothly while extending the lifespan of your garage door system. The reasons to prioritize regular maintenance are abundant.
Safety is paramount. A well-maintained garage door is a safer one, reducing the risk of unforeseen accidents, like doors unexpectedly falling. Moreover, it contributes to longevity. Much like regular check-ups for your car, routine maintenance significantly extends your garage door's lifespan, sparing you the expense of premature replacements. Convenience is another perk. Who wants to wrestle with a stubborn garage door when time is of the essence? Regular upkeep guarantees a hassle-free operation. Lastly, it enhances energy efficiency. Properly maintained doors form a tight seal, preventing drafts that can otherwise lead to escalated heating and cooling costs.
Here's your maintenance checklist, a simple yet vital routine to ensure your garage door's optimal performance. Start with a visual inspection, a monthly practice to identify wear and tear, rust, cracks, or dents. Lubricate moving parts semi-annually, including rollers, hinges, springs, and tracks, for smooth operation. Don't forget to periodically tighten nuts and bolts that may have loosened over time. Test your door's balance and auto-reverse safety feature, and clean tracks free from debris. Inspect weatherstripping, check for cable wear, and, for safety, leave spring adjustments or replacements to professionals.
Keep your garage door opener and remote in top shape and think about getting a professional inspection once a year, especially if your door is older or if there is any doubt. By following this checklist, you're ensuring your garage door functions safely, efficiently, and reliably for years to come, an investment of time and effort that ultimately pays substantial dividends.
When to Call a Professional
While DIY can be rewarding, there are times when it's wise to leave certain tasks to the experts, especially when it comes to your garage door. Here's when it's best to call a garage door repair professional, emphasizing safety and avoiding potential DIY mistakes.
1. Spring Replacement: The torsion springs on your garage door are under immense tension and can be extremely dangerous to replace. One wrong move, and they could snap, causing severe injury or even death. Leave spring replacement to the professionals who have the knowledge and proper tools.
2. Cable Repairs: Like springs, garage door cables are under high tension. Attempting to repair or replace them without the right experience can result in serious accidents or damage to your door.
3. Track Adjustments: Garage door tracks need precise alignment. If they are misaligned or damaged, it can affect the door's operation. Adjusting tracks requires expertise to avoid causing further problems.
4. Opener Installation and Repair: Garage door openers are complex machines with electrical components. Incorrect installation or repair can lead to electrical hazards and door malfunction.
5. Electrical Issues: If you suspect a problem with the electrical components of your garage door system, such as the wiring or sensors, it's best to have a professional electrician or technician diagnose and fix the issue.
6. Structural Repairs: If your garage door has sustained structural damage, such as a bent or dented panel, it's often best to have a professional assess the damage and recommend the appropriate repairs or replacement.
7. Complex Troubleshooting: If you've tried basic troubleshooting steps and your garage door issue remains unresolved, it's a sign to call in a professional. They are equipped to identify and resolve even the most difficult issues.
8. Safety Concerns: If you're ever unsure about the safety of a DIY repair or if the repair involves high-risk components like springs or cables, prioritize safety and call a professional immediately.
Emphasize Safety and Avoiding DIY Mistakes
DIY projects can be fulfilling, but safety should always be the top priority. When it comes to garage door repairs, the potential risks are high. Attempting complex repairs without the proper knowledge and tools can lead to accidents, further damage, and costly repairs.
By hiring a professional garage door repair expert, you ensure that:
- Safety protocols are followed.
- The repair is done correctly the first time.
- Potential hazards are identified and addressed.
- The longevity of your garage door system is preserved.
Remember, it's better to invest in professional repairs to keep your garage door operating safely and efficiently. Avoid the DIY route when it involves high-risk components or complex issues to prevent accidents and costly mistakes.
Conclusion
To make sure your garage door functions without a hitch, we have explored the world of garage doors and provided solutions to common problems. We've covered noisy doors, stubborn openers, sagging panels, stuck doors, and remote control glitches. Maintaining your garage door isn't just a convenience; it's vital for safety, security, and energy efficiency in your home. By following our maintenance checklist, you can extend your door's lifespan, enhance safety, cut energy costs, and avoid expensive repairs. Don't hesitate to reach out with your questions or comments, and let us know if there are other garage door topics you'd like us to explore. With a little care, your garage door can remain the unsung hero of your home, safeguarding your possessions and providing secure access to your sanctuary. Thank you for reading, and here's to a smoothly operating garage door!


