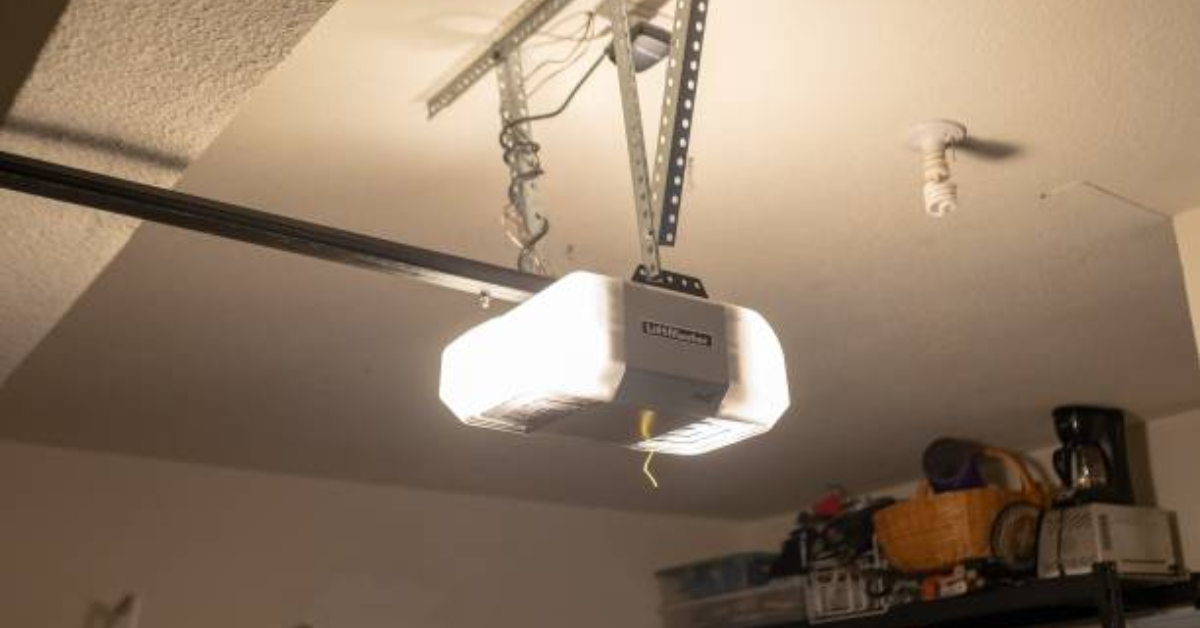
Are Chamberlain And Liftmaster The Same?

Rabia Tingat • December 13, 2024

When shopping for a garage door opener or looking for support with an existing unit, you may encounter the names Chamberlain and LiftMaster. These two brands are among the most recognized in the industry, leading many homeowners to wonder whether they are the same or distinct entities. Understanding the relationship between Chamberlain and LiftMaster can help you make an informed decision when purchasing a garage door opener or seeking compatible accessories. This article explores the similarities, differences, and features of Chamberlain and LiftMaster garage door openers, giving you a clear understanding of how these brands relate to one another.


The Connection Between Chamberlain and LiftMaster


To put it simply, Chamberlain and LiftMaster are both brands under the Chamberlain Group (CGI), a leading manufacturer of garage door openers and access solutions. CGI also owns other brands such as MyQ, Craftsman (for Sears), and Merlin. Despite being part of the same parent company, Chamberlain and LiftMaster are marketed to different customer segments and have distinct features that set them apart.


Key Similarities Between Chamberlain and LiftMaster


Since both brands are manufactured by the same company, they share several core features, including:


1. Technology

Both Chamberlain and LiftMaster openers incorporate advanced technologies like:

  • MyQ Smart Technology: Allows users to control and monitor their garage door through a smartphone app. This feature enhances convenience and security by enabling remote access.
  • Battery Backup Systems: Ensures that the garage door opener functions during power outages.
  • Safety Sensors: Both brands include sensors to prevent accidents by detecting obstructions in the door's path.


2. Quality and Durability

Products from both brands are built with high-quality materials and are designed for long-lasting performance. They are known for their reliability and minimal maintenance requirements.


3. Compatibility

Since they come from the same parent company, many parts, remotes, and accessories for Chamberlain and LiftMaster garage door openers are interchangeable.


How Chamberlain and LiftMaster Differ

While there are many similarities, Chamberlain and LiftMaster differ in their target audience, features, and installation processes.


1. Target Audience

  • LiftMaster: Primarily marketed to professional installers and is designed for commercial or heavy-duty residential use. Its products are often considered more robust and are commonly found in larger homes or businesses.
  • Chamberlain: Targeted toward DIY enthusiasts and homeowners who prefer to install their garage door openers themselves. Chamberlain models are more consumer-friendly, with detailed manuals and support for easy installation.


2. Installation Method

  • LiftMaster: These models are typically hardwired into the home’s electrical system, making them more complex to install. They are intended for professional installation, ensuring a polished and secure setup.
  • Chamberlain: These openers are designed for easier installation, often plugging into standard power outlets. This feature makes them ideal for DIY projects.


3. Features and Design

  • LiftMaster: Known for its robust construction and additional safety features. Many LiftMaster models include industrial-grade components and wall-mounted designs for space-saving convenience.
  • Chamberlain: While still durable, Chamberlain openers are generally lighter in construction and feature designs that cater to the average homeowner's needs. They are slightly more budget-friendly compared to LiftMaster models.


4. Pricing

  • LiftMaster: LiftMaster products are often more expensive due to their heavy-duty design, professional installation requirements, and additional features tailored for advanced use cases.
  • Chamberlain: Chamberlain products are priced more competitively, making them an attractive choice for budget-conscious homeowners seeking reliable performance.


Which One Should You Choose?


The decision between Chamberlain and LiftMaster ultimately depends on your needs and preferences:

  • Choose LiftMaster if:
  • You require a heavy-duty or commercial-grade opener.
  • Professional installation is your preference.
  • You want advanced safety and durability features.
  • Choose Chamberlain if:
  • You’re a DIY enthusiast looking to install the opener yourself.
  • Budget is a priority.
  • You want a reliable garage door opener for standard residential use.


Are the Accessories Interchangeable?


Yes, many accessories are interchangeable between the two brands due to their shared parent company. For example, remotes, keypads, and MyQ-compatible devices often work seamlessly with both Chamberlain and LiftMaster openers. However, always double-check compatibility to ensure proper functionality.


Conclusion


Chamberlain and LiftMaster may share the same manufacturer, but they serve different markets and offer unique benefits. LiftMaster caters to those needing professional-grade, durable solutions, while Chamberlain appeals to DIY homeowners seeking affordability and ease of use.

Both brands excel in quality, technology, and performance, making them top choices in the garage door opener market. By understanding the distinctions between the two, you can confidently choose the model that best suits your lifestyle, needs, and budget. Whether you opt for Chamberlain or LiftMaster, you’ll be investing in a reliable and innovative product backed by years of industry expertise.

You might also like

Fix N Go Blog

How to Replace a Garage Door Motor?
By Rabia Tingat July 24, 2025
If your garage door opener motor has become noisy, sluggish, or completely non-functional, it may be time to replace it. A faulty motor can make daily garage use frustrating and even unsafe. Fortunately, replacing a garage door motor isn't as complicated as it may seem—especially if you're comfortable with basic DIY tasks. In this step-by-step guide, we’ll walk you through how to replace a garage door motor safely and effectively. Whether you’re dealing with a burnt-out motor or simply upgrading to a newer model, we’ll help you understand the entire process—from removal to reinstallation. Signs Your Garage Door Motor Needs Replacing Before we jump into the replacement process, let’s look at a few signs that indicate your garage door motor is failing: The opener struggles to lift or lower the door Unusual grinding or humming noises from the motor Frequent power failures or overheating The door only opens partially or not at all The remote and wall switch stop responding If your opener exhibits any of these issues even after resetting or troubleshooting, replacing the motor is likely the best long-term solution. Choosing the Right Garage Door Motor Replacement Garage door motors (often called garage door openers) come in several types—chain drive, belt drive, screw drive, and direct drive. When choosing a replacement, make sure it’s compatible with: Your garage door's weight and size Available power source (AC or DC motor) Existing hardware and mounting setup Brands like Chamberlain, Genie, and LiftMaster offer reliable units that include all necessary mounting brackets, sensors, and manuals for a smoother installation. Tools You’ll Need Before replacing your garage door motor, gather these essential tools: Ladder Socket set Screwdrivers Adjustable wrench Wire cutters and strippers Power drill Safety glasses and gloves Once you're equipped, turn off the power supply to the opener to avoid electrical hazards. Step-by-Step Guide to Replacing a Garage Door Motor Step 1: Disconnect Power and Unplug the Motor Safety first—disconnect the opener from the power outlet. If it's hardwired into your home’s electrical system, turn off the circuit breaker. Confirm there's no electricity flowing to the unit using a voltage tester. Step 2: Disengage the Door from the Opener Pull the emergency release cord (usually a red handle) to disengage the garage door from the opener. This lets you open and close the door manually during the motor replacement process. Step 3: Remove the Old Garage Door Motor Start by detaching the wires connected to the safety sensors and wall switch. Take photos or label wires for reference during reinstallation. Next, use a socket wrench or screwdriver to unscrew the motor unit from its mounting bracket on the ceiling. Be cautious—these units are heavy and often require a second person to safely lower them. Once the motor is removed, also uninstall the rail and trolley if your new opener comes with its own. Step 4: Install the New Motor and Mounting Rail Assemble the new motor unit according to the manufacturer’s instructions. This often includes connecting the rail, carriage, and pulley system. Mount the new rail above your garage door and secure the motor to the ceiling using provided brackets. Make sure everything is level and firmly attached. A misaligned rail can lead to jerky movements or early wear on the new motor. Step 5: Wire the Motor and Accessories Reconnect the wall switch and safety sensor wires to the terminals on the new motor unit. Most openers have labeled terminals—typically for red, white, and black wires. If your model includes a backup battery, antenna, or Wi-Fi connection, set these up now. Follow your motor’s wiring diagram precisely to avoid connectivity issues. Step 6: Reconnect the Door and Adjust Settings Pull the emergency cord back into the “engaged” position to reattach the door to the trolley. Now, plug the motor into the power outlet or restore power at the breaker. Turn on the unit and test the door’s operation. Adjust the travel limits and force settings as needed. These settings ensure the door opens and closes completely without excessive strain. Refer to your manual for step-by-step adjustment instructions—usually involving small dials or digital buttons on the unit. Testing Your New Garage Door Motor Once installed, test the full functionality of the opener: Use both the wall switch and remote control Check safety sensors by blocking the beam—door should reverse Confirm smooth and quiet operation Listen for any abnormal noises or vibrations If the door doesn’t operate properly, recheck the alignment of the rail, the wiring connections, or the motor’s mounting hardware. Professional Help vs. DIY While replacing a garage door motor is a doable task for experienced DIYers, you may want to call a professional if:  Your opener is hardwired (no plug-in cord) The ceiling mount is in a tight or high area The garage door is unusually heavy or custom-built You’re unsure about wiring and adjustments Professional installers can typically complete the job within 1–2 hours, and many offer warranties on both labor and parts. Final Thoughts Replacing a garage door motor may seem like a big task, but with the right preparation and safety steps, it's well within reach for the average homeowner. Whether you're upgrading to a quieter, smarter opener or fixing a worn-out unit, understanding the wiring, mounting, and setup process will ensure a successful installation. Remember to always follow the manufacturer’s instructions, double-check your wiring, and test your new unit thoroughly. When done correctly, a new garage door motor will provide smooth, reliable performance for years to come.
How Does Genie Garage Door Motor Wire In?
By Rabia Tingat July 22, 2025
Find out how to wire a Genie garage door motor with expert tips. Improve motor performance and ensure secure, safe installation with this guide.
How to Replace a Garage Door Cable?
By Rabia Tingat July 20, 2025
Learn how to replace a garage door cable step-by-step. This guide covers tools, safety tips, and expert advice for a smooth and safe cable replacement.