How Much Does It Cost To Replace Garage Door Springs?

Rabia Tingat • June 14, 2024

Replacing garage door springs is a crucial maintenance task that every homeowner with a garage will likely face. The cost to replace garage door springs can vary significantly depending on various factors such as the type of springs, labor, and additional components. Understanding these variables can help you budget appropriately and avoid unexpected expenses. To assist you in making an informed decision, we will discuss detailed costs associated with replacing garage door springs.


Types of Garage Door Springs
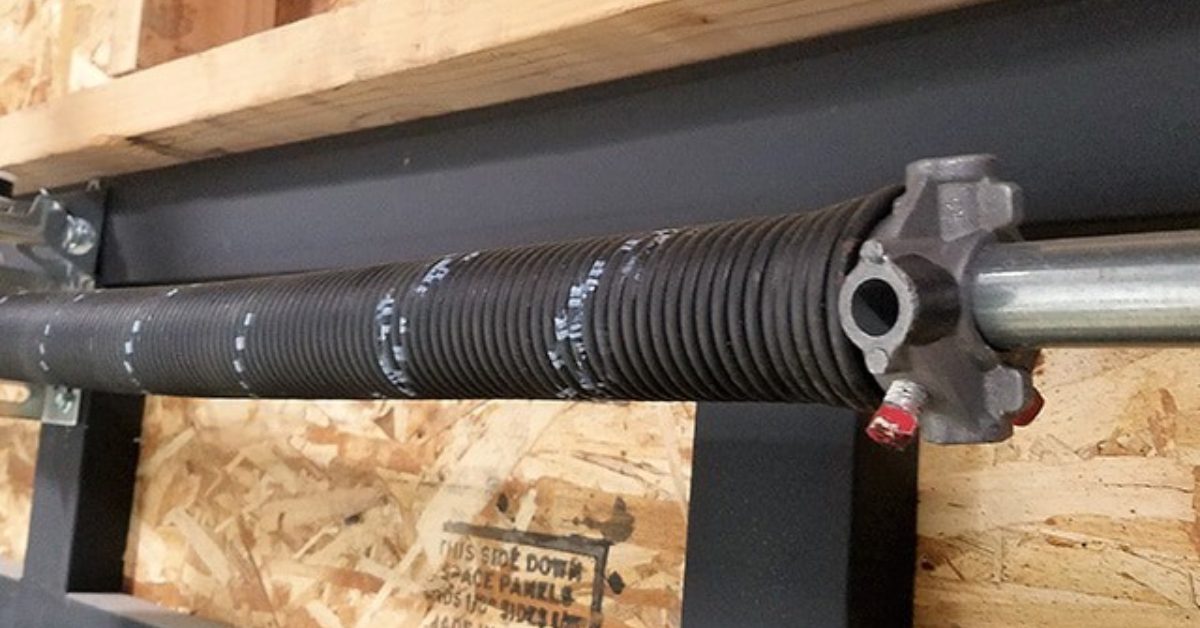

1. Torsion Springs

Torsion springs are the most common type used in modern garage doors. They are mounted horizontally above the door and use torque to lift the door.

  • Cost of Torsion Springs: The price for a single torsion spring ranges from $30 to $100 depending on the quality and the weight it needs to handle. For a double garage door, you will typically need two springs, doubling the cost.
  • Labor Costs: Hiring a professional to replace torsion springs can cost between $150 to $350. This includes the cost of the springs and the labor.
  • Total Replacement Cost: On average, the total cost for replacing torsion springs can range from $180 to $450.


2. Extension Springs


Extension springs are mounted on either side of the garage door and extend to provide the force needed to open the door. They are generally found in older garage door models.

  • Cost of Extension Springs: These springs are usually less expensive than torsion springs, ranging from $15 to $45 each.
  • Labor Costs: Professional installation for extension springs typically costs between $100 to $200.
  • Total Replacement Cost: The overall cost for replacing extension springs is usually between $130 to $290.


Factors Influencing Replacement Costs


1. Type of Springs

As mentioned, the type of springs (torsion vs. extension) plays a significant role in the cost. Torsion springs are more expensive due to their durability and the complexity of their installation.


2. Quality of Springs

Higher quality springs, made from better materials, will last longer and cost more. Investing in high-quality springs can save money in the long run by reducing the frequency of replacements.


3. Labor Costs

Labor costs can vary based on your location, the complexity of the installation, and the professional’s expertise. It's advisable to get multiple quotes to ensure you are getting a fair price.


4. Additional Components

Sometimes, other components may need replacement along with the springs, such as cables, brackets, and safety mechanisms. These additional parts can add to the overall cost.

  • Cables and Brackets: Replacing these components can add $20 to $50 to your total cost.
  • Safety Mechanisms: Upgrading or repairing safety mechanisms can cost an additional $50 to $100.


DIY vs. Professional Replacement


DIY Replacement

While DIY replacement can save on labor costs, it is generally not recommended unless you have experience with garage door systems. The high tension in garage door springs poses significant risks of injury.

  • Cost Savings: DIY can save you between $100 to $200.
  • Risks: The risk of injury or incorrect installation can lead to higher costs in the long run.


Professional Replacement

Hiring a professional ensures the job is done safely and correctly. Professionals have the right tools and expertise to handle the job efficiently.

  • Cost: Professional replacement costs more but provides peace of mind and warranty on the work done.
  • Safety: Reduces the risk of injury and potential additional repairs due to incorrect installation.


Signs That Your Garage Door Springs Need Replacement


Recognizing the signs that your garage door springs need replacement can help prevent sudden failures and potential accidents.

  • Look for gaps in the coils, rust, or any deformities in the springs.
  • If the door struggles to open or doesn’t stay open, the springs may be losing tension.
  • Unusual creaking or snapping sounds when operating the door can indicate failing springs.
  • If the door appears crooked or uneven when opening or closing, one of the springs might be damaged.


How to Maintain Your Garage Door Springs


Regular maintenance can extend the life of your garage door springs and ensure smooth operation.

  • Apply a garage door lubricant to the springs every few months to reduce friction and prevent rust.
  • Periodically check the springs for any signs of wear and tear.
  • Schedule an annual maintenance check with a professional to catch any potential issues early.


Reliable Garage Door Spring Replacement by FIX N GO


For the best services in replacing garage door springs, look no further than FIX N GO Garage Door Repair. Our team of experienced technicians is dedicated to providing top-notch, efficient, and reliable service. We use only high-quality springs and parts to ensure the longevity and smooth operation of your garage door. With transparent pricing, prompt response times, and a commitment to customer satisfaction, FIX N GO Garage Door Repair stands out as the premier choice for all your garage door needs. Trust us to keep your garage door functioning safely and efficiently.


Conclusion


Replacing garage door springs is an essential part of maintaining your garage door system. Understanding the costs involved and the factors that influence these costs can help you make an informed decision. Whether you choose to replace the springs yourself or hire a professional, ensuring the job is done correctly is crucial for the safety and longevity of your garage door.

You might also like

Fix N Go Blog

How to Replace a Garage Door Motor?
By Rabia Tingat July 24, 2025
If your garage door opener motor has become noisy, sluggish, or completely non-functional, it may be time to replace it. A faulty motor can make daily garage use frustrating and even unsafe. Fortunately, replacing a garage door motor isn't as complicated as it may seem—especially if you're comfortable with basic DIY tasks. In this step-by-step guide, we’ll walk you through how to replace a garage door motor safely and effectively. Whether you’re dealing with a burnt-out motor or simply upgrading to a newer model, we’ll help you understand the entire process—from removal to reinstallation. Signs Your Garage Door Motor Needs Replacing Before we jump into the replacement process, let’s look at a few signs that indicate your garage door motor is failing: The opener struggles to lift or lower the door Unusual grinding or humming noises from the motor Frequent power failures or overheating The door only opens partially or not at all The remote and wall switch stop responding If your opener exhibits any of these issues even after resetting or troubleshooting, replacing the motor is likely the best long-term solution. Choosing the Right Garage Door Motor Replacement Garage door motors (often called garage door openers) come in several types—chain drive, belt drive, screw drive, and direct drive. When choosing a replacement, make sure it’s compatible with: Your garage door's weight and size Available power source (AC or DC motor) Existing hardware and mounting setup Brands like Chamberlain, Genie, and LiftMaster offer reliable units that include all necessary mounting brackets, sensors, and manuals for a smoother installation. Tools You’ll Need Before replacing your garage door motor, gather these essential tools: Ladder Socket set Screwdrivers Adjustable wrench Wire cutters and strippers Power drill Safety glasses and gloves Once you're equipped, turn off the power supply to the opener to avoid electrical hazards. Step-by-Step Guide to Replacing a Garage Door Motor Step 1: Disconnect Power and Unplug the Motor Safety first—disconnect the opener from the power outlet. If it's hardwired into your home’s electrical system, turn off the circuit breaker. Confirm there's no electricity flowing to the unit using a voltage tester. Step 2: Disengage the Door from the Opener Pull the emergency release cord (usually a red handle) to disengage the garage door from the opener. This lets you open and close the door manually during the motor replacement process. Step 3: Remove the Old Garage Door Motor Start by detaching the wires connected to the safety sensors and wall switch. Take photos or label wires for reference during reinstallation. Next, use a socket wrench or screwdriver to unscrew the motor unit from its mounting bracket on the ceiling. Be cautious—these units are heavy and often require a second person to safely lower them. Once the motor is removed, also uninstall the rail and trolley if your new opener comes with its own. Step 4: Install the New Motor and Mounting Rail Assemble the new motor unit according to the manufacturer’s instructions. This often includes connecting the rail, carriage, and pulley system. Mount the new rail above your garage door and secure the motor to the ceiling using provided brackets. Make sure everything is level and firmly attached. A misaligned rail can lead to jerky movements or early wear on the new motor. Step 5: Wire the Motor and Accessories Reconnect the wall switch and safety sensor wires to the terminals on the new motor unit. Most openers have labeled terminals—typically for red, white, and black wires. If your model includes a backup battery, antenna, or Wi-Fi connection, set these up now. Follow your motor’s wiring diagram precisely to avoid connectivity issues. Step 6: Reconnect the Door and Adjust Settings Pull the emergency cord back into the “engaged” position to reattach the door to the trolley. Now, plug the motor into the power outlet or restore power at the breaker. Turn on the unit and test the door’s operation. Adjust the travel limits and force settings as needed. These settings ensure the door opens and closes completely without excessive strain. Refer to your manual for step-by-step adjustment instructions—usually involving small dials or digital buttons on the unit. Testing Your New Garage Door Motor Once installed, test the full functionality of the opener: Use both the wall switch and remote control Check safety sensors by blocking the beam—door should reverse Confirm smooth and quiet operation Listen for any abnormal noises or vibrations If the door doesn’t operate properly, recheck the alignment of the rail, the wiring connections, or the motor’s mounting hardware. Professional Help vs. DIY While replacing a garage door motor is a doable task for experienced DIYers, you may want to call a professional if:  Your opener is hardwired (no plug-in cord) The ceiling mount is in a tight or high area The garage door is unusually heavy or custom-built You’re unsure about wiring and adjustments Professional installers can typically complete the job within 1–2 hours, and many offer warranties on both labor and parts. Final Thoughts Replacing a garage door motor may seem like a big task, but with the right preparation and safety steps, it's well within reach for the average homeowner. Whether you're upgrading to a quieter, smarter opener or fixing a worn-out unit, understanding the wiring, mounting, and setup process will ensure a successful installation. Remember to always follow the manufacturer’s instructions, double-check your wiring, and test your new unit thoroughly. When done correctly, a new garage door motor will provide smooth, reliable performance for years to come.
How Does Genie Garage Door Motor Wire In?
By Rabia Tingat July 22, 2025
Find out how to wire a Genie garage door motor with expert tips. Improve motor performance and ensure secure, safe installation with this guide.
How to Replace a Garage Door Cable?
By Rabia Tingat July 20, 2025
Learn how to replace a garage door cable step-by-step. This guide covers tools, safety tips, and expert advice for a smooth and safe cable replacement.