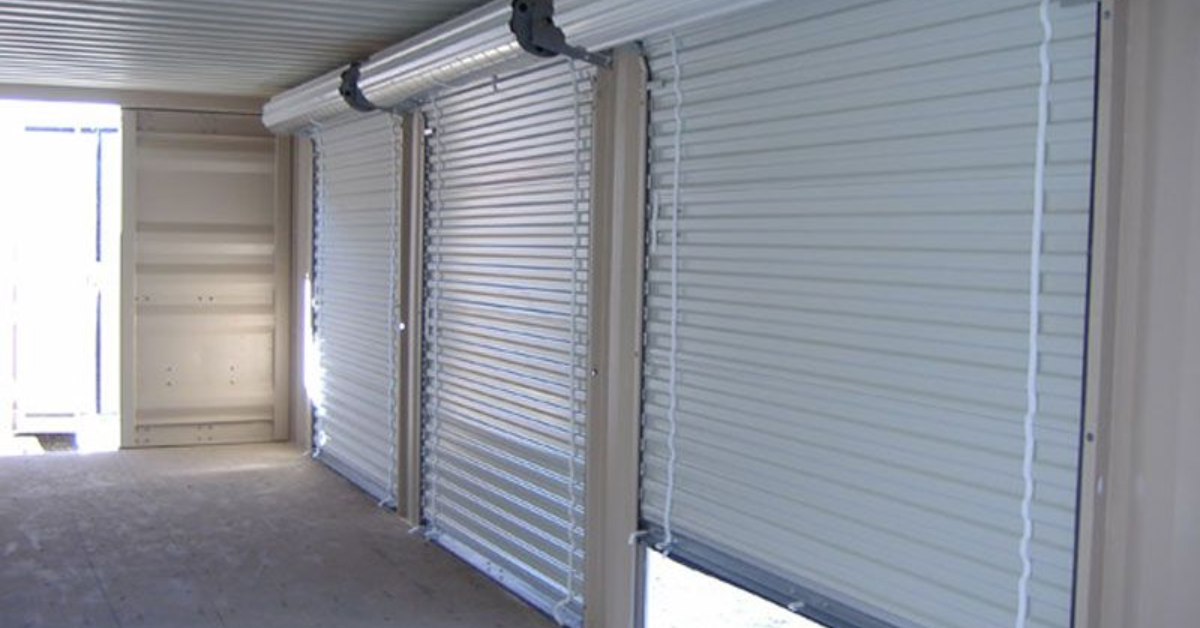
How To Insulate A Roll Up Garage Door?
Learn how to insulate a roll-up garage door effectively to improve energy efficiency and maintain a comfortable temperature in your garage. Do you find yourself shivering in your garage during the winter and sweating profusely in the summer? If your garage feels more like a freezer in the cold months and an oven in the heat, it's probably time to give some serious thought to insulating your roll-up garage door. Despite being often overlooked, insulating your garage door can have a profound impact on the overall comfort of your home. Not only does it regulate the temperature within the garage, but it also prevents extreme heat or cold from seeping into your living spaces, thereby enhancing your daily comfort levels. Plus, the benefits extend beyond comfort—proper insulation can lead to substantial savings on your energy bills by reducing the need for constant heating and cooling. So, if you're tired of facing the icy chill or blistering heat every time you step into your garage, insulating your garage door might just be the solution you've been looking for.
Why Insulate Your Roll-Up Garage Door?
Insulating your roll-up garage door is not just about keeping your car warm in the winter or cool in the summer. It serves several important purposes:
Temperature Regulation: Insulation acts as a barrier against extreme temperatures, helping to maintain a more stable and comfortable climate inside your garage throughout the year.
Energy Efficiency:
By reducing the amount of heat transfer between your garage and the outside environment, insulation can lower your heating and cooling costs by reducing the need for your HVAC system to work overtime.
Protection for Your Belongings:
Insulation helps to prevent extreme temperature fluctuations that can damage items stored in your garage, such as tools, equipment, and
even your vehicle.
Noise Reduction: Insulating your garage door can also help to dampen noise from outside, making your home quieter and more peaceful, especially if you live on a busy street or near noisy neighbors.
Benefits of Insulating Your Garage Door:
The benefits of insulating your roll-up garage door extend beyond just comfort and energy savings. Here are some additional advantages:
- Insulation can help strengthen your garage door, making it more resistant to dents, dings, and other types of damage.
- A well-insulated garage door can provide an additional layer of security for your home, making it harder for would-be intruders to gain access.
- Insulating your garage door can also improve the appearance of your home, enhancing its curb appeal and potentially increasing its resale value.
- By reducing your energy consumption, insulating your garage door can also help to reduce your carbon footprint and contribute to a more sustainable future.
Assessing Your Garage Door
Before you start insulating your roll up garage door, it's important to assess its current condition and characteristics. Here are two key steps to take:
Determine the Type of Roll Up Garage Door
- First things first, you'll need to figure out what type of roll-up garage door you have. Roll-up doors typically come in two main varieties: sectional roll-up doors and single-piece roll-up doors. Sectional doors are made up of several horizontal panels that roll up and down along tracks, while single-piece doors consist of a single large panel that rolls up into the ceiling space.
Measuring the Dimensions of Your Door
- Once you know what type of roll-up door you have, the next step is to measure its dimensions. You'll need to measure both the width and height of the door opening, as well as the thickness of the panels if you have a sectional door. These measurements will help you determine how much insulation material you'll need to cover the entire surface of the door.
Choosing the Right Insulation Material
Now that you've assessed your garage door, it's time to choose the right insulation material. There are several options available, each with its pros and cons. Here are some of the most common types of insulation materials:
Foam Board Insulation: Foam boards are lightweight and easy to cut to size, making them a popular choice for garage door insulation. They offer good thermal resistance and can help to reduce noise transmission.
Reflective Foil Insulation:
Reflective foil insulation consists of a layer of foil-backed foam that reflects heat away from the garage door. This type of insulation is particularly effective in hot climates.
Fiberglass Insulation:
Fiberglass insulation is made from tiny glass fibers and is available in batts or rolls. While it provides excellent thermal resistance, it can be messy to work with and may irritate the skin and respiratory system.
Spray Foam Insulation: Spray foam insulation is applied as a liquid that expands to fill gaps and cracks, providing a seamless layer of insulation. It offers superior thermal performance but can be expensive and difficult to install.
Considerations for Climate and Budget:
When choosing insulation material for your garage door, it's important to consider both your local climate and your budget. For example, if you live in a cold climate, you'll want insulation with a high R-value (thermal resistance) to keep your garage warm in the winter. On the other hand, if you live in a hot climate, you'll want insulation that reflects heat away from the door to keep your garage cool in the summer. Additionally, you'll need to factor in the cost of the insulation material and installation, as well as any long-term savings on energy bills. By weighing these factors carefully, you can choose the right insulation material that meets your needs and fits within your budget.
Preparation Steps
Before you dive into insulating your roll up garage door, it's essential to prepare properly. Here are two crucial preparation steps:
Cleaning the Garage Door Surface:
- Start by giving your garage door a good clean. Use a mild detergent or soap mixed with water to remove any dirt, grease, or debris from the surface. Pay special attention to any areas where dirt or grime has accumulated, as these can affect the adhesion of the insulation material.
Gathering Necessary Tools and Supplies:
- Next, gather all the tools and supplies you'll need for the insulation project. This typically includes insulation material (such as foam boards or reflective foil), a utility knife or scissors for cutting the insulation to size, measuring tape, a straight edge or ruler for making straight cuts, and adhesive or tape for securing the insulation panels to the garage door. Make sure you have everything on hand before you begin to avoid interruptions during the installation process.
Installation Process
Now that you're prepared, it's time to start installing the insulation on your roll-up garage door. Here's a step-by-step guide to help you through the process:
- Start by measuring the dimensions of your garage door panels and cutting the insulation material to fit. Use a straight edge and utility knife or scissors to make clean, straight cuts.
- If using adhesive to attach the insulation panels to the garage door, apply it evenly to the back of each panel according to the manufacturer's instructions.
- Carefully position the insulation panels onto the garage door, starting at the top and working your way down. Press firmly to ensure good adhesion and smooth out any wrinkles or bubbles.
- If you're not using adhesive, use tape or another suitable fastener to secure the insulation panels to the garage door. Make sure the panels are securely attached and won't come loose over time.
Tips for Cutting and Fitting Insulation Panels:
- Double-check your measurements before cutting the insulation material to avoid mistakes.
- A sharp utility knife or pair of scissors will make it easier to cut through the insulation material cleanly and accurately.
- Before applying adhesive or tape, test fit the insulation panels on the garage door to ensure they fit properly and make any necessary adjustments.
- Use additional insulation or weather stripping to seal any gaps or edges around the garage door to maximize efficiency.
By following these preparation steps and the installation process carefully, you can effectively insulate your roll up garage door and enjoy the benefits of a more comfortable and energy-efficient home.
Sealing and Securing the Insulation
Once you've installed the insulation panels on your roll up garage door, it's important to properly seal and secure them to ensure maximum effectiveness. After placing the insulation panels on the garage door, use tape or adhesive to firmly secure them in place. Apply the tape or adhesive along the edges and seams of the insulation panels, ensuring that they are securely attached to the door surface. This will help prevent the panels from shifting or coming loose over time, ensuring consistent insulation performance.
To achieve optimal insulation, it's essential to seal any gaps or edges around the garage door where air could leak in or out. Use additional insulation material or weather stripping to fill in any gaps between the insulation panels and the door frame. Pay special attention to corners, edges, and any areas where the panels meet or overlap. Proper sealing will help prevent heat loss or gain and improve the overall energy efficiency of your garage.
Optional Additional Steps:
Your roll up garage door can be further insulated and sealed by taking some extra steps in addition to sealing and securing the insulation panels:
Adding Reflective Foil for Increased Insulation:Consider adding a layer of reflective foil insulation over the insulation panels for added thermal protection. Reflective foil insulation helps to reflect heat away from the garage door, keeping it cooler in the summer months. Simply apply the foil over the insulation panels and secure it in place using tape or adhesive for an extra layer of insulation.
Installing Weather Stripping for Enhanced Seal:For an even tighter seal around your garage door,install weather stripping along the edges of the door frame. Weather stripping helps to seal gaps and prevent drafts, improving the overall insulation and energy efficiency of your garage. Choose weather stripping that is specifically designed for garage doors and follow the manufacturer's instructions for proper installation.
By sealing and securing the insulation panels and considering optional additional steps like adding reflective foil or installing weather stripping, you can ensure that your roll up garage door is effectively insulated and properly sealed, providing maximum comfort and energy efficiency for your home.
Maintenance and Long-Term Care
To ensure that your roll up garage door insulation continues to perform effectively over time, it's essential to prioritize maintenance and long-term care. Regular inspection of the insulation is key to identifying any potential issues early on, such as damage or wear. Addressing these issues promptly can help prevent further damage and maintain the insulation's efficiency. By staying proactive with maintenance and addressing any issues as they arise, you can prolong the lifespan of your insulation and continue to enjoy its benefits for years to come.
Conclusion
Insulating your roll up garage door is a simple yet effective way to enhance the comfort and energy efficiency of your home. By following the key steps outlined in this guide, including assessing your garage door, choosing the right insulation material, and properly installing and sealing the insulation panels, you can create a more comfortable and energy-efficient environment in your garage. Regular maintenance and care, such as inspecting the insulation and addressing any damage or wear over time, are essential for ensuring long-term performance. So, take the time to insulate your garage door today and start enjoying the benefits of a well-insulated garage for years to come.


