How to Replace a Garage Door Seal?
A garage door seal may seem like a small component, but it plays a big role in keeping your garage protected from the elements. Whether you’re dealing with rainwater seeping in, cold drafts, pests, or dust, a worn-out or damaged seal can compromise your garage’s insulation and cleanliness. Knowing how to replace a garage door seal is essential for maintaining energy efficiency, security, and protection for your belongings.
This comprehensive guide will walk you through everything you need to know about replacing a garage door seal, from identifying the signs of wear to choosing the right replacement and performing the installation yourself. With the right tools and a little know-how, this home maintenance task can be done in less than an hour.
What Is a Garage Door Seal and Why Does It Matter?
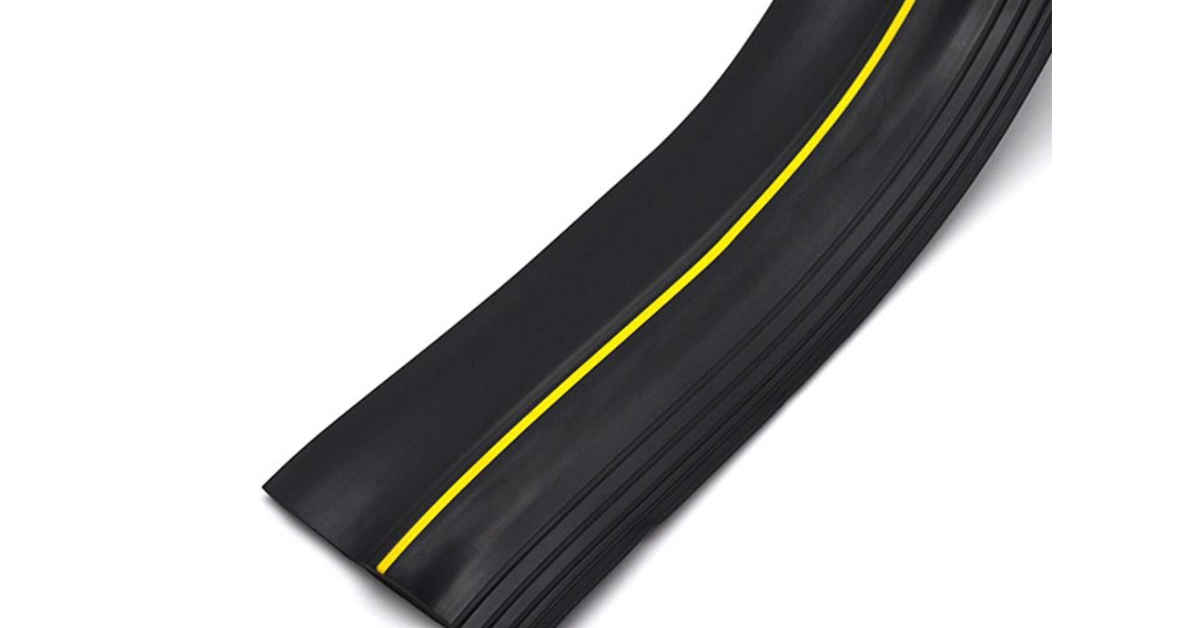
A garage door seal, often called a bottom seal or weather seal, is a strip of rubber or vinyl attached to the bottom edge of your garage door. Its main purpose is to close the gap between the door and the ground. Over time, this seal can become cracked, brittle, or compressed, which allows water, dirt, cold air, and insects to enter the garage.
Replacing a damaged garage door seal helps:
- Prevent water damage
- Keep out rodents and insects
- Improve insulation and energy efficiency
- Reduce dust and debris inside the garage
- Ensure a tight and secure door closure
If you’ve noticed daylight peeking under the door or feel cold air coming through, it's time for a replacement.
Step 1: Identify the Type of Garage Door Seal You Need
Before buying a replacement, inspect your existing seal and the track it fits into. There are several types of seals, and they vary based on your door's bottom track system.
Common types include:
- T-End or T-Bulb Seals: These have a T-shaped edge on both sides that slides into tracks.
- Beaded Seals: Feature round edges that fit into circular tracks.
- Bulb Seals: Shaped like a round tube or balloon; suitable for uneven floors.
- Flat Seals: Nailed or screwed directly onto the door; common in wooden garage doors.
Check your garage door manual or look for a part number on the existing seal. If unsure, bring the old seal to a hardware store for a match.
Step 2: Gather the Required Tools and Materials
To replace a garage door seal, you will typically need:
- Replacement garage door seal (correct size and type)
- Screwdriver or drill (if screws are present)
- Flathead screwdriver (to remove old seal)
- Utility knife or heavy-duty scissors
- Soapy water or silicone lubricant (for easier installation)
- Step ladder (if needed)
- Tape measure
Having everything ready before you start will make the process faster and smoother.
Step 3: Remove the Old Garage Door Seal
Start by fully opening your garage door to expose the bottom edge. If the door uses a track system:
- Loosen or remove the screws or brackets holding the seal in place.
- Pull the old seal out of the tracks using steady pressure. If it’s stuck, use a flathead screwdriver to loosen it.
- For nailed or stapled seals, remove the fasteners carefully to avoid damaging the door.
Once the old seal is removed, clean the bottom edge and tracks with a cloth to eliminate any debris, dirt, or leftover adhesive.
Step 4: Prepare and Install the New Seal
Measure the width of your garage door to ensure the new seal is cut to the right length. If it’s longer, trim it with a utility knife or heavy-duty scissors.
For track-style seals:
- Apply a small amount of soapy water or silicone spray to the channels to make sliding easier.
- Feed the new seal into the tracks, starting at one end. This might require some patience, especially in colder weather when the rubber is less flexible.
- Pull the seal evenly along the full length of the door, ensuring it’s centered and flush.
- Once in place, trim any excess and tighten or reinstall screws and end caps.
For nailed or screwed seals:
- Align the new seal evenly along the door’s bottom edge.
- Secure it with screws or nails, spacing them every 4 to 6 inches to ensure a tight fit.
- Make sure the seal touches the floor but isn’t compressed too tightly.
Step 5: Test the Garage Door Seal
Close the garage door and inspect the bottom edge. The new seal should create a snug barrier between the door and the ground. No light should be visible from inside. Walk outside and check for any gaps or loose areas that may need adjustment. If the floor is uneven, you may need to use a thicker bulb-type seal or add a threshold seal to enhance the seal’s performance.
Bonus Tips for Long-Lasting Results
- Choose weather-resistant materials: Rubber and synthetic seals are more durable in extreme temperatures.
- Inspect the seal annually: Replace it every 3–5 years or as needed.
- Pair it with side seals: For full protection, consider sealing the sides and top of the garage door as well.
- Keep the track clean: Dirt buildup can hinder the seal’s effectiveness.
Conclusion
Learning how to replace a garage door seal is a valuable skill for any homeowner. Not only does it protect your garage from outside elements, but it also enhances energy efficiency and keeps pests at bay. The process is simple, budget-friendly, and can be done with just a few tools and some basic DIY knowledge.
Whether you’re dealing with a cracked seal, air leaks, or just routine maintenance, replacing the seal yourself is a straightforward project that pays off in comfort and savings. Make it a part of your seasonal home maintenance routine, and your garage—and everything inside it—will stay cleaner, drier, and better protected year-round.

You might also like
Fix N Go Blog


