Services for Epoxy Floor Coating

Richard S. • March 30, 2023

Services for Epoxy Floor Coating

Services for Epoxy Floor Coating in Phoenix, Arizona
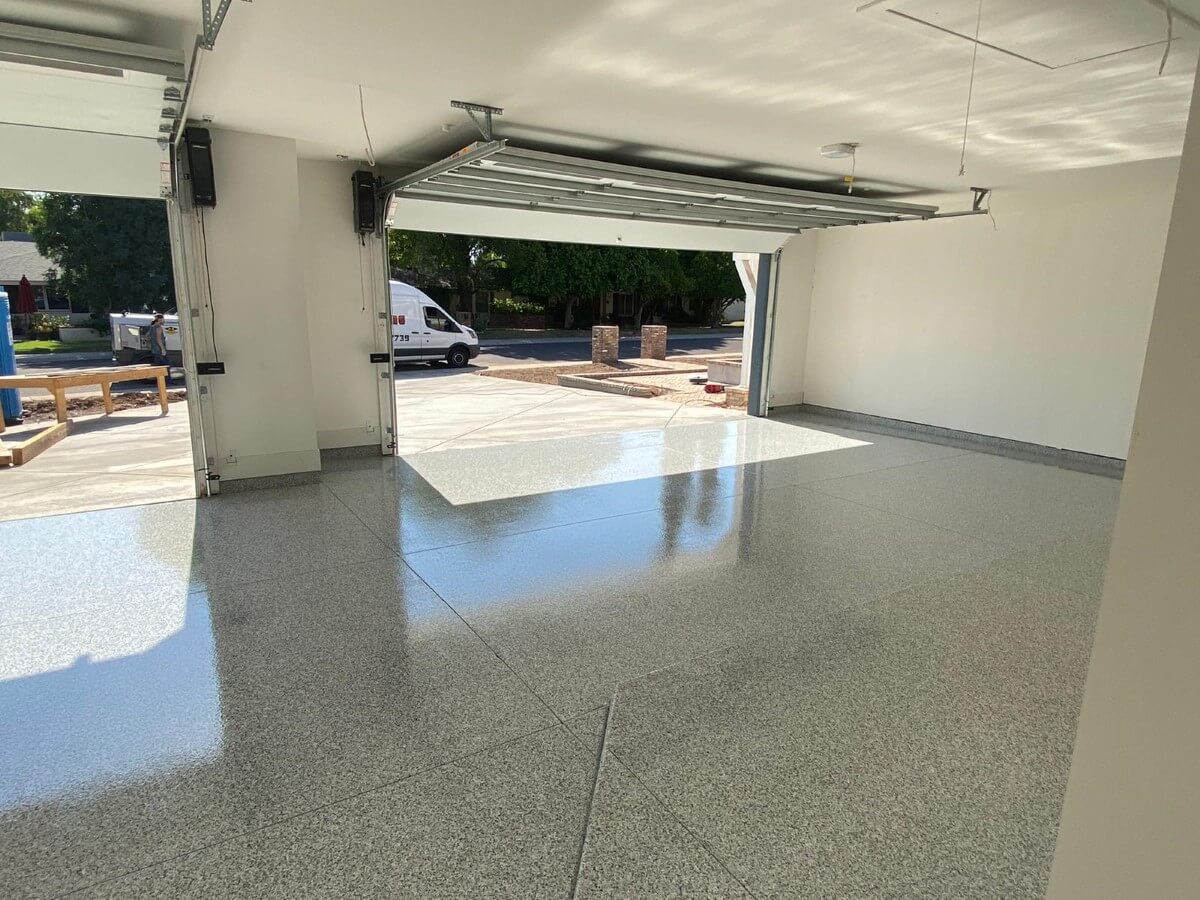
Do you wish to give your garage floor additional use? Concrete can be turned into an artistic creation by adding epoxy floor finish. Additionally, the coating gives your garage floors an additional layer of protection.

Fix N Go Service now offers epoxy floor coating services to residents of the who want to give their garage a unique touch and raise the value of their house.

Table of Contents

  • Benefits of epoxy floors
  • Types of epoxy floor coating
  • Preparation process
  • Colors and styles
  • Starting your project

 Benefits of Epoxy Floor Coating

 Wondering why you should consider adding an epoxy floor coating to your garage? Here are a few reasons:

  • The ability to add a personal, low-maintenance touch to the garage aesthetics. Epoxy floors are available in many different colors and designs. It can transform your garage into a complete and sleek area. 


  • Epoxy can protect against stains, spills, and chemical damage. They are resistant to a large number of chemicals such as solvents and acids. Epoxy features many kinds of resistance which add to its reputation and bears the brunt of heavy chock, heat, chemicals and water. It is great for your garage since cars emit many corrosive chemicals.


  • You will enjoy long-lasting shock and slip resistance for everyday garage use. Epoxy will not need to be redone for an extended amount of time. The coating endures longer than tile, and wood flooring because of its durable and protective qualities. The longevity reinforces the cost-effective advantages for your nearby home. 


Types of Epoxy Floor Coating

Epoxy is available in a variety of finishes, including single-color, full-flake, and metallic. High-end full-flake and metallic alternatives, which produce a more aesthetically beautiful floor and have other advantages, are a specialty of Fix N Go Service in nearby.

Full-Flake Epoxy: Full-flake flooring, the most popular kind of floor coating, are shock- and slip-resistant due to the coating's makeup. They are a pleasant addition to your garage because they are much less abrasive than concrete.

Metallic Epoxy: To produce exotic and one-of-a-kind designs, metallic coatings mix several metallic powder hues into transparent epoxy.

For residential garages, Fix N Go Service employs commercial-grade epoxy. Our polyaspartic clear coating provides a thicker topcoat for additional protection not provided by urethane-based products and is hydro-static pressure rated at three times the industry standard level.

The Preparation Process


Our team of factory-certified installers follows a structured process for ensuring your epoxy floor coating is properly applied for long-lasting benefit. This process includes:

  1. We diamond-grind the existing floor using OSHA-approved equipment to prepare the surface to bond with the coating. This process opens the capillaries in the surface, which absorb the coating mixture.
  2. Next, we mix the material for the 100-percent solid epoxy coating and apply a base coat to the entire surface of the floor.
  3. While the base coat is still wet, we spread the flakes across the floor to give it a signature look.
  4. Once the base coat dries, we scrape the floor, remove excess flakes and vacuum.
  5. Lastly, we apply the polyaspartic clear coat finish, which pulls everything together.
  6. A day later, you’ll be able to walk on your floor and return your belongings to their rightful place.

Additionally, as thank you for choosing Fix N Go, we’ll add a complimentary new bottom rubber to your garage space, providing insulation and helping keep insects and rodents out of your home.


How much does it cost to do an epoxy resin floor?

A full flake system epoxy floor has an average cost of $7.75 per square foot which translates to a total cost of $3,100 for a 2-car garage that is 400 square feet. Some people wonder if it’s cheaper to use epoxy compared to tile. The cost is about the same. 

Is epoxy flooring a good idea?

Epoxy floors are a good idea and are a popular option for garage flooring because:

  1. it’s aesthetically pleasing
  2. it adds protection to concrete
  3. it’s waterproof
  4. it adds value to the garage and will increase your home value. 

How long will an epoxy floor last?

We offer a lifetime adhesion warranty. 

Are epoxy floors slippery?

A full-flake epoxy floor is not slippery. We have the option to add anti-skid as well if desired.

Do epoxy floors crack?

An epoxy floor will crack if the concrete it is covering cracks. 


Contact an Experienced Epoxy Floor Coating Company Near You

Call your neighborhood garage door company at Houston (832) 400 2992 Austin (512) 543-7324 when you're ready to get started, and we'll send someone to measure your space, give you an estimate, address any concerns, and go over your financing choices. By adding an artistic touch of epoxy to your garage, we look forward to assisting you in giving it new life.

You might also like

Fix N Go Blog

How to Replace a Garage Door Motor?
By Rabia Tingat July 24, 2025
If your garage door opener motor has become noisy, sluggish, or completely non-functional, it may be time to replace it. A faulty motor can make daily garage use frustrating and even unsafe. Fortunately, replacing a garage door motor isn't as complicated as it may seem—especially if you're comfortable with basic DIY tasks. In this step-by-step guide, we’ll walk you through how to replace a garage door motor safely and effectively. Whether you’re dealing with a burnt-out motor or simply upgrading to a newer model, we’ll help you understand the entire process—from removal to reinstallation. Signs Your Garage Door Motor Needs Replacing Before we jump into the replacement process, let’s look at a few signs that indicate your garage door motor is failing: The opener struggles to lift or lower the door Unusual grinding or humming noises from the motor Frequent power failures or overheating The door only opens partially or not at all The remote and wall switch stop responding If your opener exhibits any of these issues even after resetting or troubleshooting, replacing the motor is likely the best long-term solution. Choosing the Right Garage Door Motor Replacement Garage door motors (often called garage door openers) come in several types—chain drive, belt drive, screw drive, and direct drive. When choosing a replacement, make sure it’s compatible with: Your garage door's weight and size Available power source (AC or DC motor) Existing hardware and mounting setup Brands like Chamberlain, Genie, and LiftMaster offer reliable units that include all necessary mounting brackets, sensors, and manuals for a smoother installation. Tools You’ll Need Before replacing your garage door motor, gather these essential tools: Ladder Socket set Screwdrivers Adjustable wrench Wire cutters and strippers Power drill Safety glasses and gloves Once you're equipped, turn off the power supply to the opener to avoid electrical hazards. Step-by-Step Guide to Replacing a Garage Door Motor Step 1: Disconnect Power and Unplug the Motor Safety first—disconnect the opener from the power outlet. If it's hardwired into your home’s electrical system, turn off the circuit breaker. Confirm there's no electricity flowing to the unit using a voltage tester. Step 2: Disengage the Door from the Opener Pull the emergency release cord (usually a red handle) to disengage the garage door from the opener. This lets you open and close the door manually during the motor replacement process. Step 3: Remove the Old Garage Door Motor Start by detaching the wires connected to the safety sensors and wall switch. Take photos or label wires for reference during reinstallation. Next, use a socket wrench or screwdriver to unscrew the motor unit from its mounting bracket on the ceiling. Be cautious—these units are heavy and often require a second person to safely lower them. Once the motor is removed, also uninstall the rail and trolley if your new opener comes with its own. Step 4: Install the New Motor and Mounting Rail Assemble the new motor unit according to the manufacturer’s instructions. This often includes connecting the rail, carriage, and pulley system. Mount the new rail above your garage door and secure the motor to the ceiling using provided brackets. Make sure everything is level and firmly attached. A misaligned rail can lead to jerky movements or early wear on the new motor. Step 5: Wire the Motor and Accessories Reconnect the wall switch and safety sensor wires to the terminals on the new motor unit. Most openers have labeled terminals—typically for red, white, and black wires. If your model includes a backup battery, antenna, or Wi-Fi connection, set these up now. Follow your motor’s wiring diagram precisely to avoid connectivity issues. Step 6: Reconnect the Door and Adjust Settings Pull the emergency cord back into the “engaged” position to reattach the door to the trolley. Now, plug the motor into the power outlet or restore power at the breaker. Turn on the unit and test the door’s operation. Adjust the travel limits and force settings as needed. These settings ensure the door opens and closes completely without excessive strain. Refer to your manual for step-by-step adjustment instructions—usually involving small dials or digital buttons on the unit. Testing Your New Garage Door Motor Once installed, test the full functionality of the opener: Use both the wall switch and remote control Check safety sensors by blocking the beam—door should reverse Confirm smooth and quiet operation Listen for any abnormal noises or vibrations If the door doesn’t operate properly, recheck the alignment of the rail, the wiring connections, or the motor’s mounting hardware. Professional Help vs. DIY While replacing a garage door motor is a doable task for experienced DIYers, you may want to call a professional if:  Your opener is hardwired (no plug-in cord) The ceiling mount is in a tight or high area The garage door is unusually heavy or custom-built You’re unsure about wiring and adjustments Professional installers can typically complete the job within 1–2 hours, and many offer warranties on both labor and parts. Final Thoughts Replacing a garage door motor may seem like a big task, but with the right preparation and safety steps, it's well within reach for the average homeowner. Whether you're upgrading to a quieter, smarter opener or fixing a worn-out unit, understanding the wiring, mounting, and setup process will ensure a successful installation. Remember to always follow the manufacturer’s instructions, double-check your wiring, and test your new unit thoroughly. When done correctly, a new garage door motor will provide smooth, reliable performance for years to come.
How Does Genie Garage Door Motor Wire In?
By Rabia Tingat July 22, 2025
Find out how to wire a Genie garage door motor with expert tips. Improve motor performance and ensure secure, safe installation with this guide.
How to Replace a Garage Door Cable?
By Rabia Tingat July 20, 2025
Learn how to replace a garage door cable step-by-step. This guide covers tools, safety tips, and expert advice for a smooth and safe cable replacement.