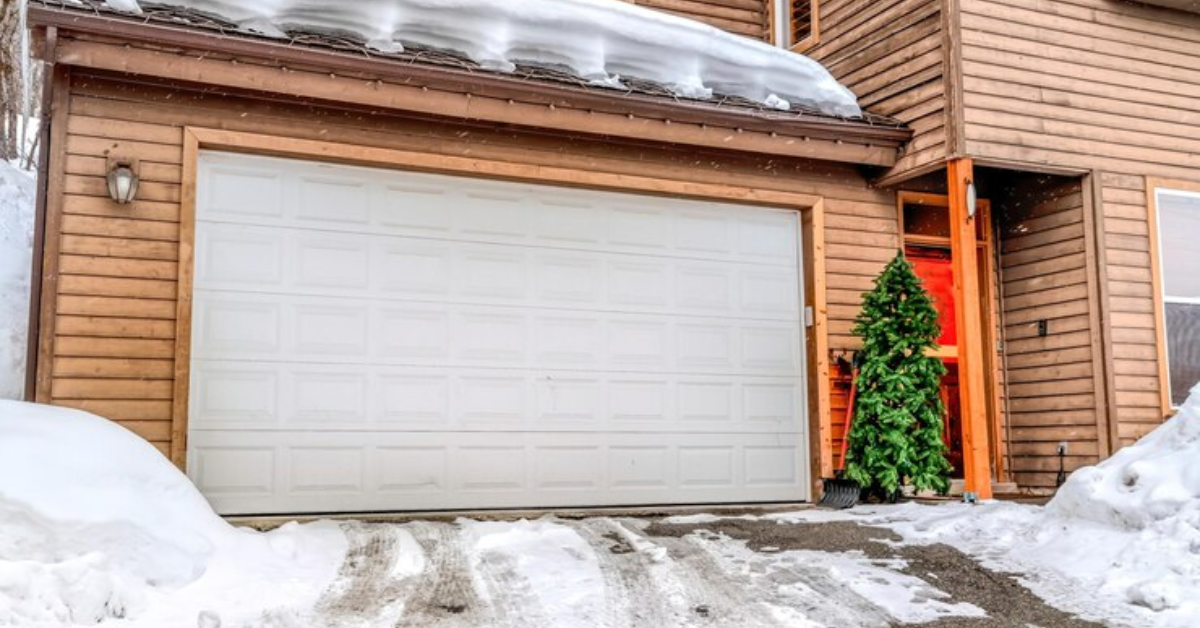
Why Your Garage Door Might Freeze Shut in the Snow

Rabia Tingat • April 14, 2025

When winter hits hard, homeowners often face a variety of cold-weather problems—and one surprisingly common issue is a frozen garage door. If you've ever tried to leave your house on a snowy morning only to discover that your automatic garage door won’t budge, you're not alone. Many people wonder: Do automatic garage doors freeze shut in snow? The short answer is yes, they can. However, understanding why it happens and how to prevent it can save you from frustration, delays, and costly repairs.


Why Do Automatic Garage Doors Freeze Shut?


Automatic garage doors can freeze shut when moisture gathers around the bottom seal and then turns to ice. This often happens overnight when temperatures drop below freezing. Snow, sleet, or rain can seep under the garage door, and once the temperature falls, that moisture solidifies, essentially gluing the door to the ground.

Another issue can be ice forming in the garage door’s track system, which prevents it from opening or closing smoothly. Add in freezing winds and consistent snow buildup, and it's easy to see how winter weather can take a toll on your garage door system.


Common Signs of a Frozen Garage Door


Recognizing the signs early can help prevent further damage. If your garage door:

  • Struggles to open or close

  • Makes loud grinding noises

  • Doesn’t respond to your remote or wall button

  • Seems sealed to the ground

It’s possible that it has frozen shut. Trying to force the door open without diagnosing the issue may damage the opener or break the seal at the bottom of the door.


How Snow and Ice Affect the Garage Door System


It's not just the door that’s affected when temperatures drop. Cold weather can cause:

  • Rubber seals become brittle, making them less flexible and more prone to sticking to icy surfaces.

  • Metal components like springs and tracks to contract, which can affect the alignment and operation.

  • Garage door openers work harder than normal, reducing their lifespan if consistently strained.

Even insulated garage doors aren’t immune if the door threshold isn't properly weather-sealed or if snow consistently piles up outside.


Preventing Garage Doors from Freezing Shut


The good news is that there are effective ways to prevent your automatic garage door from freezing shut during snowstorms and frigid nights.

  1. Keep the area around the door clear of snow and ice. After each snowfall, shovel away snow from the base of the garage door to prevent moisture from seeping in.

  2. Apply a de-icing solution. Safe, pet-friendly de-icers or even a homemade salt and water mix can prevent ice buildup. Just be careful, as some chemicals can damage concrete or garage seals.

  3. Use a silicone-based lubricant on the rubber seal. This reduces the chances of the door sticking to the ground by creating a water-repellent barrier.

  4. Install a garage door threshold seal. This helps block out water and snow, reducing the risk of freezing at the base of the door.

  5. Check your garage insulation. A well-insulated garage stays warmer, which can reduce the likelihood of freezing. Insulated doors and weather stripping make a big difference.

What to Do if Your Garage Door Freezes Shut


If you suspect your garage door is frozen, resist the urge to repeatedly hit the opener button. This can damage the motor or pull the rubber seal off entirely.

Instead, try the following:

  • Gently chip away at the ice with a plastic shovel or scraper.

  • Pour warm (not boiling) water along the base to melt the ice. Follow up immediately by drying the area with a towel to prevent refreezing.

  • Use a blow dryer or heat gun (with caution) to thaw the bottom seal.

  • Disconnect the opener and attempt to lift the door manually. If it still won’t move, don’t force it—wait until the ice is fully melted.

Professional Maintenance and Winter Prep


To avoid issues during winter, it’s smart to have your garage door system inspected and serviced in the fall. A professional technician can:

  • Check the balance and alignment

  • Lubricate moving parts

  • Replace worn-out seals

  • Test the opener’s efficiency in cold temperatures

This proactive step can keep your garage door operating smoothly all winter long.


Final Thoughts


So yes, automatic garage doors can freeze shut in snow, but it’s not inevitable. With proper maintenance, awareness, and a few preventative measures, you can reduce the risk of winter disruptions. Remember, your garage door is one of the most frequently used entrances in your home, and keeping it functional in cold weather is essential for convenience and safety.

By taking care of your garage door system and staying ahead of the freeze, you'll save yourself a lot of trouble—and keep your mornings stress-free, even when snow blankets your driveway.

You might also like

Fix N Go Blog

How to Replace a Garage Door Motor?
By Rabia Tingat July 24, 2025
If your garage door opener motor has become noisy, sluggish, or completely non-functional, it may be time to replace it. A faulty motor can make daily garage use frustrating and even unsafe. Fortunately, replacing a garage door motor isn't as complicated as it may seem—especially if you're comfortable with basic DIY tasks. In this step-by-step guide, we’ll walk you through how to replace a garage door motor safely and effectively. Whether you’re dealing with a burnt-out motor or simply upgrading to a newer model, we’ll help you understand the entire process—from removal to reinstallation. Signs Your Garage Door Motor Needs Replacing Before we jump into the replacement process, let’s look at a few signs that indicate your garage door motor is failing: The opener struggles to lift or lower the door Unusual grinding or humming noises from the motor Frequent power failures or overheating The door only opens partially or not at all The remote and wall switch stop responding If your opener exhibits any of these issues even after resetting or troubleshooting, replacing the motor is likely the best long-term solution. Choosing the Right Garage Door Motor Replacement Garage door motors (often called garage door openers) come in several types—chain drive, belt drive, screw drive, and direct drive. When choosing a replacement, make sure it’s compatible with: Your garage door's weight and size Available power source (AC or DC motor) Existing hardware and mounting setup Brands like Chamberlain, Genie, and LiftMaster offer reliable units that include all necessary mounting brackets, sensors, and manuals for a smoother installation. Tools You’ll Need Before replacing your garage door motor, gather these essential tools: Ladder Socket set Screwdrivers Adjustable wrench Wire cutters and strippers Power drill Safety glasses and gloves Once you're equipped, turn off the power supply to the opener to avoid electrical hazards. Step-by-Step Guide to Replacing a Garage Door Motor Step 1: Disconnect Power and Unplug the Motor Safety first—disconnect the opener from the power outlet. If it's hardwired into your home’s electrical system, turn off the circuit breaker. Confirm there's no electricity flowing to the unit using a voltage tester. Step 2: Disengage the Door from the Opener Pull the emergency release cord (usually a red handle) to disengage the garage door from the opener. This lets you open and close the door manually during the motor replacement process. Step 3: Remove the Old Garage Door Motor Start by detaching the wires connected to the safety sensors and wall switch. Take photos or label wires for reference during reinstallation. Next, use a socket wrench or screwdriver to unscrew the motor unit from its mounting bracket on the ceiling. Be cautious—these units are heavy and often require a second person to safely lower them. Once the motor is removed, also uninstall the rail and trolley if your new opener comes with its own. Step 4: Install the New Motor and Mounting Rail Assemble the new motor unit according to the manufacturer’s instructions. This often includes connecting the rail, carriage, and pulley system. Mount the new rail above your garage door and secure the motor to the ceiling using provided brackets. Make sure everything is level and firmly attached. A misaligned rail can lead to jerky movements or early wear on the new motor. Step 5: Wire the Motor and Accessories Reconnect the wall switch and safety sensor wires to the terminals on the new motor unit. Most openers have labeled terminals—typically for red, white, and black wires. If your model includes a backup battery, antenna, or Wi-Fi connection, set these up now. Follow your motor’s wiring diagram precisely to avoid connectivity issues. Step 6: Reconnect the Door and Adjust Settings Pull the emergency cord back into the “engaged” position to reattach the door to the trolley. Now, plug the motor into the power outlet or restore power at the breaker. Turn on the unit and test the door’s operation. Adjust the travel limits and force settings as needed. These settings ensure the door opens and closes completely without excessive strain. Refer to your manual for step-by-step adjustment instructions—usually involving small dials or digital buttons on the unit. Testing Your New Garage Door Motor Once installed, test the full functionality of the opener: Use both the wall switch and remote control Check safety sensors by blocking the beam—door should reverse Confirm smooth and quiet operation Listen for any abnormal noises or vibrations If the door doesn’t operate properly, recheck the alignment of the rail, the wiring connections, or the motor’s mounting hardware. Professional Help vs. DIY While replacing a garage door motor is a doable task for experienced DIYers, you may want to call a professional if:  Your opener is hardwired (no plug-in cord) The ceiling mount is in a tight or high area The garage door is unusually heavy or custom-built You’re unsure about wiring and adjustments Professional installers can typically complete the job within 1–2 hours, and many offer warranties on both labor and parts. Final Thoughts Replacing a garage door motor may seem like a big task, but with the right preparation and safety steps, it's well within reach for the average homeowner. Whether you're upgrading to a quieter, smarter opener or fixing a worn-out unit, understanding the wiring, mounting, and setup process will ensure a successful installation. Remember to always follow the manufacturer’s instructions, double-check your wiring, and test your new unit thoroughly. When done correctly, a new garage door motor will provide smooth, reliable performance for years to come.
How Does Genie Garage Door Motor Wire In?
By Rabia Tingat July 22, 2025
Find out how to wire a Genie garage door motor with expert tips. Improve motor performance and ensure secure, safe installation with this guide.
How to Replace a Garage Door Cable?
By Rabia Tingat July 20, 2025
Learn how to replace a garage door cable step-by-step. This guide covers tools, safety tips, and expert advice for a smooth and safe cable replacement.