How Much To Repair Garage Door Spring

Rabia Tingat • June 6, 2024

Garage door springs play a critical role in the functionality of your garage door. These springs bear the weight of the door, allowing it to open and close smoothly. When a spring breaks, it can lead to significant inconvenience and even safety hazards. Understanding the cost to repair a garage door spring is essential for homeowners. Here, we will delve into the factors that influence repair costs, types of springs, common issues, and the benefits of professional repair services.


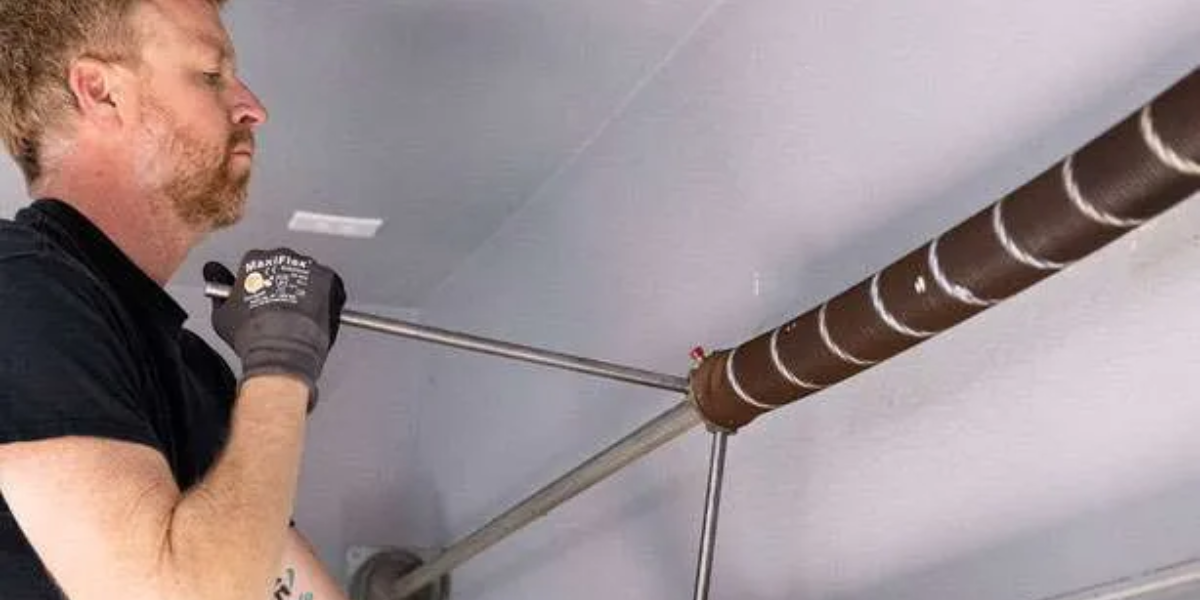
Types of Garage Door Springs


Torsion springs are commonly used in modern garage doors. These springs are mounted above the door and work by twisting to store energy. They are known for their durability and longevity. However, when they do break, they require specialized tools and knowledge to repair or replace.


Extension springs are typically found on older garage doors. These springs are located on either side of the door and stretch to provide the necessary force to lift the door. While they are generally easier to replace than torsion springs, they also pose significant risks if not handled correctly.


Repair Cost Factors


Type of Spring: The type of spring used in your garage door greatly influences the repair cost. Torsion springs are more expensive to repair or replace compared to extension springs due to their complexity and the specialized tools required.


Labor Costs: Labor costs vary depending on your location and the company you hire. Professional repair services typically charge an hourly rate, and the total labor cost can increase if additional repairs or adjustments are needed.


Material Quality: The quality of the spring materials affects the overall repair cost. Higher-quality springs, made from durable materials, are more expensive but offer better longevity and performance.


Additional Repairs: If your garage door requires additional repairs beyond the spring replacement, such as cable or track adjustments, this will increase the total cost. It is essential to have a comprehensive inspection to identify all potential issues.


The price of replacing a garage door spring encompasses both the cost of the parts and the labor required. However, the overall expense can vary depending on the specific type of garage door you have. On average, the total amount you should anticipate spending for a garage door spring replacement falls between $150 and $300.


Common Issues with Garage Door Springs


  • Over time, garage door springs experience wear and tear from regular use. This can lead to a gradual loss of tension, making it difficult for the door to open and close properly. Regular maintenance can help extend the lifespan of your springs.
  • Rust and corrosion are common issues that can weaken garage door springs, leading to premature failure. Keeping the springs well-lubricated and protected from moisture can prevent rust and corrosion.
  • Improper installation of garage door springs can cause uneven wear and additional stress on the door mechanism. It is crucial to hire a professional to ensure proper installation and avoid future problems.


Benefits of Professional Garage Door Spring Repair


Repairing a garage door spring is a dangerous task that requires expertise and proper tools. Professional technicians have the training and experience to perform the repairs safely, minimizing the risk of injury. Professionals can quickly and efficiently repair or replace garage door springs, reducing downtime and inconvenience. Their expertise ensures that the job is done correctly the first time, saving you time and money. Reputable repair services offer warranties and guarantees on their work. If any problems arise after the repair, they will be addressed promptly and without additional charge.


How to Choose a Garage Door Repair Service


When choosing a garage door repair service, it is important to consider several key factors to ensure you receive quality service and value for your money. Start by checking the credentials and certifications of the technicians to confirm their expertise and training. Reading customer reviews and testimonials can provide insight into the reliability and professionalism of the service. Also, request quotes from multiple companies to compare prices and services offered. Among the top choices for exceptional garage door repair services is Fix N' Go, renowned for its skilled technicians, prompt service, and competitive pricing, making it a trusted name in the industry.


Conclusion


Repairing a garage door spring is a critical task that should not be taken lightly. Understanding the factors that influence the cost, recognizing common issues, and knowing the benefits of professional repair services can help you make an informed decision. For reliable and efficient garage door spring repair, Fix N' Go stands out as a top choice, offering expert services and excellent customer care.

You might also like

Fix N Go Blog

How to Replace a Garage Door Motor?
By Rabia Tingat July 24, 2025
If your garage door opener motor has become noisy, sluggish, or completely non-functional, it may be time to replace it. A faulty motor can make daily garage use frustrating and even unsafe. Fortunately, replacing a garage door motor isn't as complicated as it may seem—especially if you're comfortable with basic DIY tasks. In this step-by-step guide, we’ll walk you through how to replace a garage door motor safely and effectively. Whether you’re dealing with a burnt-out motor or simply upgrading to a newer model, we’ll help you understand the entire process—from removal to reinstallation. Signs Your Garage Door Motor Needs Replacing Before we jump into the replacement process, let’s look at a few signs that indicate your garage door motor is failing: The opener struggles to lift or lower the door Unusual grinding or humming noises from the motor Frequent power failures or overheating The door only opens partially or not at all The remote and wall switch stop responding If your opener exhibits any of these issues even after resetting or troubleshooting, replacing the motor is likely the best long-term solution. Choosing the Right Garage Door Motor Replacement Garage door motors (often called garage door openers) come in several types—chain drive, belt drive, screw drive, and direct drive. When choosing a replacement, make sure it’s compatible with: Your garage door's weight and size Available power source (AC or DC motor) Existing hardware and mounting setup Brands like Chamberlain, Genie, and LiftMaster offer reliable units that include all necessary mounting brackets, sensors, and manuals for a smoother installation. Tools You’ll Need Before replacing your garage door motor, gather these essential tools: Ladder Socket set Screwdrivers Adjustable wrench Wire cutters and strippers Power drill Safety glasses and gloves Once you're equipped, turn off the power supply to the opener to avoid electrical hazards. Step-by-Step Guide to Replacing a Garage Door Motor Step 1: Disconnect Power and Unplug the Motor Safety first—disconnect the opener from the power outlet. If it's hardwired into your home’s electrical system, turn off the circuit breaker. Confirm there's no electricity flowing to the unit using a voltage tester. Step 2: Disengage the Door from the Opener Pull the emergency release cord (usually a red handle) to disengage the garage door from the opener. This lets you open and close the door manually during the motor replacement process. Step 3: Remove the Old Garage Door Motor Start by detaching the wires connected to the safety sensors and wall switch. Take photos or label wires for reference during reinstallation. Next, use a socket wrench or screwdriver to unscrew the motor unit from its mounting bracket on the ceiling. Be cautious—these units are heavy and often require a second person to safely lower them. Once the motor is removed, also uninstall the rail and trolley if your new opener comes with its own. Step 4: Install the New Motor and Mounting Rail Assemble the new motor unit according to the manufacturer’s instructions. This often includes connecting the rail, carriage, and pulley system. Mount the new rail above your garage door and secure the motor to the ceiling using provided brackets. Make sure everything is level and firmly attached. A misaligned rail can lead to jerky movements or early wear on the new motor. Step 5: Wire the Motor and Accessories Reconnect the wall switch and safety sensor wires to the terminals on the new motor unit. Most openers have labeled terminals—typically for red, white, and black wires. If your model includes a backup battery, antenna, or Wi-Fi connection, set these up now. Follow your motor’s wiring diagram precisely to avoid connectivity issues. Step 6: Reconnect the Door and Adjust Settings Pull the emergency cord back into the “engaged” position to reattach the door to the trolley. Now, plug the motor into the power outlet or restore power at the breaker. Turn on the unit and test the door’s operation. Adjust the travel limits and force settings as needed. These settings ensure the door opens and closes completely without excessive strain. Refer to your manual for step-by-step adjustment instructions—usually involving small dials or digital buttons on the unit. Testing Your New Garage Door Motor Once installed, test the full functionality of the opener: Use both the wall switch and remote control Check safety sensors by blocking the beam—door should reverse Confirm smooth and quiet operation Listen for any abnormal noises or vibrations If the door doesn’t operate properly, recheck the alignment of the rail, the wiring connections, or the motor’s mounting hardware. Professional Help vs. DIY While replacing a garage door motor is a doable task for experienced DIYers, you may want to call a professional if:  Your opener is hardwired (no plug-in cord) The ceiling mount is in a tight or high area The garage door is unusually heavy or custom-built You’re unsure about wiring and adjustments Professional installers can typically complete the job within 1–2 hours, and many offer warranties on both labor and parts. Final Thoughts Replacing a garage door motor may seem like a big task, but with the right preparation and safety steps, it's well within reach for the average homeowner. Whether you're upgrading to a quieter, smarter opener or fixing a worn-out unit, understanding the wiring, mounting, and setup process will ensure a successful installation. Remember to always follow the manufacturer’s instructions, double-check your wiring, and test your new unit thoroughly. When done correctly, a new garage door motor will provide smooth, reliable performance for years to come.
How Does Genie Garage Door Motor Wire In?
By Rabia Tingat July 22, 2025
Find out how to wire a Genie garage door motor with expert tips. Improve motor performance and ensure secure, safe installation with this guide.
How to Replace a Garage Door Cable?
By Rabia Tingat July 20, 2025
Learn how to replace a garage door cable step-by-step. This guide covers tools, safety tips, and expert advice for a smooth and safe cable replacement.