How To Seal Roll Up Garage Door?

Rabia Tingat • June 21, 2024

Properly sealing your roll-up garage door is essential for maintaining your garage's temperature, protecting it from pests, and keeping out dirt and debris. An effective seal not only improves energy efficiency but also enhances the overall durability of your garage door. By creating a tight barrier, you can prevent cold drafts in the winter and hot air in the summer from entering your garage, making it a more comfortable and usable space throughout the year. 


Sealing your garage door also helps to keep out unwanted pests like rodents and insects, which can cause damage and create unsanitary conditions. Dirt and debris can also accumulate in an unsealed garage, leading to increased maintenance and potential damage to stored items. In this detailed guide, we will walk you through the step-by-step process of sealing a roll-up garage door, discuss the materials you will need, and provide tips for maintaining the seal over time. This comprehensive approach ensures that your garage remains a secure, clean, and energy-efficient part of your home.


Why Sealing Your Roll-Up Garage Door is Important


1. Energy Efficiency: A well-sealed garage door can significantly reduce energy loss, especially if your garage is attached to your home. By preventing drafts, you can maintain a more stable temperature inside your garage, which can help lower your heating and cooling costs.


2. Pest Control: Sealing gaps around your garage door can keep out pests such as rodents, insects, and other small animals that might otherwise find their way into your garage.


3. Protection from the Elements: A proper seal protects your garage from rain, snow, and wind, preventing water damage and the buildup of dirt and debris. This is particularly important if you store valuable items or use your garage as a workspace.


4. Enhanced Security: Sealing your garage door adds an extra layer of security by eliminating gaps that intruders could exploit to gain entry.


Materials Needed for Sealing a Roll-Up Garage Door


Before you begin the sealing process, gather the following materials:

  • Garage Door Seal Kit: These kits typically include bottom seals, weatherstripping, and side seals.
  • Screwdriver or Drill: For removing and securing screws.
  • Utility Knife: For cutting seals to the appropriate length.
  • Measuring Tape: To ensure precise measurements.
  • Clean Cloth: To clean the surfaces before applying the seals.
  • Adhesive: If not included in the seal kit, to attach the seals to the garage door.
  • Weatherstripping: For sealing gaps along the sides and top of the door.
  • Bottom Seal: To cover the gap between the door and the floor.


Step-by-Step Guide to Sealing a Roll-Up Garage Door


1. Measure the Door

Begin by measuring the width of your garage door to determine the length of the bottom seal and weatherstripping you will need. Use a measuring tape to get precise measurements from one side of the door to the other. Accurate measurements ensure that the seals fit perfectly, providing optimal protection against drafts, pests, and debris. Measure the width at both the top and bottom of the door to account for any variations, ensuring a snug fit. This careful attention to detail will help you avoid gaps and ensure the effectiveness of the seal, contributing to a well-protected and energy-efficient garage.


2. Clean the Surface

Use a clean cloth to thoroughly wipe down the areas where you will apply the seals. Focus on removing all dirt, dust, and debris from the surfaces of the garage door and the surrounding frame. Any contaminants left behind can interfere with the adhesive's ability to bond properly, leading to a less effective seal. By ensuring that these areas are clean, you improve the adhesive's bonding strength, which helps the seals stay in place longer and perform better. This step is crucial for achieving a durable and long-lasting seal that will effectively protect your garage from drafts, pests, and moisture.


3. Install the Bottom Seal

  • If your garage door already has a seal, remove it by unscrewing any fasteners or cutting through the adhesive.
  • Use your measuring tape and utility knife to cut the new bottom seal to the appropriate length.
  • Slide the new seal into the bottom track of the door or use adhesive to secure it in place. Ensure it fits snugly without any gaps.


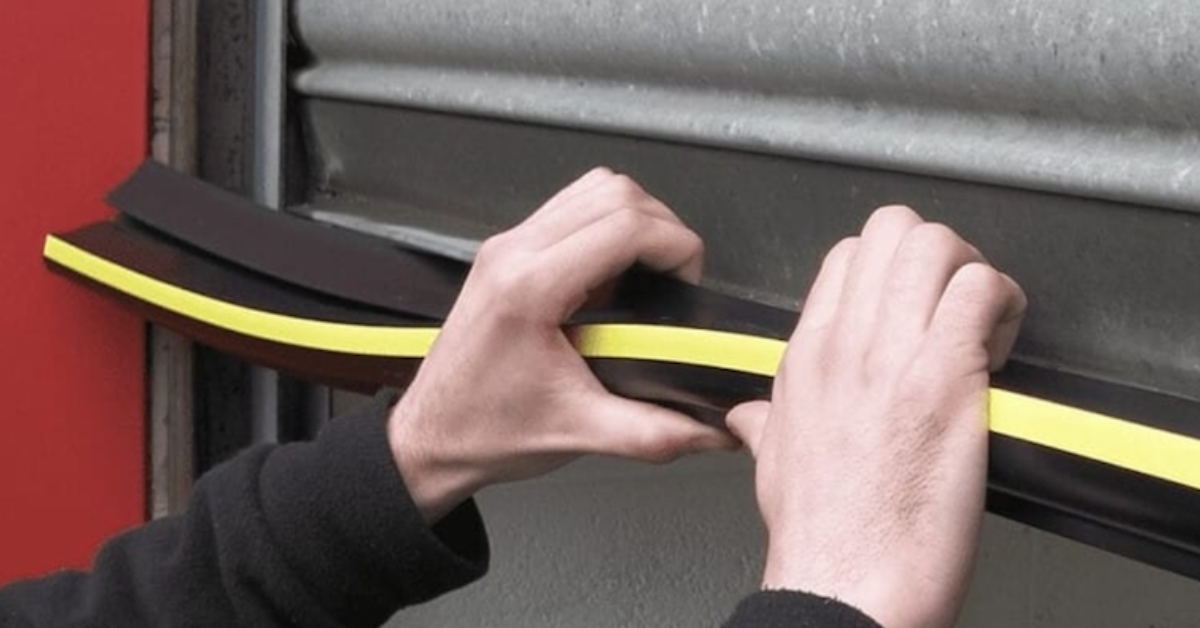
4. Apply Weatherstripping

  • Measure the height of your garage door and cut the weatherstripping to fit the sides and top.
  • Peel off the backing and press the weatherstripping firmly against the door frame. For added security, you can use screws or nails to hold it in place.


5. Install Side Seals

  • Measure the vertical edges of your garage door and cut the side seals to the correct length.
  • Use adhesive or screws to secure the side seals, ensuring they fit tightly against the door to prevent any gaps.


6. Test the Seal

Close your garage door and check for any visible gaps. Ensure that the bottom seal compresses slightly against the floor, and the weatherstripping fits snugly along the sides and top. Adjust as needed to achieve a perfect seal.


Maintaining Your Garage Door Seal


  • Periodically inspect the seals for signs of wear and tear. Look for cracks, gaps, or areas where the adhesive may be coming loose. Regular inspections help you catch issues early before they become major problems.
  • Keep the seals clean by wiping them down with a damp cloth. Removing dirt and debris prevents the seals from degrading and maintains their effectiveness.
  • If you notice that the seals are no longer providing an effective barrier, it's time to replace them. Regular replacement ensures that your garage remains well-protected against the elements, pests, and energy loss.


Conclusion


Sealing a roll-up garage door is a straightforward yet essential task that enhances your garage's functionality, security, and energy efficiency. By following the steps outlined in this guide and maintaining the seals regularly, you can ensure that your garage remains a clean, comfortable, and secure space. Investing time and effort into proper sealing will pay off in the long run, providing numerous benefits for both your garage and your home.

You might also like

Fix N Go Blog

How to Replace a Garage Door Motor?
By Rabia Tingat July 24, 2025
If your garage door opener motor has become noisy, sluggish, or completely non-functional, it may be time to replace it. A faulty motor can make daily garage use frustrating and even unsafe. Fortunately, replacing a garage door motor isn't as complicated as it may seem—especially if you're comfortable with basic DIY tasks. In this step-by-step guide, we’ll walk you through how to replace a garage door motor safely and effectively. Whether you’re dealing with a burnt-out motor or simply upgrading to a newer model, we’ll help you understand the entire process—from removal to reinstallation. Signs Your Garage Door Motor Needs Replacing Before we jump into the replacement process, let’s look at a few signs that indicate your garage door motor is failing: The opener struggles to lift or lower the door Unusual grinding or humming noises from the motor Frequent power failures or overheating The door only opens partially or not at all The remote and wall switch stop responding If your opener exhibits any of these issues even after resetting or troubleshooting, replacing the motor is likely the best long-term solution. Choosing the Right Garage Door Motor Replacement Garage door motors (often called garage door openers) come in several types—chain drive, belt drive, screw drive, and direct drive. When choosing a replacement, make sure it’s compatible with: Your garage door's weight and size Available power source (AC or DC motor) Existing hardware and mounting setup Brands like Chamberlain, Genie, and LiftMaster offer reliable units that include all necessary mounting brackets, sensors, and manuals for a smoother installation. Tools You’ll Need Before replacing your garage door motor, gather these essential tools: Ladder Socket set Screwdrivers Adjustable wrench Wire cutters and strippers Power drill Safety glasses and gloves Once you're equipped, turn off the power supply to the opener to avoid electrical hazards. Step-by-Step Guide to Replacing a Garage Door Motor Step 1: Disconnect Power and Unplug the Motor Safety first—disconnect the opener from the power outlet. If it's hardwired into your home’s electrical system, turn off the circuit breaker. Confirm there's no electricity flowing to the unit using a voltage tester. Step 2: Disengage the Door from the Opener Pull the emergency release cord (usually a red handle) to disengage the garage door from the opener. This lets you open and close the door manually during the motor replacement process. Step 3: Remove the Old Garage Door Motor Start by detaching the wires connected to the safety sensors and wall switch. Take photos or label wires for reference during reinstallation. Next, use a socket wrench or screwdriver to unscrew the motor unit from its mounting bracket on the ceiling. Be cautious—these units are heavy and often require a second person to safely lower them. Once the motor is removed, also uninstall the rail and trolley if your new opener comes with its own. Step 4: Install the New Motor and Mounting Rail Assemble the new motor unit according to the manufacturer’s instructions. This often includes connecting the rail, carriage, and pulley system. Mount the new rail above your garage door and secure the motor to the ceiling using provided brackets. Make sure everything is level and firmly attached. A misaligned rail can lead to jerky movements or early wear on the new motor. Step 5: Wire the Motor and Accessories Reconnect the wall switch and safety sensor wires to the terminals on the new motor unit. Most openers have labeled terminals—typically for red, white, and black wires. If your model includes a backup battery, antenna, or Wi-Fi connection, set these up now. Follow your motor’s wiring diagram precisely to avoid connectivity issues. Step 6: Reconnect the Door and Adjust Settings Pull the emergency cord back into the “engaged” position to reattach the door to the trolley. Now, plug the motor into the power outlet or restore power at the breaker. Turn on the unit and test the door’s operation. Adjust the travel limits and force settings as needed. These settings ensure the door opens and closes completely without excessive strain. Refer to your manual for step-by-step adjustment instructions—usually involving small dials or digital buttons on the unit. Testing Your New Garage Door Motor Once installed, test the full functionality of the opener: Use both the wall switch and remote control Check safety sensors by blocking the beam—door should reverse Confirm smooth and quiet operation Listen for any abnormal noises or vibrations If the door doesn’t operate properly, recheck the alignment of the rail, the wiring connections, or the motor’s mounting hardware. Professional Help vs. DIY While replacing a garage door motor is a doable task for experienced DIYers, you may want to call a professional if:  Your opener is hardwired (no plug-in cord) The ceiling mount is in a tight or high area The garage door is unusually heavy or custom-built You’re unsure about wiring and adjustments Professional installers can typically complete the job within 1–2 hours, and many offer warranties on both labor and parts. Final Thoughts Replacing a garage door motor may seem like a big task, but with the right preparation and safety steps, it's well within reach for the average homeowner. Whether you're upgrading to a quieter, smarter opener or fixing a worn-out unit, understanding the wiring, mounting, and setup process will ensure a successful installation. Remember to always follow the manufacturer’s instructions, double-check your wiring, and test your new unit thoroughly. When done correctly, a new garage door motor will provide smooth, reliable performance for years to come.
How Does Genie Garage Door Motor Wire In?
By Rabia Tingat July 22, 2025
Find out how to wire a Genie garage door motor with expert tips. Improve motor performance and ensure secure, safe installation with this guide.
How to Replace a Garage Door Cable?
By Rabia Tingat July 20, 2025
Learn how to replace a garage door cable step-by-step. This guide covers tools, safety tips, and expert advice for a smooth and safe cable replacement.