
Dented Garage Door? Fix It with Easy Repair Techniques
Dealing with a dented garage door can be a bothersome issue for any homeowner. Not only do these dents affect the visual appeal, but they can also compromise the functionality and durability of the door. Understanding the nature of these dents, their origins, and the various factors that contribute to their appearance is crucial in effectively addressing and repairing them. From accidental collisions to weather-related damage and the effects of time, comprehending the diverse causes behind these dents helps in evaluating the extent of the damage and selecting the most suitable repair techniques. By delving into the core of these dents and their origins, homeowners can navigate through effective repair strategies to restore their garage door's appearance and functionality.
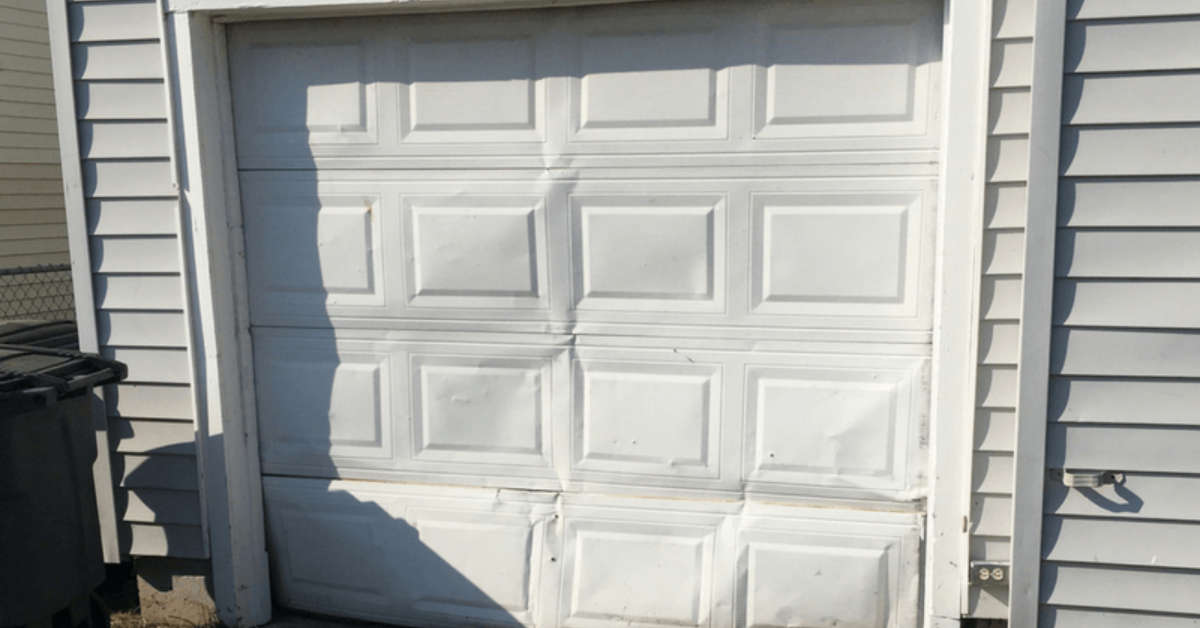
Types and Causes of Dents
Garage door dents can vary in severity and appearance, ranging from minor surface imperfections to more noticeable and substantial damage. They can result from various factors, including:
Impact Damage
One prevalent cause of garage door dents is impact damage resulting from inadvertent collisions with vehicles, bicycles, or other objects. A minor mishap, even a slight bump, can leave visible marks and dents on the door's surface, especially if the impact is forceful.
Hail or Weather-Related Damage
Harsh weather conditions, notably hailstorms, pose a significant risk to garage doors. Hailstones pelting the surface can cause a multitude of dents, ranging from small depressions to more extensive damage across the door panels.
Age and Wear
The passage of time inevitably takes its toll, leading to wear and tear that can contribute to the formation of dents on garage doors, particularly in older models. Continuous use, exposure to elements, and natural aging of the materials can result in the development of dents over time.
Incorrect Handling
Improper handling during maintenance or repairs can inadvertently lead to dents on the door surface. Mishandling tools, applying excessive force, or incorrect installation practices can cause visible dents or deformities in the door panels.
Material Vulnerabilities
Certain garage door materials, especially thin aluminum or steel panels, exhibit vulnerabilities to dents. Their composition and thickness make them more prone to denting upon impact, increasing the risk of surface irregularities even from minor collisions.
Understanding these diverse causes of garage door dents empowers homeowners to assess the origins of the damage and take appropriate preventive measures. It also guides in choosing the most effective repair techniques tailored to the specific type and extent of the dents, ensuring the restoration of both the door's appearance and functionality.
Assessing the Damage
Begin the assessment by visually inspecting the dents on the garage door surface. Take a close look at each dent, examining its size, depth, and location across the door panels. Note any visible creases, scratches, or paint damage surrounding the dented areas.
During this inspection, consider the following aspects:
- Evaluate the size and depth of each dent. Some dents might be minor surface imperfections, while others could be deeper and more substantial.
- Note the locations of the dents across the door panels. Some areas might have multiple dents clustered together, while others might have isolated damages.
- Assess if the dents have caused any paint damage, such as chipping or cracking, which could further impact the door's appearance and susceptibility to corrosion.
Determining Severity of Damage
After the visual inspection, proceed to determine the severity of the damage based on the observed characteristics of the dents:
- Minor dents that do not affect the door's functionality fall into the cosmetic category. These dents may slightly mar the door's appearance but do not hinder its operation.
- Deeper or more extensive dents might affect the door's functionality, such as hindering smooth operation or causing misalignments. These damages may require immediate attention to prevent further issues.
- Assess if the dents have compromised the structural integrity of the door. Any significant damage that weakens the door's stability or security needs prompt repair to ensure safety and proper functionality.
Determining the severity of the damage guides the decision-making process regarding the necessary repair techniques. Cosmetic damages might require simple fixes, while more severe or functional impairments may need comprehensive repairs to restore both appearance and functionality. By conducting a detailed visual inspection and accurately assessing the severity of the damage, homeowners can better understand the extent of the dents and make informed decisions regarding the most suitable repair approaches.
Tools and Materials Needed
When undertaking garage door dent repairs, having the right tools and materials at hand is crucial for a successful and efficient restoration process.
Rubber Mallet or Hammer:
For gently tapping out minor dents, a rubber mallet or a soft-faced hammer helps reshape the metal without causing further damage.
Pliers or Vice Grips: These tools are handy for pulling out dents or straightening panels by gripping and applying controlled pressure.
Heat Source (Hair Dryer or Heat Gun): Applying heat to the dented area allows the metal to expand slightly, making it easier to manipulate and flatten out the dent.
Wooden Block or Support: Placing a wooden block behind the dented area helps distribute the force while hammering or tapping, preventing further damage to the door.
Dent Repair Kit: These kits often include specialized tools like dent pullers, suction cups, or dent removal rods designed specifically for repairing dents on garage doors.
Safety Equipment: Ensure you have safety glasses, gloves, and protective gear to safeguard against any potential injuries during the repair process.
Repair Materials
In addition to tools, gather necessary repair materials that might be required:
Cleaners or Solvents: Use mild cleaners or solvents to remove dirt, grease, or residue from the dented area before commencing repairs.
Putty or Filler Compound: For more substantial dents or holes, a suitable putty or filler compound helps smoothen the surface and restore the door's appearance.
Sandpaper or Abrasive Pad: Use sandpaper or an abrasive pad to smooth the repaired area after filling, ensuring a flush surface for painting.
Paint and Primer: Matching paint and primer are necessary to restore the door's finish after repairing the dents. Ensure the paint matches the existing door color for a seamless finish.
Having these tools and materials readily available streamlines the repair process and ensures that you have everything necessary to effectively address the dents on your garage door. Also, following safety protocols and using appropriate protective gear is essential while working on any repair project.
Easy DIY Repair Techniques
Using a Plunger for Minor Dents
For minor dents on garage doors, a plunger can be surprisingly effective. Here's how to do it:
- Ensure the dented area is dry and clean.
- Place the plunger over the dent, ensuring a tight seal.
- Firmly push and pull the plunger to create suction and gradually pull out the dent.
- This technique works best for shallow and flexible dents, gradually restoring the surface to its original shape.
Heating and Cooling Method
Using temperature changes to address dents is another effective DIY technique:
- Use a heat source, such as a hairdryer or heat gun, to apply heat directly to the dented area.
- Heat the metal for a few minutes until it becomes warm, but avoid overheating.
- Once heated, quickly apply a cool substance, like compressed air or a can of cold spray, to the same area.
- The rapid change in temperature can cause the metal to contract, often popping out minor dents.
Hammering Out Small Dents
For slightly more substantial dents, gentle hammering might do the trick:
- Place a wooden block behind the dent to serve as support.
- Use a rubber mallet or a soft-faced hammer to tap the dent lightly from the outside edges toward the center.
- Work gradually and cautiously, ensuring not to apply excessive force, to slowly flatten the dent and restore the door's surface.
Applying Dent Repair Kits
Dent repair kits offer specialized tools designed explicitly for addressing garage door dents:
- These kits often include tools like dent pullers, suction cups, or dent removal rods.
- Follow the instructions provided with the kit, which typically involve using the specific tools to pull or push the dented area back into shape.
- Dent repair kits are useful for various dent sizes and types, offering a more structured approach to DIY dent repairs.
Each of these DIY techniques offers an approach to address garage door dents of varying sizes and severities. While these methods can be effective for minor to moderate dents, it's essential to assess the dent's size, depth, and door material before choosing the most suitable DIY approach.
Step-by-Step Repair Process
Begin by thoroughly cleaning the dented area using a mild detergent or cleaner and a clean cloth. Remove any dirt, debris, or grease to ensure a clean working surface. Evaluate the dent's size, depth, and location to determine the best repair approach. Consider the type of material and the severity of the damage before proceeding. Use masking tape or protective coverings to shield the surrounding unaffected areas of the door. This prevents accidental damage during the repair process.
Depending on the chosen repair method (plunger, heating and cooling, hammering, dent repair kit, etc.), apply the technique following the specific instructions for that method. Regardless of the method used, apply gentle and controlled pressure. If hammering, use light taps, ensuring not to cause further damage to the door's surface. Continuously assess the dent's progress during the repair. Stop and reevaluate if the method is not yielding the desired results or if there are any unexpected challenges.
Once the dent is mostly repaired, use sandpaper or an abrasive pad to smooth the repaired area. This step ensures a flush and even surface for further finishing. If necessary, apply matching paint or a finish coat to the repaired area, ensuring it blends seamlessly with the rest of the door. Follow manufacturer guidelines for drying and curing times. Carefully remove any protective coverings or masking tape from the surrounding areas, ensuring no residue is left behind.
By following these step-by-step procedures, homeowners can systematically repair garage door dents, from preparation and application of chosen repair techniques to the final touches, resulting in a restored and aesthetically pleasing door surface.
Professional Help and Alternatives
When dealing with complex or severe dents beyond DIY repair capabilities, seeking professional assistance is advisable. Professionals possess the expertise, tools, and experience to address intricate issues effectively. Garage door technicians have the necessary skills to handle various types of dents, ensuring safety and precision during repairs. Their expertise minimizes the risk of further damage or complications. Professional assistance ensures comprehensive solutions for severe dents. Technicians can assess the damage, provide expert recommendations, and execute repairs to restore the door's functionality and appearance.
In cases of extensive or irreparable damage to specific panels, an alternative to repairing severe dents is panel replacement.
Professional technicians can replace damaged panels, preserving the overall door structure. For severe or widespread damage that compromises the door's integrity, opting for a full door replacement might be the most viable solution. This option guarantees a completely restored and functional garage door. Consultation with a garage door specialist helps explore alternative options suited to the severity of the dents. They can provide insights into repair feasibility and recommend the most appropriate course of action.
Considering professional assistance or exploring alternative options becomes crucial when dealing with severe dents that surpass DIY repair capabilities. Consulting with professionals ensures tailored solutions to restore the garage door's functionality and aesthetics effectively.
Preventive Measures and Maintenance
- Park vehicles carefully, ensuring there's enough space between the car and the garage door. Avoid hasty or reckless maneuvers when parking to prevent accidental collisions.
- Install protective padding or bumpers on the walls inside the garage to cushion any accidental impacts between the door and parked vehicles or other objects.
- During hailstorms or adverse weather conditions, consider covering the garage door with a protective tarp or blanket to shield it from potential damage.
- Periodically inspect the door for signs of wear, vulnerable spots, or areas prone to dents. Identifying and addressing these issues early can prevent future damage.
Regular Maintenance Practices
- Regularly lubricate moving parts of the garage door, such as hinges, rollers, and tracks, to ensure smooth operation and prevent unnecessary strain that could lead to dents.
- Check and tighten loose bolts, nuts, or screws on the door and its components. Loose hardware can cause misalignments that may lead to dents or damage.
- Schedule periodic inspections and maintenance with a garage door professional. They can identify potential issues, align sensors, and perform adjustments to prevent future dents and ensure optimal door functionality.
- Keep the garage door and its surrounding area clean. Regularly remove debris, dirt, or leaves that could accumulate and potentially cause dents or affect door mechanisms.
Adhering to these preventive measures and adopting regular maintenance practices significantly reduces the risk of future dents and ensures the longevity of your garage door. Being proactive in maintenance and implementing preventive strategies minimizes the likelihood of encountering dent-related issues in the future.
Conclusion
In the pursuit of repairing garage door dents, various techniques offer homeowners effective DIY solutions. Methods like using a plunger, employing heating and cooling, gentle hammering, and utilizing dent repair kits have proven beneficial for addressing minor to moderate dents. Each technique applies unique approaches to restore the door's surface, allowing homeowners to choose the most suitable method based on dent size, severity, and door material.
Repairing garage door dents not only rejuvenates the door's appearance but also ensures its functionality and longevity. Restoring a dent-free surface not only enhances the aesthetic appeal of your home but also contributes to the overall safety and efficiency of the garage door system. The restoration process, whether DIY or with professional assistance, empowers homeowners to preserve the door's integrity, providing peace of mind and a renewed sense of curb appeal.
Restoring your garage door involves a combination of repair techniques, maintenance efforts, and preventive measures. Embracing these strategies fosters a resilient and visually appealing garage door, adding value to your property and ensuring a secure and functional entrance to your home.
You might also like
Fix N Go Blog


