
Efficient Ways to Upgrade Your Garage Door Track System
A well-functioning garage door track system is the unsung hero behind the smooth and reliable operation of your garage door. It serves as the silent conductor, guiding the door along its path and ensuring seamless movement. The significance of this often-overlooked component becomes evident when considering the pivotal role it plays in the overall functionality and safety of your garage door. A properly functioning track system not only enhances the door's performance but also contributes to the security and longevity of the entire mechanism. As the backbone of the garage door operation, the track system deserves careful attention to ensure optimal efficiency and hassle-free functionality.
Overview of Upgrading Options for Enhanced Efficiency
In the pursuit of an efficiently operating garage door, upgrading the track system emerges as a strategic and transformative step. This introduction sets the stage for an exploration into various upgrading options designed to elevate the efficiency of your garage door track system. From advanced security features to materials that enhance performance, this overview provides a glimpse into the diverse avenues available for homeowners seeking to optimize their garage door's functionality. It is essential to understand the array of upgrade options available so that your garage door performs at its best, combining reliability, security, and efficiency.
Assessment of Current Track System
- Begin the assessment process by cultivating a profound understanding of the signs that indicate wear and inefficiency in your garage door track system.
- Vigilance is key; pay attention to subtle cues that might go unnoticed. These early signs are crucial in identifying potential issues before they escalate.
- During the door's operation, keenly listen for any unusual noises. These auditory cues can serve as indicators of underlying problems within the track system.
- Conduct a visual inspection for visible damage or warping to the tracks. Identifying these issues early on allows for timely intervention and prevents further deterioration.
- Misalignment is a common problem. Check if the tracks are aligned properly to ensure the smooth movement of the garage door.
- Observe the door's movement. Any irregularities, hesitations, or difficulties in smoothly opening and closing the garage door may signify underlying track issues.
- Recognizing these telltale signs empowers homeowners to proactively address emerging issues. This proactive approach is crucial for preventing further deterioration and ensuring the continued reliability of the garage door system.
Knowing When an Upgrade is Necessary
Knowing when to transition from routine maintenance to a comprehensive track system upgrade is a pivotal aspect of responsible garage door ownership. When signs of wear and inefficiency persist despite regular maintenance efforts, and repairs become increasingly frequent, it may be a clear indicator that an
upgrade is necessary. Moreover,
technological advancements and innovative features in newer track systems present opportunities to enhance the overall performance and security of your garage door. Beyond reactive responses to issues, a proactive approach involves considering an upgrade when the current system no longer aligns with modern standards or when lifestyle changes necessitate additional functionalities.
Selecting the Right Track System
The diversity of garage door track systems available in the market necessitates a thoughtful exploration of the options to make an informed decision. Understanding the types of track systems is crucial in aligning your choice with the specific needs of your garage door. Common configurations include standard lift, vertical lift, high lift, and low headroom tracks, each designed for different garage setups and door types.
Beyond understanding the types, selecting the ideal garage door track system involves a meticulous consideration of various factors. Homeowners must weigh crucial considerations such as the weight and size of the garage door, the available headroom and side room, and the desired level of insulation. Additionally, the choice between steel, aluminum, or other materials for the tracks impacts both durability and maintenance requirements. Security features, ease of maintenance, and aesthetic preferences are further elements that demand thoughtful evaluation.
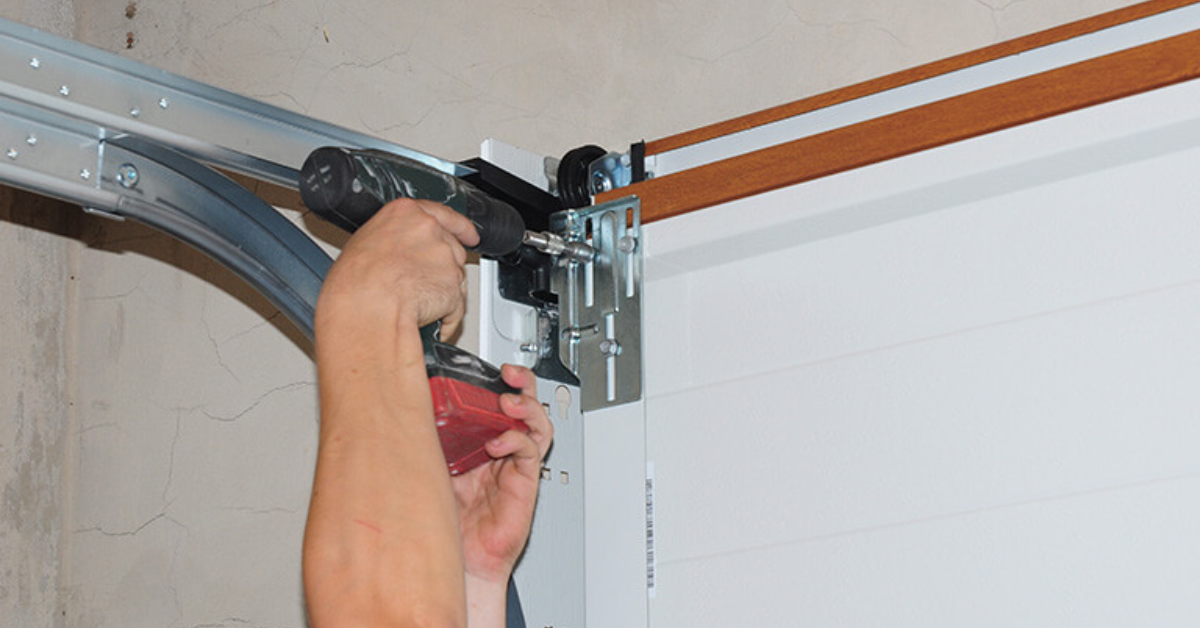
Installation Process for Upgraded Tracks
DIY Installation Tips:
- Gather all necessary tools before starting the installation process.
- Ensure the area around the garage door is clear for safe and unobstructed work.
- Follow the manufacturer's guidelines and instructions provided with the upgraded tracks.
- Double-check measurements to guarantee precise installation and alignment.
- Use safety equipment, including gloves and safety goggles, to protect yourself during the installation.
Professional Installation Services:
- Consider hiring professional technicians for a hassle-free and expert installation.
- Research and select reputable garage door installation services with experience in track upgrades.
- Schedule a convenient time for the installation, ensuring minimal disruption to your daily routine.
- Verify that the professionals are equipped with the necessary tools and materials for the upgrade.
- Communicate any specific preferences or concerns you may have regarding the installation process.
Enhanced Security Features
Enhancing the security of your garage door involves a strategic integration of advanced measures. Smart access controls present a modern solution, allowing you to manage and monitor garage access efficiently. Additionally, considering biometric technologies adds a layer of personalized security, ensuring only authorized individuals can access the garage. Motion sensors play a crucial role by detecting any unusual movements, triggering immediate alerts to keep you informed of potential security threats. Remote monitoring options further contribute to real-time surveillance, providing an additional layer of security for your garage. Exploring the incorporation of a robust security camera system into the track upgrades amplifies overall safety and adds an extra level of surveillance to your garage area.
Benefits of Security-focused Track Upgrades
- Deter potential intruders with advanced security features embedded in the track system.
- Prevent forced entries and unauthorized access attempts through tamper-resistant features.
- Enjoy the peace of mind that comes with real-time monitoring of your garage door area.
- Potentially lower insurance premiums by showcasing proactive security measures.
- Enhance overall home security with a track system that prioritizes advanced security features.
Improving Door Performance
To elevate the performance of your garage door, focusing on key aspects that contribute to smooth and efficient operation is paramount. Upgrading the tracks of your garage door system plays a pivotal role in achieving this goal. The enhanced design and precision engineering of upgraded tracks contribute to the seamless movement of the door along its path. Reduced resistance and improved alignment are tangible benefits that translate into a garage door that glides effortlessly, minimizing wear and tear on components.
Beyond achieving a smoother operation, minimizing noise and friction stands as a central objective in improving door performance. Upgraded tracks incorporate features and materials specifically designed to reduce vibrations and friction points during the door's movement. This dual focus not only enhances the immediate convenience of a quieter garage door but also extends the lifespan of the entire system by minimizing stress on components.
Long-Term Maintenance Strategies
Establishing robust long-term maintenance strategies is fundamental to ensuring the prolonged efficiency and reliability of your garage door track system. Routine maintenance emerges as a cornerstone in this approach, involving a series of proactive measures aimed at preventing premature wear and addressing potential issues before they escalate. Regular cleaning and lubrication of the tracks, inspection of fasteners, and alignment checks are essential tasks that contribute to the extended lifespan of the track system.
Cost Considerations and Budgeting Tips
Taking the step to upgrade your garage door tracks requires careful consideration of costs and strategic budgeting. To ensure a smooth and well-informed process, here are essential insights into cost considerations and budget-friendly strategies.
Estimating Costs for Track Upgrades:
Begin by estimating the costs associated with various track upgrades. Factors such as the type of track system, materials, and additional features contribute to the overall budget. Consult with professionals or explore reliable sources to gather accurate estimates tailored to your specific requirements.
Budget-Friendly Strategies for Efficient Upgrades:
Optimize your budget by exploring cost-effective materials without compromising quality. Prioritize essential features that align with your garage door's specific needs, avoiding unnecessary expenses. Consider undertaking certain aspects of the upgrade as DIY projects to save on labor costs. Research available discounts, promotions, or financing options offered by manufacturers or installation services to further manage costs.
Strategic Decision-Making:
Strategically plan your budget by breaking down costs into categories such as materials, labor, and additional features. Allocate funds based on priorities, ensuring that essential aspects are addressed within the available budget. Seek professional advice to understand where potential cost savings can be realized without compromising the overall quality and functionality of the track upgrades.
Flexible Budgeting for Contingencies:
Recognize the potential for unforeseen expenses during the upgrade process. Maintain flexibility in your budget to accommodate unexpected costs that may arise during installation or due to unique requirements.
Conclusion
Exploring efficient ways to upgrade your garage door track system is an investment in both immediate functionality and long-term durability. By focusing on crucial aspects such as track selection, installation processes, security features, and performance enhancements, homeowners can elevate their garage door experience. Whether opting for a DIY approach or seeking professional services, the goal is to create a track system that ensures smooth, quiet operation while enhancing the overall security of the home. Incorporating long-term maintenance strategies and considering cost-effective measures further solidifies the efficiency and reliability of the upgraded track system. Ultimately, these efforts contribute to a garage door that not only meets but exceeds expectations, providing homeowners with a resilient and optimized entry point to their homes for years to come.
You might also like
Fix N Go Blog


