
Top 5 Signs Your Garage Door Tracks Need Repair
Garage door tracks serve as the backbone of the entire door system, often working silently behind the scenes to ensure smooth and seamless door operation. Their significance cannot be overstated, as they provide the necessary guidance and support for the door's movement along its designated path. Understanding the pivotal role these tracks play in the functionality of your garage door system is crucial.
Garage door tracks form the foundation upon which the door operates, facilitating its up-and-down movement. These tracks, typically made of durable metals like steel or aluminum, provide the necessary guidance for the
rollers attached to the door panels. The precise alignment and condition of these tracks directly impact the door's stability, smoothness of movement, and overall functionality. They ensure the door moves along its intended path without deviation or hindrance, offering convenience and security to homeowners.
Despite their robustness, garage door tracks are susceptible to various issues over time. These problems, if left unattended, can not only disrupt the door's operation but also
pose safety risks. Signs indicating track-related problems manifest in different ways, ranging from audible cues such as unusual noises during door operation to visible signs like misalignment, gaps, or wear on the tracks themselves. Understanding and recognizing these signs are pivotal in addressing potential track issues promptly and effectively.
Signs Indicating Garage Door Track Problems
Unusual Noises During Operation
Grinding, squeaking, or popping sounds within a garage door operation are often indicative of underlying issues. These noises might suggest worn-out rollers rubbing against the tracks (as evidenced by grinding noises) or insufficient lubrication or debris accumulation (manifested as squeaking or popping sounds). Common causes encompass worn-out rollers, misaligned tracks, or loose hardware. Neglecting these sounds risks exacerbating wear on components, escalating friction, and potentially causing failure in the door's moving parts.
Misalignment or Crookedness of the Door
A visibly misaligned or crooked garage door often signifies underlying track issues, possibly stemming from loose hardware, damaged tracks, or obstructed movement. This misalignment significantly hampers the door's smooth operation, increasing the likelihood of jams or getting stuck. Continuous operation in this compromised state poses risks, damaging rollers, tracks, and other vital door components, thereby compromising safety.
Slow or Jerky Movement of the Door
Slow or jerky movements in a garage door might stem from various causes such as inadequate lubrication, debris accumulation, or worn-out rollers. These observations indicate heightened friction and strain within the door system. Prolonged operation under these conditions risks premature wear on crucial components like rollers and tracks, ultimately compromising the door's overall functionality.
Gaps or Spaces Between Tracks and Rollers
Visible gaps or spaces between the tracks and rollers are indicative of potential issues like misalignment, worn-out components, or tracks displaced from their proper position. These gaps significantly impact the door's stability and alignment, imposing heightened stress on components and increasing the risk of door derailment. Such compromised conditions pose safety hazards during the door's operation, emphasizing the need for prompt attention and resolution.
Visible Damage or Wear on the Tracks
Visible signs of wear and tear on garage door tracks, such as dents, bends, rust, or general wear, often result from age, impact, or inadequate maintenance. Ignoring these indications can lead to escalated deterioration, posing severe risks to door functionality. Continued use without addressing track damage might cause malfunctions, jams, or even detachment from the tracks, posing significant safety hazards. Recognizing these detailed signs enables homeowners to take timely action, ensuring the ongoing smooth and safe operation of their garage door systems.
Importance of Timely Track Repair
Timely track repair plays a pivotal role in preventing the escalation of existing issues. Addressing track problems promptly avoids exacerbating damage to the door system. For instance, neglecting misaligned tracks or worn-out rollers can result in increased stress on other components. This added strain might lead to damage to the door panels, hinges, or even the motor, requiring extensive repairs or complete replacements. By addressing track issues early on, homeowners can mitigate the risk of costly and extensive damages to the entire garage door system.
Neglected track issues pose significant safety hazards. Misaligned tracks, worn-out rollers, or damaged components increase the risk of the door malfunctioning during operation. This malfunction could lead to unexpected door closures, jamming, or even detachment from the tracks, potentially causing injury to individuals or damage to property. Timely track repair ensures the door operates smoothly, reducing the likelihood of accidents and ensuring the safety of occupants and belongings.
Addressing track issues promptly proves cost-effective in the long run. Timely repairs prevent small problems from escalating into more extensive and expensive issues. By investing in early repairs for track-related problems, homeowners avoid the need for extensive repairs or replacements that might incur higher costs. Moreover,
regular maintenance and timely repairs prolong the lifespan of the door system, reducing the frequency of repairs and replacements, ultimately saving on long-term maintenance expenses.
Timely track repair is crucial not only to prevent further damage to the door system but also to ensure safety and cost-efficiency. Addressing track issues promptly avoids potential hazards, preserves the integrity of the door system, and minimizes the need for extensive repairs or replacements, making it a prudent investment in the long-term functionality and safety of the garage door.
Solutions and Repair for Garage Door Tracks
For minor track issues such as minor misalignments, debris accumulation, or minor lubrication needs, homeowners can undertake DIY solutions. This includes tasks like cleaning the tracks from debris using a soft brush or cloth, applying lubricant to rollers and tracks, and tightening loose hardware. DIY fixes help maintain the tracks' functionality between professional maintenance sessions, ensuring smooth door operation.
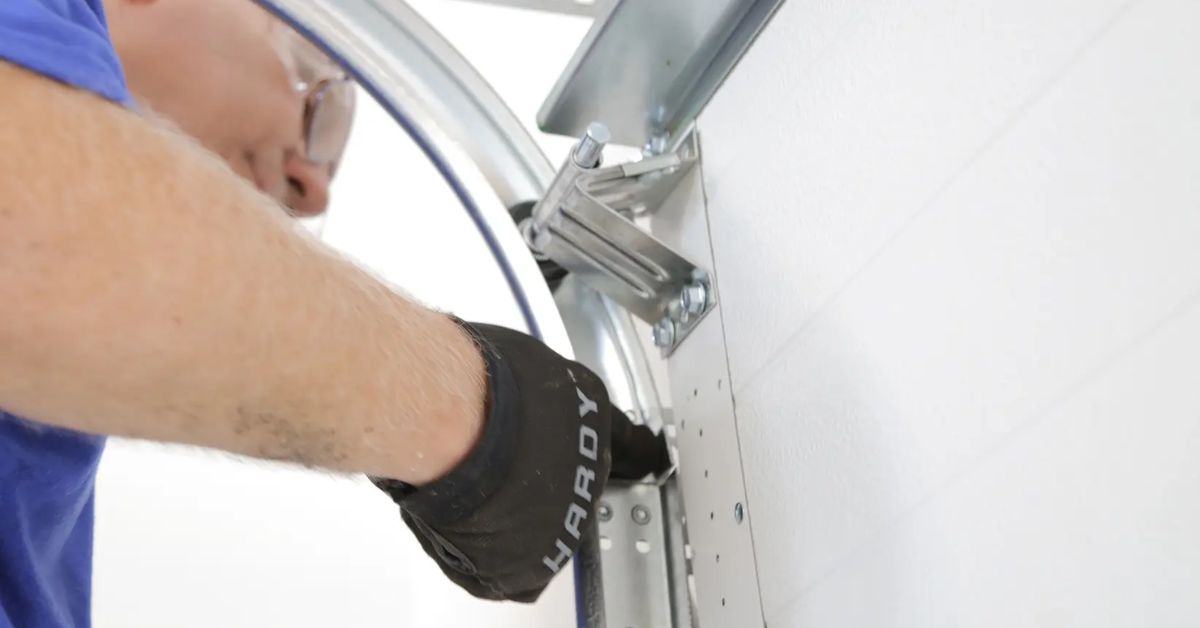
Complex track issues, such as severe misalignments, significant damage to the tracks, or intricate repairs requiring technical expertise, warrant professional assistance. Trained technicians possess the necessary skills, tools, and experience to address complex problems effectively. They can accurately diagnose track issues, realign tracks, replace damaged components, or conduct adjustments that might be beyond the scope of DIY repairs. Seeking professional help ensures proper resolution of track-related problems and prevents potential safety hazards.
Replacement vs. Repair Considerations
When determining whether to repair or replace tracks, several factors come into play. Repairing is suitable for minor damages or issues, preserving the existing tracks with cost-effective solutions. However, if tracks suffer severe damage, extensive wear, or structural issues compromising their integrity, replacement might be the more viable option. Replacement becomes necessary when repairs are no longer feasible or when safety concerns arise. Professionals can provide guidance on whether repairs suffice or if replacement is the more prudent choice based on the severity of track damage.
Maintenance Tips to Prevent Track Issues
Regular Cleaning and Lubrication: Regular cleaning and lubrication are foundational for track maintenance. Cleaning the tracks with a soft brush or cloth to remove debris, dirt, or any buildup ensures smooth door movement. Additionally, applying a high-quality lubricant to the tracks and rollers reduces friction, preventing premature wear and ensuring optimal functionality. Regular lubrication, usually every six months or as recommended by the manufacturer, enhances the lifespan of tracks and rollers.
Scheduled Inspections and Maintenance Checks:
Scheduled inspections play a crucial role in identifying potential track issues early. Conducting routine checks on the tracks, rollers, and hardware allows homeowners to spot signs of misalignment, wear, or damage. Checking for loose bolts or screws, visible signs of wear on the tracks, and ensuring proper alignment prevents minor issues from developing into major problems. Consistent maintenance checks contribute to the overall health and longevity of the garage door system.
Professional Tune-Ups and Servicing:
Periodic
professional tune-ups and servicing are essential for comprehensive track maintenance. Engaging professionals for regular servicing ensures a thorough inspection of the entire garage door system. Trained technicians can detect hidden issues, adjust tracks and rollers, realign components, and conduct necessary adjustments that might go unnoticed during routine checks. Professional tune-ups and servicing help prevent potential track problems, ensuring the door operates smoothly and efficiently.
Conclusion
Recognizing the top five signs indicating garage door track issues—such as unusual noises during operation, visible misalignment or crookedness, slow or jerky door movements, gaps between tracks and rollers, and evident wear and tear—stands paramount for homeowners. Addressing these signs promptly through repairs or maintenance safeguards against escalated damage, preventing potential safety hazards and ensuring the smooth, reliable operation of the garage door. Staying vigilant and taking timely action when these signs manifest ensures the long-term health and functionality of the garage door tracks, enhancing overall safety and peace of mind for homeowners.
You might also like
Fix N Go Blog


