Essential Steps for Garage Door Spring Adjustment
Garage door spring adjustment is a critical maintenance task often underestimated in its significance. These unassuming components shoulder the hefty responsibility of counterbalancing the weight of the door, ensuring its smooth operation day in and day out. Their proper adjustment isn't just a matter of convenience; it's a safety imperative.
The importance of this adjustment lies in its fundamental contribution to the functionality and longevity of your garage door. Well-adjusted springs facilitate effortless opening and closing, preventing unnecessary strain on the opener motor and other mechanisms. This not only extends the lifespan of the entire system but also reduces the likelihood of sudden breakdowns or malfunctions.
Throughout this comprehensive guide, we'll explore the intricacies of adjusting
garage door springs, outlining a step-by-step approach to safeguard both the functionality of your garage door and the well-being of those interacting with it. From preliminary checks to the adjustment techniques specific to different types of springs, this guide aims to equip you with the knowledge and understanding needed to carry out this maintenance task effectively and securely.
Getting to Know Garage Door Springs
There are two main types of garage door springs: torsion springs and extension springs. Torsion springs, typically mounted above the door, use torque to counterbalance the weight of the door as it opens and closes. On the other hand, extension springs, usually located along the tracks or sides of the door, stretch and contract to support the door's weight.
Understanding these spring types is crucial, as each operates differently and requires specific adjustment techniques. Torsion springs, due to their torque-based mechanism, store energy by twisting tightly when the door is closed and release it as the door opens. Extension springs, conversely, stretch and contract as the door moves, utilizing this tension to assist in its operation.
Properly adjusted springs play an integral role in the
smooth and safe functioning of your garage door. They act as the primary force that offsets the weight of the door, reducing strain on the opener motor and other components. This optimal balance not only ensures effortless door movement but also extends the overall lifespan of the garage door system. Moreover, properly adjusted springs minimize the risk of sudden malfunctions or unexpected door drops, enhancing both safety and convenience.
Recognizing the signs indicating the need for spring adjustment is essential for timely maintenance. These signs may include uneven movement of the door,
excessive noise during operation, visible gaps or inconsistencies in spring tension, or difficulty in manually opening or closing the door. Additionally, if the door feels heavier than usual or appears unbalanced when partially opened, it's a clear indication that the springs might need adjustment.
Regular inspection and awareness of these signs enable homeowners to identify when adjustments are necessary, preventing potential accidents or more extensive damage due to neglected spring issues. Prioritizing the timely adjustment of garage door springs ensures their optimal performance and contributes significantly to the overall safety and functionality of the garage door system.
Safety Precautions
Safety precautions are paramount when it comes to garage door spring adjustment, as mishandling these components can lead to severe injuries or property damage.
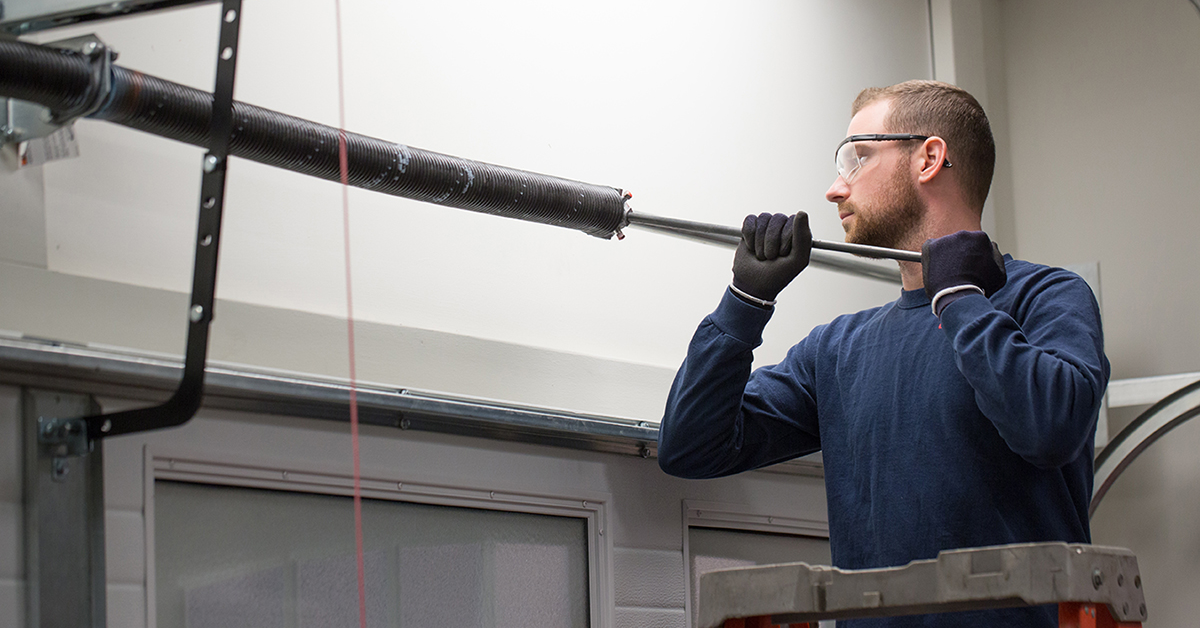
The use of appropriate safety gear and tools cannot be overstated. Wear safety glasses to protect your eyes from debris or spring-related accidents. Thick gloves and sturdy clothing help shield against cuts or abrasions, while ensuring a firm grip on tools. Additionally, using winding bars specifically designed for torsion springs and reliable clamps for securing extension springs is essential for safe handling during adjustments.
Attempting a DIY adjustment without adequate knowledge and experience can pose significant risks. The immense tension stored in garage door springs can cause them to snap violently if mishandled. This sudden release of tension can result in serious injuries or damage to property. Therefore, it's crucial to emphasize that only individuals with the necessary expertise and understanding of garage door mechanisms should attempt spring adjustments. Encouraging homeowners to seek professional assistance instead of risking DIY adjustments is a key safety precaution.
When undertaking spring adjustments, certain tips can help minimize the risk of accidents. Firstly, ensuring the door is fully closed and disconnected from the opener prevents unintended movement during adjustment. Additionally, securing the door with clamps or locking pliers helps maintain stability while working on the springs. When adjusting torsion springs, using winding bars to control the tension and maintaining a steady and controlled movement is vital. For extension springs, carefully releasing tension and using proper tools to adjust without applying excessive force is crucial to avoid accidents.
Regularly reinforcing these safety precautions and emphasizing the potential dangers of mishandling garage door springs can significantly reduce the risk of accidents during adjustment. Prioritizing safety not only protects individuals performing the adjustments but also safeguards against potential damage to property and ensures a secure environment when maintaining garage door systems.
Steps for Garage Door Spring Adjustment
Preparation and Safety Checks Before Starting: Before starting any adjustments, prioritize safety by wearing safety glasses, gloves, and suitable attire. Gather the necessary tools such as winding bars for torsion springs or specialized clamps for extension springs. Additionally, disconnect the garage door opener to prevent accidental movement and use clamps or locking pliers to securely hold the door in place during adjustments.
Adjusting Torsion Springs:
To release tension from the torsion spring, insert winding bars into the winding cone. Slowly and carefully unwind the spring by turning the bars in the correct direction. Once the tension is released, cautiously remove the old or damaged spring to prepare for replacement or repair.
Adjusting the Spring's Tension:
When installing the new torsion spring, ensure its correct orientation before proceeding. Gradually wind the spring using the winding bars, following the manufacturer's specified number of turns. Maintain equal turns on both sides to achieve balanced tension across the spring for optimal functionality and safety.
Rechecking Balance and Functionality:
Once the new torsion spring is in place and properly wound, begin by cautiously removing any securing clamps or pliers used during installation. Slowly raise the door manually to assess its balance and ensure smooth operation. If needed, make necessary adjustments to achieve optimal balance, ensuring the door functions smoothly and operates correctly.
Adjusting Extension Springs:
Understanding the setup of extension springs involves locating them along the tracks or sides of the door and comprehending their connection to the pulley and cable system. Adjusting the tension in extension springs requires securing the door with appropriate clamps and carefully releasing tension by disconnecting them from the pulley system. This adjustment involves moving the spring to a different notch on the pulley or altering the cable length, ensuring both springs are adjusted equally to maintain balanced tension.
Post-adjustment, verifying the door's balance is crucial. Reconnecting the springs securely to the pulley system, manually raising and lowering the door to test its balance and smooth movement is essential. Any necessary adjustments should be made to guarantee the door operates smoothly and maintains proper balance without encountering any issues.
Following these step-by-step procedures for adjusting both torsion and extension springs ensures a methodical approach, emphasizing safety, and effectiveness in preserving the optimal functionality of your garage door system.
Common Mistakes to Avoid
Over-tightening or Under-tightening Springs:
One common mistake is over-tightening torsion springs, which occurs when they are wound excessively, creating an excess of tension. This excessive tension can strain the door, motor, and other components, potentially causing premature wear or failure. Conversely, under-tightening the springs leads to insufficient tension, failing to provide adequate support for the door's weight. This lack of support strains the opener and results in an unbalanced door, potentially causing issues with the door's proper closure.
Ignoring Warning Signs of Spring Failure:
During door operation, unusual grinding, scraping, or squeaking noises can indicate potential spring issues. Visible signs like cracks, gaps, or noticeable wear on the springs serve as signals of potential failure. When the door displays uneven movement or doesn't operate smoothly, appearing lopsided during movement, it's a clear indicator of underlying spring problems. Additionally, experiencing difficulty while opening or closing the door, or sensing an unusual heaviness in its movement, often signifies issues with the springs that need attention.
Skipping Safety Precautions and Equipment:
Failure to utilize safety gear such as safety glasses, gloves, or suitable attire can result in injuries during garage door spring adjustments. Using makeshift or incorrect tools for these adjustments can lead to accidents or cause damage. Neglecting to disconnect the opener or secure the door before making adjustments poses risks of sudden movement or the release of tension, potentially causing harm. Avoiding these common mistakes is crucial for safe and effective garage door spring adjustments. It's important to maintain the correct tension, remain vigilant about warning signs, and prioritize safety measures and equipment. These steps are essential not only for successful adjustments but also for ensuring personal safety during the process.
When to Call a Professional
Knowing when to seek professional help for garage door spring issues is crucial for safety and optimal functionality. There are certain situations where attempting a DIY adjustment is not recommended. If you lack the necessary expertise, experience, or specialized tools required for spring adjustments, it's best to avoid attempting it yourself. Moreover, if the springs are visibly damaged, severely worn, or if there's suspicion of underlying issues with the door mechanism beyond the springs, DIY adjustments can exacerbate problems.
Signs that indicate the need for professional intervention include persistent issues even after attempted adjustments,
sudden or extreme changes in door operation or balance, and visible damage or irregularities in the springs. Additionally, if you're unsure about the specific type or model of springs in your garage door, it's safer to consult a professional to avoid any errors in adjustments.
Regular maintenance by a professional is essential for the
long-term health of your garage door system. Professionals can conduct thorough inspections, identify potential issues before they escalate, and perform necessary adjustments or replacements with precision. This proactive approach not only ensures the safety and smooth operation of your garage door but also extends its overall lifespan, saving you from costly repairs or replacements in the future.
Ultimately, knowing when to call a professional for garage door spring issues ensures that the adjustments are carried out safely and accurately, preserving the functionality of your garage door and prioritizing your safety.
Conclusion
Properly adjusted garage door springs are pivotal for a safe and efficient system, bearing the weight and ensuring smooth functionality. Safety measures like using proper tools and gear, heeding warning signs, and avoiding common mistakes are imperative during adjustments. Encouraging regular professional maintenance is key, allowing for early issue detection and preserving the door's longevity. Ultimately, prioritizing these practices guarantees not only safety but also the prolonged effectiveness of your garage door system.


