How To Change The Battery In Chamberlain Garage Door Openers

Rabia Tingat • June 29, 2024

Chamberlain garage door openers are renowned for their reliability, convenience, and advanced technology. These openers often come equipped with battery backup systems designed to ensure the garage door functions seamlessly even during power outages, enhancing the security and accessibility of your home. As with any mechanical system, regular maintenance is crucial to keep the garage door opener operating smoothly and efficiently. One of the essential maintenance tasks is changing the battery in your Chamberlain garage door opener.


Over time, batteries lose their capacity to hold a charge, which can compromise the functionality of your garage door opener during power failures. Neglecting this simple maintenance task can lead to inconvenient situations where your garage door fails to operate just when you need it the most.


In this comprehensive guide, we will provide you with detailed, step-by-step instructions on how to replace the battery in your Chamberlain garage door opener. We will also share important tips and best practices to ensure the process is straightforward and hassle-free. Whether you are a seasoned DIY enthusiast or new to home maintenance tasks, our guide is designed to help you successfully complete this task with confidence. Let's dive in and ensure your Chamberlain garage door opener remains in optimal working condition.


Why Changing the Battery is Important


The battery backup system in your Chamberlain garage door opener is designed to provide power when the main electricity supply is unavailable. Over time, the battery loses its ability to hold a charge, necessitating a replacement to maintain optimal performance. By regularly changing the battery, you ensure that your garage door opener remains functional during power outages, enhancing the security and convenience of your home.


Identifying the Battery Type


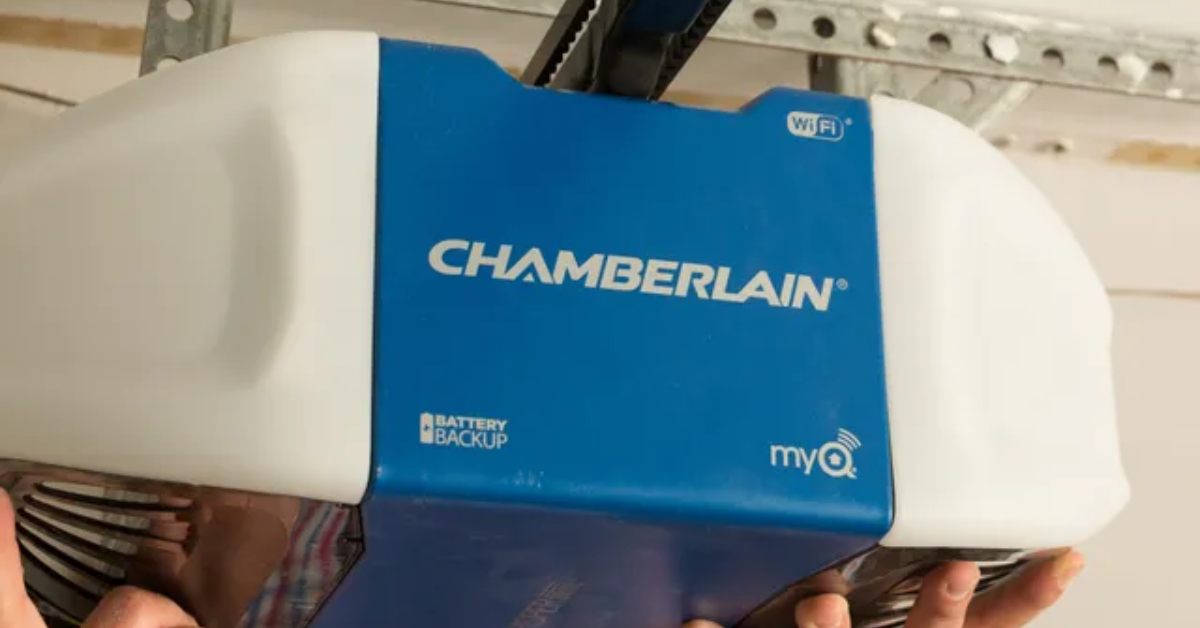
Before you begin, it’s crucial to identify the correct battery type for your Chamberlain garage door opener. Most models use a 12V rechargeable battery, but it’s always best to consult your owner’s manual or check the specifications on the existing battery.


Steps to Identify the Battery Type:

  1. Consult the Owner’s Manual: Refer to the manual provided with your garage door opener to find the battery specifications.
  2. Check the Existing Battery: Open the battery compartment and note the details on the existing battery, including voltage and model number.
  3. Visit Chamberlain’s Website: If the manual is unavailable, you can visit the Chamberlain website and search for your garage door opener model to find the battery information.


Tools and Materials Needed

Before you start the battery replacement process, gather the following tools and materials:

  • A replacement 12V rechargeable battery (specific to your Chamberlain model)
  • A Phillips-head screwdriver
  • A flathead screwdriver (if needed)
  • Safety gloves


Step-by-Step Guide to Changing the Battery


Step 1: Ensure Safety First

Before beginning any maintenance on your garage door opener, it’s important to prioritize safety:

  1. Unplug the garage door opener from the power outlet to prevent any accidental activation during the battery replacement process.
  2. Protect your hands by wearing safety gloves, especially if you’re handling electrical components.


Step 2: Access the Battery Compartment

Locate the battery compartment on your Chamberlain garage door opener. This is typically found on the back or side of the unit.

  1. Depending on your model, you may need to use a Phillips-head screwdriver to remove the screws securing the battery compartment cover.
  2. Carefully remove the cover to access the battery.


Step 3: Remove the Old Battery

With the battery compartment open, you can now remove the old battery.

  1. Gently disconnect the wires attached to the battery terminals. Note the orientation of the red (positive) and black (negative) wires for reconnection.
  2. Carefully lift the old battery out of the compartment.


Step 4: Install the New Battery

Now that the old battery has been removed, it’s time to install the new one.

  1. Place the new 12V rechargeable battery into the compartment in the same orientation as the old one.
  2. Attach the red wire to the positive terminal and the black wire to the negative terminal. Ensure the connections are secure.


Step 5: Secure the Battery Compartment

Once the new battery is in place and connected, you can close the battery compartment.

  1. Position the cover back over the compartment and secure it with the screws you previously removed.
  2. Use the Phillips-head screwdriver to tighten the screws, ensuring the cover is firmly in place.


Step 6: Reconnect the Opener

With the new battery installed and the compartment secured, you can now reconnect the garage door opener to the power supply.

  1. Restore power to the garage door opener by plugging it back into the power outlet.
  2. Activate the garage door opener to ensure it is functioning correctly with the new battery.


Maintaining Your Chamberlain Garage Door Opener


Regular maintenance extends the life of your garage door opener and ensures reliable performance. Here are a few tips to keep your opener in top condition:

  • Check the Battery Regularly: Periodically test the battery backup system to ensure it’s working properly.
  • Clean the Opener: Dust and debris can accumulate on the opener. Clean it periodically to prevent malfunction.
  • Lubricate Moving Parts: Apply lubricant to the moving parts of your garage door and opener to ensure smooth operation.
  • Inspect the Door: Regularly inspect the garage door itself for any signs of wear or damage.


Conclusion


Changing the battery in your Chamberlain garage door opener is a straightforward process that enhances the reliability and functionality of your system. By following the steps outlined in this guide, you can ensure your opener continues to operate smoothly, even during power outages. Regular maintenance and timely battery replacement will keep your garage door opener in optimal condition, providing convenience and security for your home.

You might also like

Fix N Go Blog

How to Replace a Garage Door Motor?
By Rabia Tingat July 24, 2025
If your garage door opener motor has become noisy, sluggish, or completely non-functional, it may be time to replace it. A faulty motor can make daily garage use frustrating and even unsafe. Fortunately, replacing a garage door motor isn't as complicated as it may seem—especially if you're comfortable with basic DIY tasks. In this step-by-step guide, we’ll walk you through how to replace a garage door motor safely and effectively. Whether you’re dealing with a burnt-out motor or simply upgrading to a newer model, we’ll help you understand the entire process—from removal to reinstallation. Signs Your Garage Door Motor Needs Replacing Before we jump into the replacement process, let’s look at a few signs that indicate your garage door motor is failing: The opener struggles to lift or lower the door Unusual grinding or humming noises from the motor Frequent power failures or overheating The door only opens partially or not at all The remote and wall switch stop responding If your opener exhibits any of these issues even after resetting or troubleshooting, replacing the motor is likely the best long-term solution. Choosing the Right Garage Door Motor Replacement Garage door motors (often called garage door openers) come in several types—chain drive, belt drive, screw drive, and direct drive. When choosing a replacement, make sure it’s compatible with: Your garage door's weight and size Available power source (AC or DC motor) Existing hardware and mounting setup Brands like Chamberlain, Genie, and LiftMaster offer reliable units that include all necessary mounting brackets, sensors, and manuals for a smoother installation. Tools You’ll Need Before replacing your garage door motor, gather these essential tools: Ladder Socket set Screwdrivers Adjustable wrench Wire cutters and strippers Power drill Safety glasses and gloves Once you're equipped, turn off the power supply to the opener to avoid electrical hazards. Step-by-Step Guide to Replacing a Garage Door Motor Step 1: Disconnect Power and Unplug the Motor Safety first—disconnect the opener from the power outlet. If it's hardwired into your home’s electrical system, turn off the circuit breaker. Confirm there's no electricity flowing to the unit using a voltage tester. Step 2: Disengage the Door from the Opener Pull the emergency release cord (usually a red handle) to disengage the garage door from the opener. This lets you open and close the door manually during the motor replacement process. Step 3: Remove the Old Garage Door Motor Start by detaching the wires connected to the safety sensors and wall switch. Take photos or label wires for reference during reinstallation. Next, use a socket wrench or screwdriver to unscrew the motor unit from its mounting bracket on the ceiling. Be cautious—these units are heavy and often require a second person to safely lower them. Once the motor is removed, also uninstall the rail and trolley if your new opener comes with its own. Step 4: Install the New Motor and Mounting Rail Assemble the new motor unit according to the manufacturer’s instructions. This often includes connecting the rail, carriage, and pulley system. Mount the new rail above your garage door and secure the motor to the ceiling using provided brackets. Make sure everything is level and firmly attached. A misaligned rail can lead to jerky movements or early wear on the new motor. Step 5: Wire the Motor and Accessories Reconnect the wall switch and safety sensor wires to the terminals on the new motor unit. Most openers have labeled terminals—typically for red, white, and black wires. If your model includes a backup battery, antenna, or Wi-Fi connection, set these up now. Follow your motor’s wiring diagram precisely to avoid connectivity issues. Step 6: Reconnect the Door and Adjust Settings Pull the emergency cord back into the “engaged” position to reattach the door to the trolley. Now, plug the motor into the power outlet or restore power at the breaker. Turn on the unit and test the door’s operation. Adjust the travel limits and force settings as needed. These settings ensure the door opens and closes completely without excessive strain. Refer to your manual for step-by-step adjustment instructions—usually involving small dials or digital buttons on the unit. Testing Your New Garage Door Motor Once installed, test the full functionality of the opener: Use both the wall switch and remote control Check safety sensors by blocking the beam—door should reverse Confirm smooth and quiet operation Listen for any abnormal noises or vibrations If the door doesn’t operate properly, recheck the alignment of the rail, the wiring connections, or the motor’s mounting hardware. Professional Help vs. DIY While replacing a garage door motor is a doable task for experienced DIYers, you may want to call a professional if:  Your opener is hardwired (no plug-in cord) The ceiling mount is in a tight or high area The garage door is unusually heavy or custom-built You’re unsure about wiring and adjustments Professional installers can typically complete the job within 1–2 hours, and many offer warranties on both labor and parts. Final Thoughts Replacing a garage door motor may seem like a big task, but with the right preparation and safety steps, it's well within reach for the average homeowner. Whether you're upgrading to a quieter, smarter opener or fixing a worn-out unit, understanding the wiring, mounting, and setup process will ensure a successful installation. Remember to always follow the manufacturer’s instructions, double-check your wiring, and test your new unit thoroughly. When done correctly, a new garage door motor will provide smooth, reliable performance for years to come.
How Does Genie Garage Door Motor Wire In?
By Rabia Tingat July 22, 2025
Find out how to wire a Genie garage door motor with expert tips. Improve motor performance and ensure secure, safe installation with this guide.
How to Replace a Garage Door Cable?
By Rabia Tingat July 20, 2025
Learn how to replace a garage door cable step-by-step. This guide covers tools, safety tips, and expert advice for a smooth and safe cable replacement.