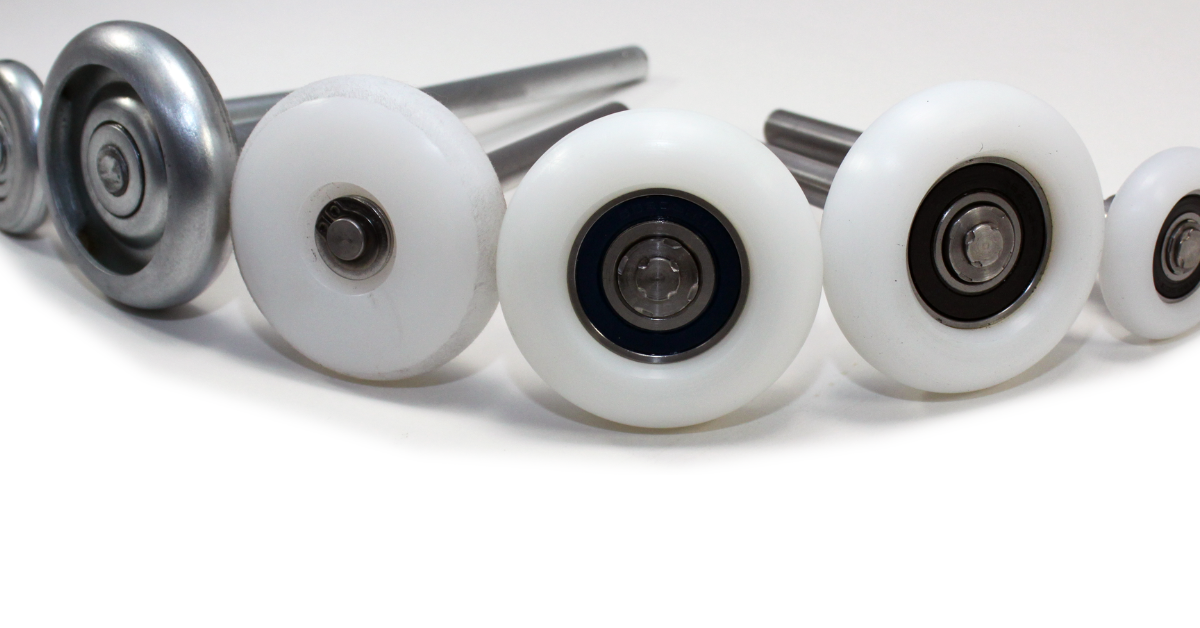
How to Choose the Right Garage Door Rollers
Garage door rollers might seem inconspicuous, but they play a pivotal role in the smooth operation and longevity of your garage door system. As seemingly humble components, these rollers serve as the silent workhorses, facilitating the effortless movement of the door along its tracks. Understanding their significance and selecting the appropriate rollers can significantly impact the functionality, noise level, and durability of your garage door system.
Garage door rollers serve as the primary interface between
the door panels and the tracks. Their design and quality dictate the ease of door movement, ensuring smooth opening and closing. Moreover, they bear the weight of the entire door, necessitating a robust and reliable build to withstand frequent usage without compromising performance. Functionally, these rollers contribute to the door's stability,
noise reduction, and overall efficiency. Whether nylon, steel, or other materials, the right rollers maintain the door's alignment, minimize friction, and reduce operational noise. Additionally, their compatibility with the door's weight and track system is crucial for optimal performance.
When selecting or
replacing garage door rollers, it is essential to understand their nuances. Factors like material, durability, size, and maintenance requirements are pivotal in making an informed choice. In this guide, we delve into the intricacies of choosing the right garage door rollers, empowering you to make educated decisions that enhance the functionality and longevity of your garage door system.
Types of Garage Door Rollers
Garage door rollers come in various materials and designs, each offering distinct advantages and considerations. Understanding the differences among these types empowers homeowners to make informed decisions based on their specific needs and preferences.
Nylon Rollers
Nylon rollers are a popular choice due to their smooth and quiet operation. Constructed with nylon wheels and either steel or nylon stems, they reduce noise significantly compared to older metal rollers. They are lightweight, corrosion-resistant, and require minimal maintenance. However, their load-bearing capacity might be limited compared to some other types, making them better suited for residential garage doors with moderate usage.
Steel Rollers
Steel rollers are durable and capable of handling heavier doors and more frequent use. They come in various designs, including those with ball bearings or without bearings. These rollers provide robust support and are ideal for commercial or heavy-duty residential garage doors. While they might produce more noise compared to nylon rollers, they offer exceptional strength and longevity, making them a preferred choice for high-traffic garage doors.
Plastic Rollers
Plastic rollers, often made from high-quality PVC or other sturdy polymers, offer a cost-effective solution. They are lightweight, corrosion-resistant, and quieter than traditional steel rollers. However, their load-bearing capacity might be lower than that of steel rollers, making them more suitable for lighter residential doors or infrequently used garage spaces.
Ball Bearing Rollers
Ball bearing rollers, available in both nylon and steel variants, are characterized by their smooth and efficient operation. These rollers utilize ball bearings within the wheel assembly, allowing for reduced friction and smoother movement along the tracks. They are known for their quiet operation and can accommodate heavier garage doors while maintaining ease of use.
Factors to Consider When Choosing Garage Door Rollers
Selecting the right garage door rollers involves assessing various critical factors to ensure optimal functionality, longevity, and compatibility with your specific door system.
Durability and Lifespan:
The durability and lifespan of garage door rollers are crucial considerations. Steel rollers, for instance, are known for their robustness and longevity, enduring frequent usage and heavy door weights. Nylon and plastic rollers also offer good durability, albeit with different load-bearing capacities suited for varying door weights and usage frequencies. Understanding the material's resilience and expected lifespan helps in choosing rollers that withstand the demands of your garage door.
Noise Level:
The noise level generated by garage door rollers varies significantly among different materials and designs. Nylon, plastic, and ball bearing rollers typically operate more quietly than traditional steel rollers. If noise is a concern, opting for rollers specifically engineered for reduced friction and quieter operation, such as nylon or ball bearing rollers, can significantly mitigate operational noise.
Weight Capacity:
Consider the weight capacity the rollers can support. Heavier doors require rollers with higher load-bearing capacities to ensure smooth operation and prevent premature wear. Steel rollers, particularly those designed for heavy-duty applications, generally possess greater weight-bearing capabilities compared to nylon or plastic rollers. Assessing the weight of your garage door and choosing rollers capable of comfortably supporting it is crucial for optimal performance.
Maintenance Requirements:
Different roller materials have varying maintenance needs. Steel rollers might require periodic lubrication to maintain smooth operation and prevent corrosion. In contrast, nylon or plastic rollers are often corrosion-resistant and require minimal maintenance. Understanding the maintenance demands of each roller type helps in selecting rollers aligned with your maintenance preferences and capabilities.
Compatibility with Door Type:
Not all rollers are universally compatible with every
garage door type or track system. Ensure the selected rollers are compatible with the
tracks and design of your garage door. Factors such as roller size, stem length, and track compatibility should be considered to prevent installation issues and ensure seamless functionality.
Considering these factors in your decision-making process empowers you to select garage door rollers that align with your specific needs, ensuring optimal performance, reduced noise, and increased longevity for your garage door system.
Dimensions and Sizes of Rollers
Correct sizing and compatibility are vital when choosing or replacing garage door rollers. Understanding the guidelines, compatibility with tracks, and how to measure for replacements ensures a seamless fit and optimal functionality.
Sizing Guidelines:
Roller sizes can vary based on door type and manufacturer specifications. Common sizes include diameters of 2 inches or 3 inches for residential doors, while commercial or heavier doors might require larger sizes. Referencing the manufacturer's guidelines or consulting a professional can provide precise sizing recommendations based on your specific garage door system.
Compatibility with Tracks:
The compatibility between rollers and
tracks is essential for smooth door operation. Rollers must fit snugly within the tracks without excessive play or tightness. Ensuring the rollers match the track design and width prevents issues such as misalignment, binding, or premature wear. Different track systems may require specific roller sizes and designs, so verifying compatibility is crucial before installation.
How to Measure for Replacement:
Measuring for replacement rollers involves determining the diameter and stem length. To measure the diameter accurately, remove the existing roller and measure its diameter using a caliper or ruler. For stem length, measure from the base of the roller to the end of the stem. These measurements ensure you acquire replacement rollers that match the dimensions of the existing ones, facilitating a smooth and accurate replacement process.
A proper fit and functionality of garage door rollers within your door system depends on understanding the roller sizes, their compatibility with tracks, and the precise measurements for replacements.
Installation and Replacement of Garage Door Rollers
When considering the installation or replacement of garage door rollers, homeowners often face the choice between a DIY approach and professional installation. A DIY installation can be feasible for those experienced with garage door systems and equipped with the necessary tools. However, it's crucial to follow manufacturer guidelines meticulously and prioritize safety. Professional installation, on the other hand, ensures expertise, compliance with safety standards, and efficient handling of complex systems, making it a reliable choice for those less familiar or uncertain about the process.
For those
opting for a DIY approach, a step-by-step replacement guide can streamline the process. Firstly, preparing the workspace and disconnecting the power source is essential to prevent accidental door activation. Securing the door in place with locking pliers or clamps helps maintain stability during the replacement. Carefully removing old rollers from the track, inserting and aligning the new rollers, and securely reattaching brackets are key steps. Testing the door's movement afterward ensures the new rollers function correctly.
Irrespective of the chosen installation method, adhering to safety precautions is paramount. Disconnecting the power source prevents accidental door movements, and wearing protective gear like goggles and gloves safeguards against potential injuries from moving parts or debris. Additionally, securing the door with locking pliers or clamps during the process prevents unexpected movement. Following manufacturer instructions and recommended safety protocols is crucial to ensure a safe and successful installation or replacement of garage door rollers.
Maintenance Tips for Garage Door Rollers
Regular maintenance ensures the longevity and smooth operation of garage door rollers. Proper lubrication stands as a fundamental aspect to minimize friction and ensure seamless movement. Using a high-quality silicone or lithium-based lubricant on the rollers, hinges, and tracks reduces wear and noise. Applying the lubricant periodically, usually every six months or as recommended by the manufacturer, keeps the rollers functioning optimally.
Regular inspection and cleaning play pivotal roles in maintaining garage door rollers. Conducting visual inspections to check for debris, dirt buildup, or signs of damage on the rollers and tracks is crucial. Regular cleaning with a soft brush or cloth, removing debris, and ensuring tracks are free from obstructions or hardened grease promotes smooth movement and prevents premature wear of the rollers.
Vigilance regarding signs of wear and tear is essential to address
potential issues promptly. Keep an eye out for visible signs such as chipping, cracking, or misalignment of the rollers. Unusual noises during door operation, jerky movements, or uneven door balance might also indicate roller problems. Timely identification of such signs allows for prompt maintenance or replacement, preventing further damage and ensuring the continued functionality of the garage door system.
By adhering to these maintenance tips—regular lubrication, thorough inspection and cleaning, and vigilance toward signs of wear and tear—homeowners can prolong the lifespan of garage door rollers and maintain the smooth and efficient operation of their garage doors.
Conclusion
Choosing the right garage door rollers is pivotal for a smooth and durable door system. Understanding factors like material, durability, noise level, weight capacity, and compatibility with your door type enables homeowners to make informed decisions. By selecting rollers aligned with specific needs and prioritizing quality, longevity, and functionality, homeowners can ensure a reliable and efficient garage door operation for years to come.


