What Are Standard Garage Door Sizes?

February 7, 2023

What Are Standard Garage Door Sizes?

What Are Standard Garage Door Sizes?

Understanding typical garage door sizes is crucial when buying a replacement door or installing one in a new house. It's challenging to categorize any one option as a normal garage door size given the range of dimension combinations, although some sizes are undoubtedly more prevalent than others. According to height and breadth, the following is the typical garage door size: 2

  •  7-8 feet high by 8-10 feet wide for a single garage door
  •  7-8 feet high by 16-18 feet wide for a double garage door
  • 10-14 feet high by 10-14 feet wide for a RV garage door

What’s Ahead

  • Garage Door Designs
  • Single Garage Doors
  • Double Garage Doors
  • RV Doors
  • Combination Garage Doors
  • Custom Garage Doors
  • Measuring Your Garage Door
  • Ordering A New Garage Door


Garage Door Design Options

The size and configuration of your garage itself will determine the appropriate garage door size. The designs for garages range from little areas intended for a single vehicle to bigger, typical 2 car garage door sizes to possibilities for several vehicles.

If you purchased a pre-existing property, this choice was probably already made for you. But there are a number of things to take into account when building or modifying a house, such as:

  • Personal preference, style, and needs are based on a number of vehicles.
  • Aesthetics and how the garage façade will affect the appearance of your home. 
  • Practicality and the cost of maintaining multiple doors and an opener system.


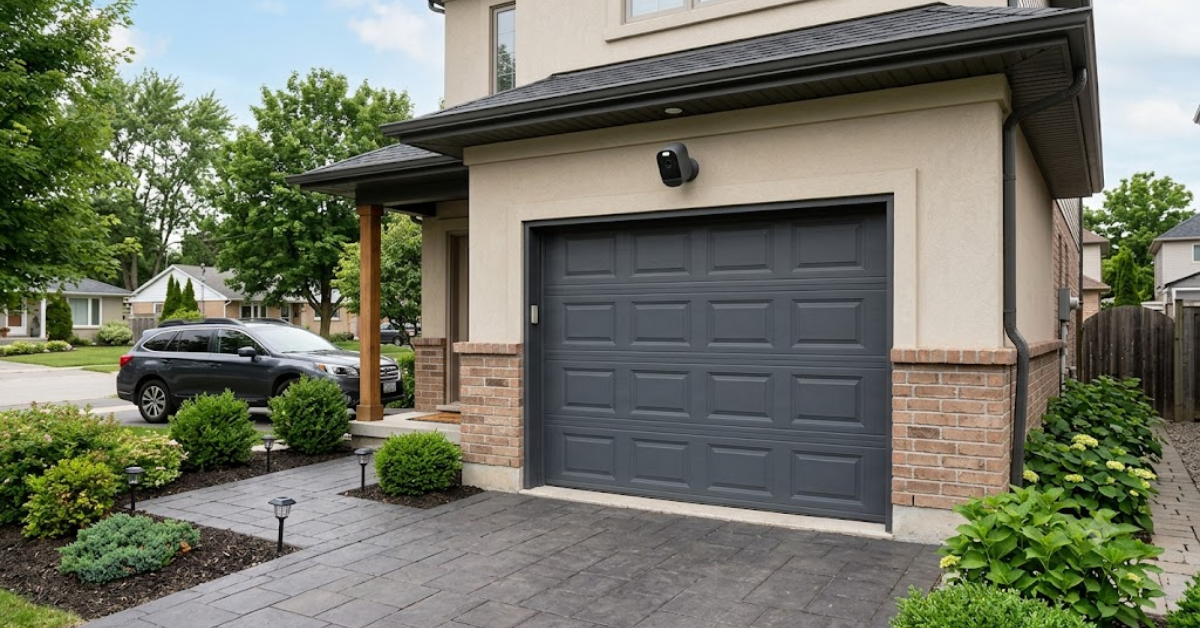
Single Car Garage Door Dimensions

Suited for smaller garage spaces with room for only one vehicle, single garage doors most commonly measure either 7 or 8 feet in height and 8, 9, or 10 feet in width. The doors are suited for a single standard-sized car, SUV, truck, or van.


Two Car Garage Door Dimensions

Homes with multiple-vehicle garages will most commonly use a double-door option, measuring 7 or 8 feet in height and 16 or 18 feet in width. This option is also popular with those planning to use a portion of their garage as a workshop or storage space.


RV Garage Door Dimensions

Large doors are available for those with specialized needs, such as parking several vehicles or an RV. These oversized garage doors tend to be 10, 12, or 14 feet in both height and width.


Combination Garage Doors 

As seen in the graphic above, many garages use a combination of either multiple single doors or a single and double door. While these garage door designs offer more space and flexibility, they also require maintenance and upkeep of at least two separate openers and garage door systems.


Custom Garage Doors

If you’re having trouble finding the right pre-fabricated door to meet your needs, Door 48 can assist with the design and creation of custom wood and steel garage doors. Visit the Door 48 website or call Houston (832) 400 2992 Austin (512) 543-7324 for more information.


Standard Garage Door Thickness

The thickness of most garage door panels is about 1/8 inch. Depending on how you use your garage, insulation might or might not be necessary. You should think about installing insulation if you spend a lot of time in your garage. In addition to lowering energy expenses, properly placed insulation can keep your garage 12 degrees warmer in the winter and 25 degrees cooler in the summer.

You might also like

Fix N Go Blog

How to Replace a Garage Door Motor?
By Rabia Tingat July 24, 2025
If your garage door opener motor has become noisy, sluggish, or completely non-functional, it may be time to replace it. A faulty motor can make daily garage use frustrating and even unsafe. Fortunately, replacing a garage door motor isn't as complicated as it may seem—especially if you're comfortable with basic DIY tasks. In this step-by-step guide, we’ll walk you through how to replace a garage door motor safely and effectively. Whether you’re dealing with a burnt-out motor or simply upgrading to a newer model, we’ll help you understand the entire process—from removal to reinstallation. Signs Your Garage Door Motor Needs Replacing Before we jump into the replacement process, let’s look at a few signs that indicate your garage door motor is failing: The opener struggles to lift or lower the door Unusual grinding or humming noises from the motor Frequent power failures or overheating The door only opens partially or not at all The remote and wall switch stop responding If your opener exhibits any of these issues even after resetting or troubleshooting, replacing the motor is likely the best long-term solution. Choosing the Right Garage Door Motor Replacement Garage door motors (often called garage door openers) come in several types—chain drive, belt drive, screw drive, and direct drive. When choosing a replacement, make sure it’s compatible with: Your garage door's weight and size Available power source (AC or DC motor) Existing hardware and mounting setup Brands like Chamberlain, Genie, and LiftMaster offer reliable units that include all necessary mounting brackets, sensors, and manuals for a smoother installation. Tools You’ll Need Before replacing your garage door motor, gather these essential tools: Ladder Socket set Screwdrivers Adjustable wrench Wire cutters and strippers Power drill Safety glasses and gloves Once you're equipped, turn off the power supply to the opener to avoid electrical hazards. Step-by-Step Guide to Replacing a Garage Door Motor Step 1: Disconnect Power and Unplug the Motor Safety first—disconnect the opener from the power outlet. If it's hardwired into your home’s electrical system, turn off the circuit breaker. Confirm there's no electricity flowing to the unit using a voltage tester. Step 2: Disengage the Door from the Opener Pull the emergency release cord (usually a red handle) to disengage the garage door from the opener. This lets you open and close the door manually during the motor replacement process. Step 3: Remove the Old Garage Door Motor Start by detaching the wires connected to the safety sensors and wall switch. Take photos or label wires for reference during reinstallation. Next, use a socket wrench or screwdriver to unscrew the motor unit from its mounting bracket on the ceiling. Be cautious—these units are heavy and often require a second person to safely lower them. Once the motor is removed, also uninstall the rail and trolley if your new opener comes with its own. Step 4: Install the New Motor and Mounting Rail Assemble the new motor unit according to the manufacturer’s instructions. This often includes connecting the rail, carriage, and pulley system. Mount the new rail above your garage door and secure the motor to the ceiling using provided brackets. Make sure everything is level and firmly attached. A misaligned rail can lead to jerky movements or early wear on the new motor. Step 5: Wire the Motor and Accessories Reconnect the wall switch and safety sensor wires to the terminals on the new motor unit. Most openers have labeled terminals—typically for red, white, and black wires. If your model includes a backup battery, antenna, or Wi-Fi connection, set these up now. Follow your motor’s wiring diagram precisely to avoid connectivity issues. Step 6: Reconnect the Door and Adjust Settings Pull the emergency cord back into the “engaged” position to reattach the door to the trolley. Now, plug the motor into the power outlet or restore power at the breaker. Turn on the unit and test the door’s operation. Adjust the travel limits and force settings as needed. These settings ensure the door opens and closes completely without excessive strain. Refer to your manual for step-by-step adjustment instructions—usually involving small dials or digital buttons on the unit. Testing Your New Garage Door Motor Once installed, test the full functionality of the opener: Use both the wall switch and remote control Check safety sensors by blocking the beam—door should reverse Confirm smooth and quiet operation Listen for any abnormal noises or vibrations If the door doesn’t operate properly, recheck the alignment of the rail, the wiring connections, or the motor’s mounting hardware. Professional Help vs. DIY While replacing a garage door motor is a doable task for experienced DIYers, you may want to call a professional if:  Your opener is hardwired (no plug-in cord) The ceiling mount is in a tight or high area The garage door is unusually heavy or custom-built You’re unsure about wiring and adjustments Professional installers can typically complete the job within 1–2 hours, and many offer warranties on both labor and parts. Final Thoughts Replacing a garage door motor may seem like a big task, but with the right preparation and safety steps, it's well within reach for the average homeowner. Whether you're upgrading to a quieter, smarter opener or fixing a worn-out unit, understanding the wiring, mounting, and setup process will ensure a successful installation. Remember to always follow the manufacturer’s instructions, double-check your wiring, and test your new unit thoroughly. When done correctly, a new garage door motor will provide smooth, reliable performance for years to come.
How Does Genie Garage Door Motor Wire In?
By Rabia Tingat July 22, 2025
Find out how to wire a Genie garage door motor with expert tips. Improve motor performance and ensure secure, safe installation with this guide.
How to Replace a Garage Door Cable?
By Rabia Tingat July 20, 2025
Learn how to replace a garage door cable step-by-step. This guide covers tools, safety tips, and expert advice for a smooth and safe cable replacement.