
Can You Use Spray Foam To Insulate A Garage Door?
Spray foam insulation has emerged as a popular choice for homeowners seeking to improve energy efficiency and comfort in their living spaces. But can this versatile insulation material also be used to insulate a garage door effectively? The purpose of this comprehensive guide is to explore the feasibility of using spray foam insulation for garage door insulation. From understanding the basics of spray foam insulation to considering its benefits and limitations for garage door applications, we'll delve into the details to provide you with the information needed to make an informed decision. Come learn about the possibilities of using spray foam to insulate a garage door if you want to enhance the thermal performance or minimize noise and moisture infiltration.
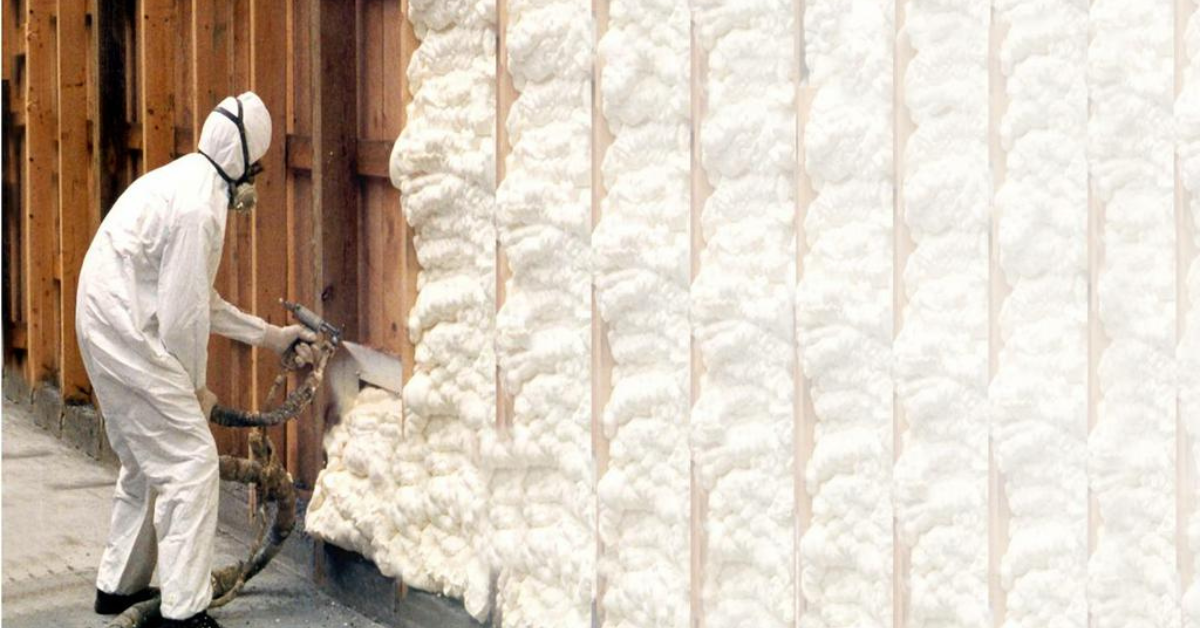
The Basics Of Spray Foam Insulation
Spray foam insulation is a highly versatile and effective insulation material used in residential and commercial buildings. It comes in two main types: open-cell and closed-cell foam.
Open-Cell Foam:
- Open-cell foam is less dense and consists of cells that are not completely closed. This allows air to fill the open spaces within the material.
- Due to its composition, open-cell foam is softer and more flexible than closed-cell foam.
- It provides excellent sound insulation and is often used in interior walls and ceilings.
Closed-Cell Foam:
- Closed-cell foam is denser and has cells that are completely closed, creating a rigid structure.
- This type of foam is more resistant to moisture and provides superior insulation properties
- compared to open-cell foam.
- Closed-cell foam is commonly used in exterior applications, such as roofing and wall insulation, as well as in areas prone to moisture, such as basements and crawl spaces.
How Spray Foam Insulation Works
Spray foam insulation works by expanding upon application to fill gaps, cracks, and crevices in the building envelope. This expansion creates an air-tight seal, effectively preventing air leakage and improving energy efficiency.
Application Process:
- Spray foam insulation is applied using specialized equipment that mixes two components – isocyanate and polyol resin – at the spray gun nozzle.
- When these components mix, they undergo a chemical reaction that causes the mixture to expand and harden into foam upon contact with the surface.
- The foam expands to fill the cavity, adhering to the surrounding surfaces and forming a seamless barrier against air infiltration.
Expansion and Curing:
- As the foam expands, it fills gaps and conforms to the shape of the area being insulated, ensuring complete coverage.
- After application, the foam cures and hardens within a short period, typically within a few hours.
- Once cured, the foam creates a durable and long-lasting insulation barrier that helps regulate indoor temperature and reduce energy consumption.
Homeowners and builders can make informed decisions about spray foam insulation's suitability for their insulation needs by understanding the types and how it works. Whether insulating walls, roofs, or garage doors, spray foam insulation offers numerous benefits for improving energy efficiency and indoor comfort.
Benefits of Insulating a Garage Door
Insulating a garage door offers several advantages that contribute to the overall comfort and efficiency of a home.
Improved Energy Efficiency:
Insulating a garage door helps
regulate temperatures inside the garage, which can have a significant impact on the overall energy efficiency of the home. By minimizing heat loss in colder months and heat gain in warmer months, insulated garage doors reduce the workload on heating and cooling systems, ultimately leading to lower energy bills.
Enhanced Comfort and Noise Reduction:
An insulated garage door provides better temperature control, creating a more comfortable environment for activities such as DIY projects, hobbies, or simply spending time in the garage. Also, insulation helps dampen sound transmission, reducing noise from the street or neighboring properties, creating a quieter indoor space.
Prevention of Moisture and Air Infiltration:
Insulating the garage door helps seal gaps and cracks, preventing moisture and air infiltration. This is particularly important in regions with fluctuating temperatures or high humidity levels, as it helps protect stored belongings from damage caused by condensation, mold, or mildew.
Considerations Before Using Spray Foam on a Garage Door
- Before using spray foam insulation on a garage door, it's essential to consider several factors to ensure successful installation and long-term performance.
- Not all garage door materials are compatible with spray foam insulation. It's crucial to verify compatibility with the manufacturer or consult with a professional installer before proceeding with insulation.
- Proper application is key to achieving effective insulation and preventing issues such as uneven coverage or foam expansion. Following manufacturer guidelines and using appropriate application techniques is essential for optimal results.
- Adequate ventilation is necessary to prevent moisture buildup inside the garage, especially after insulating the garage door. Proper ventilation helps maintain air quality, reduce the risk of mold or mildew growth, and ensure the longevity of the insulation material.
By considering these factors and taking necessary precautions, homeowners can effectively insulate their garage doors to improve energy efficiency, comfort, and indoor air quality.
Step-by-Step Guide to Using Spray Foam for Garage Door Insulation
Insulating a garage door with spray foam insulation requires careful preparation and application to ensure optimal results. Here's a step-by-step guide to help you through the process:
Preparing the Garage Door Surface:
- Before applying spray foam insulation, thoroughly clean the surface of the garage door to remove any dirt, dust, or debris. Ensure that the surface is dry and free from moisture to promote proper adhesion of the foam. Use a brush or vacuum to remove any loose particles and smooth out any rough areas.
Applying the Spray Foam Insulation:
- Once the surface is clean and dry, begin applying the spray foam insulation evenly across the garage door surface. Use a spray foam applicator to distribute the foam in a uniform layer, covering all areas of the door. Be sure to follow the manufacturer's instructions for proper application, including the recommended thickness of the foam layer.
Allowing the Foam to Cure:
- After applying the spray foam insulation, allow it to cure fully according to the manufacturer's recommendations. This typically involves allowing the foam to expand and harden for a specified period, usually several hours. Avoid touching or disturbing the foam during this curing process to ensure proper bonding and insulation effectiveness.
Alternative Insulation Options for Garage Doors
While spray foam insulation is an effective option for insulating garage doors, there are alternative insulation materials available to suit different needs and preferences:
Reflective Insulation:
Reflective insulation consists of a reflective material, such as foil, that reflects radiant heat away from the garage door. This type of insulation is particularly effective in hot climates and can help reduce heat transfer into the garage.
Rigid Foam Board Insulation:
Rigid foam board insulation offers excellent thermal resistance and can be cut to fit the dimensions of the garage door. It provides a durable and long-lasting insulation solution, particularly in areas prone to temperature fluctuations.
Fiberglass Batt Insulation:
Fiberglass batt insulation is a more traditional option that comes in pre-cut panels or rolls. It offers good thermal performance and is relatively easy to install, making it a popular choice for garage door insulation projects.
To improve energy efficiency and indoor comfort, homeowners can
insulate their garage doors to improve energy efficiency and comfort by considering these alternative insulation options.
Conclusion
While spray foam insulation can be a viable option for insulating a garage door, it's essential to consider factors such as compatibility with garage door materials, proper application techniques, and ventilation requirements. By weighing these considerations and exploring alternative insulation options, homeowners can make informed decisions to enhance energy efficiency, comfort, and durability in their garage spaces.
You might also like
Fix N Go Blog


