How Do You Find the Right Professional for Roller Repair? Expert Tips
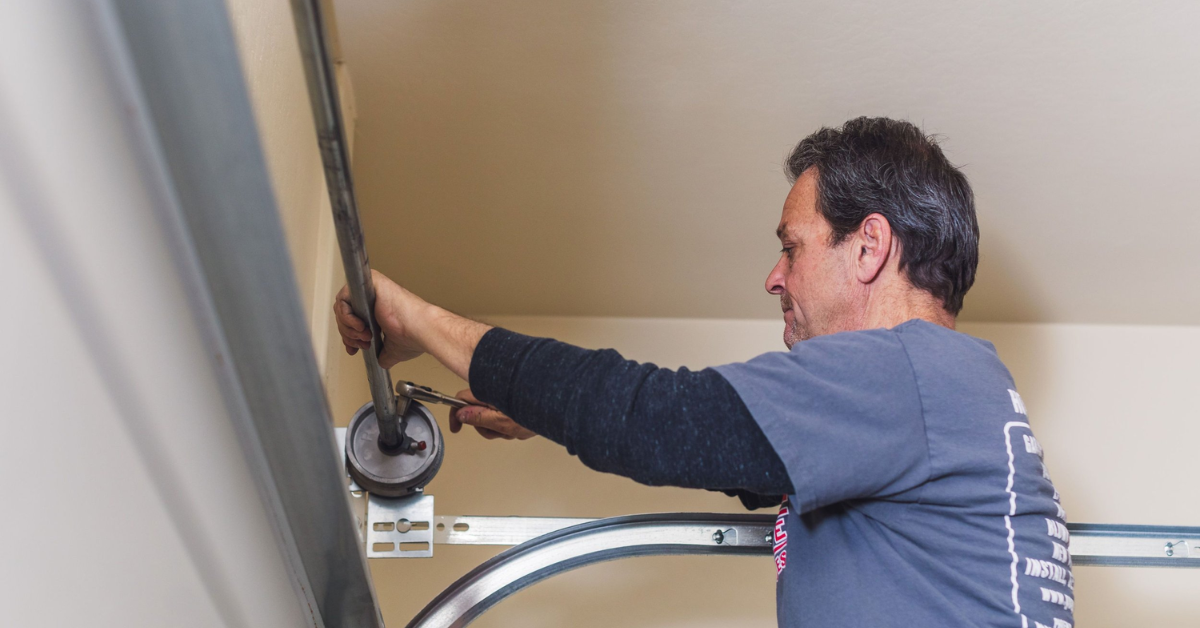
Roller repair is a critical facet in maintaining the efficiency and longevity of industrial and commercial systems that rely on rollers for various applications. From conveyor belts in manufacturing plants to garage doors and shutters, rollers play a pivotal role in ensuring smooth operations. The importance of roller repair cannot be overstated, as neglecting issues can lead to costly downtimes, increased wear and tear, and potential safety hazards.
When it comes to addressing roller malfunctions, one of the most crucial decisions is choosing the right professional for the job. Selecting a skilled and reliable roller repair expert is not merely a matter of convenience; it's a strategic and critical decision that directly impacts the performance and safety of the equipment involved. In this blog, we delve into the significance of roller repair and provide expert insights on how to navigate the process of choosing the right professional. Understanding the stakes involved underscores the need for a meticulous approach to roller repair, ensuring that your systems operate seamlessly and with enhanced durability.
Assessing Your Roller Repair Needs
Before embarking on the journey of roller repair, a crucial initial step is a thorough identification of the issues plaguing your rollers. This involves a keen observation of the equipment in action, looking out for signs of wear, misalignment, unusual noises, or reduced performance. Visual inspection can reveal visible damages, such as dents, cracks, or uneven wear on the rollers. Additionally, paying attention to any deviations from the usual smooth operation can provide early indicators of underlying problems. Identifying roller issues at an early stage not only aids in preventing further damage but also streamlines the subsequent repair process, allowing for a more targeted and effective solution.
Once the roller issues have been identified, the next crucial step is understanding the scope of the necessary repairs. This involves a comprehensive assessment of the extent of damage, potential causes, and the specific components requiring attention. Some roller issues may be isolated and easily fixable, while others may indicate systemic problems that demand a more in-depth approach. Understanding the scope of repair is essential for accurate communication with the chosen professional and obtaining an appropriate estimate. It also helps in planning for potential downtime and ensures that the repair process addresses not only the evident issues but also potential underlying factors contributing to the problem. Through a detailed understanding of the repair scope, you can make informed decisions to restore your rollers to optimal functionality.
Researching Potential Professionals
In the digital age, a wealth of information about roller repair professionals is readily available on various online platforms. Websites, social media, and review platforms offer insights into the reputation and reliability of different service providers. Their online presence showcases a commitment to transparency, with detailed information about their services, expertise, and customer testimonials. When researching potential professionals, pay attention to reviews on platforms like Google, Yelp, or specialized industry forums. Positive reviews and consistent high ratings can serve as indicators of a reliable and trustworthy roller repair service.
Another valuable avenue for researching potential roller repair professionals is seeking recommendations from peers and industry experts. Colleagues who have faced similar roller issues or industry connections may provide firsthand experiences and insights into the effectiveness of different repair services. Leveraging personal connections and industry networks can offer a more personalized perspective, helping you make an informed decision based on trusted recommendations. As you explore options, consider the reputation of recommended professionals and how well they align with your specific roller repair needs.
Key Qualities to Look for in a Roller Repair Professional
Experience and Expertise: When entrusting your roller repair needs to a professional, their level of experience and expertise becomes paramount. A seasoned roller repair specialist, such as those at Fix N’ Go Garage Door Repair and Installation, brings a wealth of knowledge gained through years of hands-on experience. Look for professionals who have successfully navigated a variety of roller-related issues, demonstrating their ability to handle diverse challenges. Experience ensures a deeper understanding of the intricacies of roller systems, allowing for more accurate diagnostics and effective solutions to restore optimal functionality.
Licensing and Certifications:
Ensuring that your chosen roller repair professional holds the necessary licenses and certifications is a fundamental aspect of selecting a reliable service provider. Proper licensing demonstrates compliance with industry standards and regulatory requirements. Companies like Fix N’ Go Garage Door Repair and Installation prioritize adhering to these standards, showcasing their commitment to professionalism and quality workmanship. Certification from reputable organizations further validates the expertise of the repair team, assuring you that the individuals working on your rollers have undergone rigorous training and possess the necessary qualifications.
Track Record of Successful Repairs:
A strong track record of successful repairs is a tangible testament to the competence of a roller repair professional. Investigate the history of completed projects and inquire about specific cases similar to your own. Customer testimonials and case studies can provide insights into the satisfaction of previous clients and offer a glimpse into the kind of outcomes you can expect from the chosen roller repair service. Prioritize professionals with a proven track record of effectively addressing diverse roller issues.
Checking for Insurance and Warranty
Before finalizing your decision on a roller repair professional, it's crucial to ensure they have proper insurance coverage. Adequate insurance coverage not only safeguards against unexpected accidents or damages but also reflects a commitment to professionalism and accountability. Request and verify the details of their insurance policy to provide you with peace of mind throughout the repair journey.
Understanding the warranty terms offered by a roller repair professional is essential for long-term assurance of the work performed. Carefully review the duration of the warranty, what it covers, and any conditions that may apply. A robust warranty indicates the repair professional's confidence in their work and provides you with a safety net in case any issues arise post-repair. Clarity on warranty terms is key to establishing a transparent and trustworthy relationship with your chosen roller repair service.
Site Inspection and Evaluation
The significance of an on-site assessment cannot be overstated when it comes to roller repair. A thorough evaluation of the site allows professionals to identify nuances and specific challenges unique to your roller system. On-site evaluations enable the repair team to tailor their approach, ensuring that the proposed solutions address the specific issues affecting your rollers. This personalized touch enhances the effectiveness of the repair process and minimizes the likelihood of oversights.
Following the on-site assessment, obtaining a comprehensive quote is the next crucial step in the roller repair process. A detailed quote from a reputable service provider outlines the scope of work, materials needed, and associated costs. Fix N’ Go Garage Door Repair and Installation is known for providing transparent and detailed quotes, ensuring that clients are fully informed about the financial aspects of the repair. By getting a comprehensive quote, you not only gain insights into the anticipated expenses but also establish clear expectations regarding the repair timeline and deliverables. This proactive approach helps in avoiding surprises and ensures a smoother collaboration with the roller repair professionals.
Finalizing the Agreement
Before committing to a roller repair service, it is imperative to thoroughly review the terms and conditions outlined in the agreement. Pay close attention to aspects such as the scope of work, timelines, any potential additional charges, and the responsibilities of both parties. A careful review of the agreement guarantees that both you and the repair professional are on the same page, fostering a relationship built on trust and mutual understanding.
Understanding and clarifying payment terms is a vital aspect of finalizing the agreement with a roller repair professional. Fix N’ Go Garage Door Repair and Installation always provides transparent and reasonable payment structures. Clarify details such as the total cost, payment milestones, accepted payment methods, and any conditions related to payment. A clear understanding of the financial aspects ensures a smooth and transparent transaction, avoiding potential misunderstandings and disputes. By addressing payment terms upfront, you establish a solid foundation for a professional and mutually beneficial collaboration.
Monitoring and Follow-Up
While the roller repair professionals are at work, actively supervising the repair process can contribute to a successful outcome. Regular communication with the repair team, as exemplified by Fix N’ Go Garage Door Repair and Installation, allows you to stay informed about the progress. Supervision enables you to address any emerging concerns promptly and ensures that the repair is conducted according to the agreed-upon specifications. Your involvement in the process demonstrates your commitment to the successful resolution of the roller issues, fostering a collaborative and efficient repair experience.
Even after the repair is complete, post-repair customer support remains a valuable aspect of the service. Ensure that you have clear information about post-repair support channels and response times. This commitment to customer support ensures that you have assistance in the rare event of post-repair issues, contributing to a comprehensive and satisfactory roller repair experience. Regular follow-ups and feedback sessions can also provide insights for continuous improvement and customer satisfaction.
Conclusion
In the realm of roller repair making the right choice in selecting a professional is paramount. By prioritizing experienced and certified experts, reviewing terms diligently, and supervising the repair process, you lay the foundation for a successful outcome. Equally crucial is ensuring long-term durability by considering warranty terms, actively participating in post-repair support, and valuing ongoing communication. In the end, the careful consideration of these factors not only resolves immediate roller issues but also ensures the sustained functionality and durability of your equipment, providing peace of mind and a solid investment in the future.


