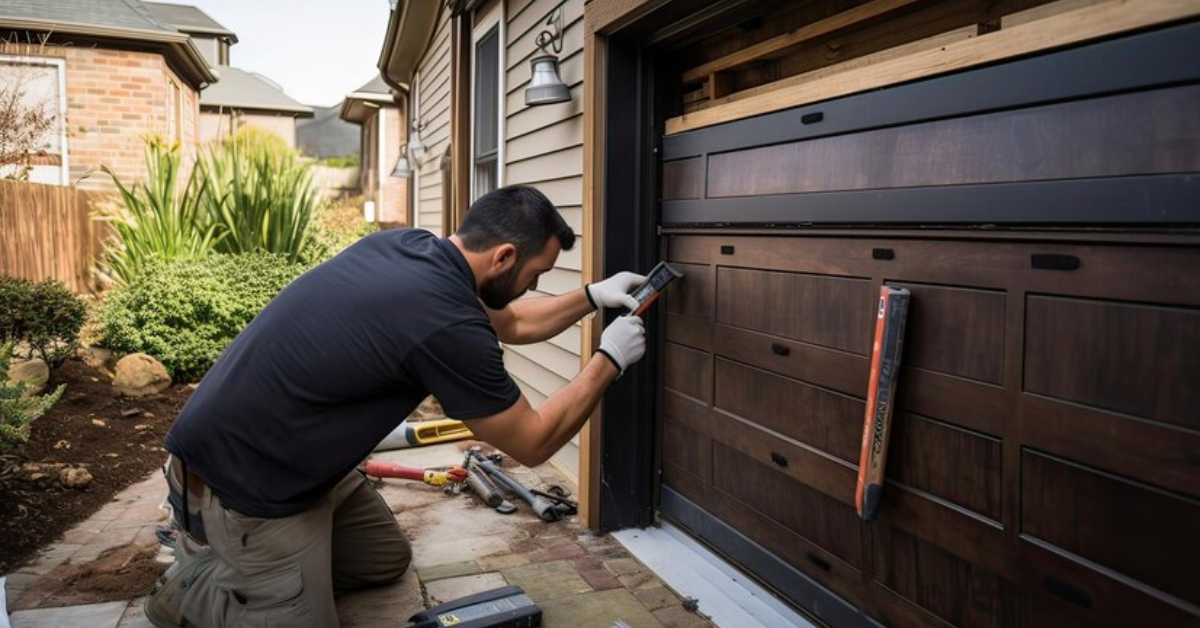
How Much Does Garage Door Repair Cost?

Rabia Tingat • May 31, 2024

When considering garage door repair, one of the most pressing questions homeowners face is the cost associated with these repairs. The price can vary significantly depending on the type of repair needed, the materials involved, and the professional rates in your area. This comprehensive guide will explore all facets of garage door repair costs, providing you with a detailed understanding to help you budget effectively.


Factors Influencing Garage Door Repair Costs

Type of Repair


The specific nature of the repair plays a crucial role in determining the cost. Here are some common types of garage door repairs and their typical price ranges:

  • Spring Replacement: One of the most common repairs, replacing a garage door spring can cost between $100 and $300. Springs are under high tension and can break over time, making this an essential maintenance task.
  • Cable Repair: Repairing or replacing garage door cables can range from $150 to $200. Cables are vital for the door's operation and can wear out or snap.
  • Track Adjustment or Replacement: Tracks guide the door’s movement. Adjustments may cost around $125, while replacing a bent or damaged track can go up to $200.
  • Sensor Repair or Replacement: Safety sensors are crucial for preventing accidents. Repairing sensors usually costs between $85 and $100.
  • Panel Replacement: Damaged panels can be replaced for $250 to $800 depending on the material and size of the panel.


Materials and Parts

The materials used in your garage door also affect the cost of repairs:

  • Steel Doors: Typically more affordable and durable, but can dent easily. Repairs generally cost between $150 and $300.
  • Wooden Doors: Prone to rot and warping, repairs can be more expensive, ranging from $250 to $800.
  • Aluminum Doors: Light and rust-resistant, repairs usually range from $200 to $600.
  • Fiberglass Doors: Durable and low-maintenance, but more expensive to repair, costing between $250 and $800.


Labor Costs

Professional labor rates vary by region and can significantly impact the overall cost of garage door repairs. On average, you can expect to pay between $75 and $150 per hour for labor. Some repairs are straightforward and quick, while others might require more time and expertise, increasing the labor cost.


Additional Costs

Other factors that might influence the cost include:

  • Emergency Repairs: Services required outside regular business hours or on holidays can incur additional charges, often between $50 and $100 extra.
  • Customization: Custom or high-end garage doors may require specialized parts and expertise, increasing the overall cost.
  • Regular Maintenance: Regular maintenance and tune-ups can prevent costly repairs. These services typically cost around $100 to $150.


Common Garage Door Problems and Repair Costs

Broken Springs

Broken springs are a frequent issue, and their replacement is critical for the door's functionality. Torsion springs usually cost more to replace than extension springs.

  • Torsion Springs: $200 to $300
  • Extension Springs: $100 to $200


Faulty Garage Door Opener

Garage door openers can experience various issues, from motor failure to sensor problems. Repairing a garage door opener generally costs between $150 and $350. If a replacement is necessary, the price can range from $300 to $500.


Misaligned or Damaged Tracks

Tracks can become bent or misaligned over time, leading to improper door operation.

  • Track Realignment: $125 to $150
  • Track Replacement: $150 to $200


Damaged Panels

Accidents or severe weather can damage garage door panels. Replacement costs vary based on material and size.

  • Steel Panels: $150 to $300
  • Wooden Panels: $250 to $800
  • Aluminum Panels: $200 to $600
  • Fiberglass Panels: $250 to $800


Broken Cables

Cables can fray and snap due to wear and tear. Replacing garage door cables typically costs between $150 and $200.


Sensor Issues

Garage doors are equipped with safety sensors to prevent accidents. Sensor repairs usually cost between $85 and $100.


DIY vs. Professional Garage Door Repair


Many homeowners are tempted to handle garage door repairs themselves to save money. However, garage door repairs can be dangerous due to the heavy components and high tension in springs. DIY repairs offer cost savings since you can avoid labor charges and complete immediate repairs without waiting for a professional. Nevertheless, they pose significant safety risks because garage door components can be hazardous if mishandled, and a lack of expertise may result in incorrect repairs, leading to further damage or safety issues.


On the other hand, professional repairs come with the expertise and experience necessary to perform repairs safely and correctly, often accompanied by warranties and insurance for peace of mind. The main drawback is that professional services are more expensive due to labor charges.


Tips to Reduce Garage Door Repair Costs


To minimize repair costs, consider the following tips:

  • Regularly lubricate moving parts, inspect for wear and tear, and address issues early.
  • Invest in high-quality parts to reduce the frequency of repairs.
  • Schedule annual inspections with a professional to catch potential problems before they escalate.
  • Handle basic maintenance tasks yourself, like tightening bolts and lubricating parts.


Conclusion


The cost of garage door repairs can vary widely based on the type of repair, materials, labor, and additional factors. By understanding these variables, homeowners can better prepare for potential expenses and make informed decisions. Regular maintenance and professional inspections can help reduce unexpected repair costs and ensure your garage door operates smoothly for years to come.

You might also like

Fix N Go Blog

How to Replace a Garage Door Motor?
By Rabia Tingat July 24, 2025
If your garage door opener motor has become noisy, sluggish, or completely non-functional, it may be time to replace it. A faulty motor can make daily garage use frustrating and even unsafe. Fortunately, replacing a garage door motor isn't as complicated as it may seem—especially if you're comfortable with basic DIY tasks. In this step-by-step guide, we’ll walk you through how to replace a garage door motor safely and effectively. Whether you’re dealing with a burnt-out motor or simply upgrading to a newer model, we’ll help you understand the entire process—from removal to reinstallation. Signs Your Garage Door Motor Needs Replacing Before we jump into the replacement process, let’s look at a few signs that indicate your garage door motor is failing: The opener struggles to lift or lower the door Unusual grinding or humming noises from the motor Frequent power failures or overheating The door only opens partially or not at all The remote and wall switch stop responding If your opener exhibits any of these issues even after resetting or troubleshooting, replacing the motor is likely the best long-term solution. Choosing the Right Garage Door Motor Replacement Garage door motors (often called garage door openers) come in several types—chain drive, belt drive, screw drive, and direct drive. When choosing a replacement, make sure it’s compatible with: Your garage door's weight and size Available power source (AC or DC motor) Existing hardware and mounting setup Brands like Chamberlain, Genie, and LiftMaster offer reliable units that include all necessary mounting brackets, sensors, and manuals for a smoother installation. Tools You’ll Need Before replacing your garage door motor, gather these essential tools: Ladder Socket set Screwdrivers Adjustable wrench Wire cutters and strippers Power drill Safety glasses and gloves Once you're equipped, turn off the power supply to the opener to avoid electrical hazards. Step-by-Step Guide to Replacing a Garage Door Motor Step 1: Disconnect Power and Unplug the Motor Safety first—disconnect the opener from the power outlet. If it's hardwired into your home’s electrical system, turn off the circuit breaker. Confirm there's no electricity flowing to the unit using a voltage tester. Step 2: Disengage the Door from the Opener Pull the emergency release cord (usually a red handle) to disengage the garage door from the opener. This lets you open and close the door manually during the motor replacement process. Step 3: Remove the Old Garage Door Motor Start by detaching the wires connected to the safety sensors and wall switch. Take photos or label wires for reference during reinstallation. Next, use a socket wrench or screwdriver to unscrew the motor unit from its mounting bracket on the ceiling. Be cautious—these units are heavy and often require a second person to safely lower them. Once the motor is removed, also uninstall the rail and trolley if your new opener comes with its own. Step 4: Install the New Motor and Mounting Rail Assemble the new motor unit according to the manufacturer’s instructions. This often includes connecting the rail, carriage, and pulley system. Mount the new rail above your garage door and secure the motor to the ceiling using provided brackets. Make sure everything is level and firmly attached. A misaligned rail can lead to jerky movements or early wear on the new motor. Step 5: Wire the Motor and Accessories Reconnect the wall switch and safety sensor wires to the terminals on the new motor unit. Most openers have labeled terminals—typically for red, white, and black wires. If your model includes a backup battery, antenna, or Wi-Fi connection, set these up now. Follow your motor’s wiring diagram precisely to avoid connectivity issues. Step 6: Reconnect the Door and Adjust Settings Pull the emergency cord back into the “engaged” position to reattach the door to the trolley. Now, plug the motor into the power outlet or restore power at the breaker. Turn on the unit and test the door’s operation. Adjust the travel limits and force settings as needed. These settings ensure the door opens and closes completely without excessive strain. Refer to your manual for step-by-step adjustment instructions—usually involving small dials or digital buttons on the unit. Testing Your New Garage Door Motor Once installed, test the full functionality of the opener: Use both the wall switch and remote control Check safety sensors by blocking the beam—door should reverse Confirm smooth and quiet operation Listen for any abnormal noises or vibrations If the door doesn’t operate properly, recheck the alignment of the rail, the wiring connections, or the motor’s mounting hardware. Professional Help vs. DIY While replacing a garage door motor is a doable task for experienced DIYers, you may want to call a professional if:  Your opener is hardwired (no plug-in cord) The ceiling mount is in a tight or high area The garage door is unusually heavy or custom-built You’re unsure about wiring and adjustments Professional installers can typically complete the job within 1–2 hours, and many offer warranties on both labor and parts. Final Thoughts Replacing a garage door motor may seem like a big task, but with the right preparation and safety steps, it's well within reach for the average homeowner. Whether you're upgrading to a quieter, smarter opener or fixing a worn-out unit, understanding the wiring, mounting, and setup process will ensure a successful installation. Remember to always follow the manufacturer’s instructions, double-check your wiring, and test your new unit thoroughly. When done correctly, a new garage door motor will provide smooth, reliable performance for years to come.
How Does Genie Garage Door Motor Wire In?
By Rabia Tingat July 22, 2025
Find out how to wire a Genie garage door motor with expert tips. Improve motor performance and ensure secure, safe installation with this guide.
How to Replace a Garage Door Cable?
By Rabia Tingat July 20, 2025
Learn how to replace a garage door cable step-by-step. This guide covers tools, safety tips, and expert advice for a smooth and safe cable replacement.