
How Much Does Garage Door Opener Repair Cost?
Garage doors are often the unsung heroes of our homes, quietly safeguarding our vehicles, belongings, and providing convenient access to our living spaces. Yet, behind the scenes, the real hero ensuring seamless operation is the garage door opener. Its functionality is paramount to the smooth operation of our daily routines, offering convenience, security, and peace of mind.
The garage door opener serves as the backbone of our garage systems, providing effortless access to our vehicles and storage areas with the simple push of a button. Its significance becomes apparent during inclement weather, late-night arrivals, or hectic mornings when convenience is paramount. A
malfunctioning garage door opener can disrupt our routines, causing frustration and inconvenience.
Moreover, a properly functioning opener enhances home security by ensuring that the garage door remains securely closed when not in use, deterring potential intruders and safeguarding our homes and valuables.
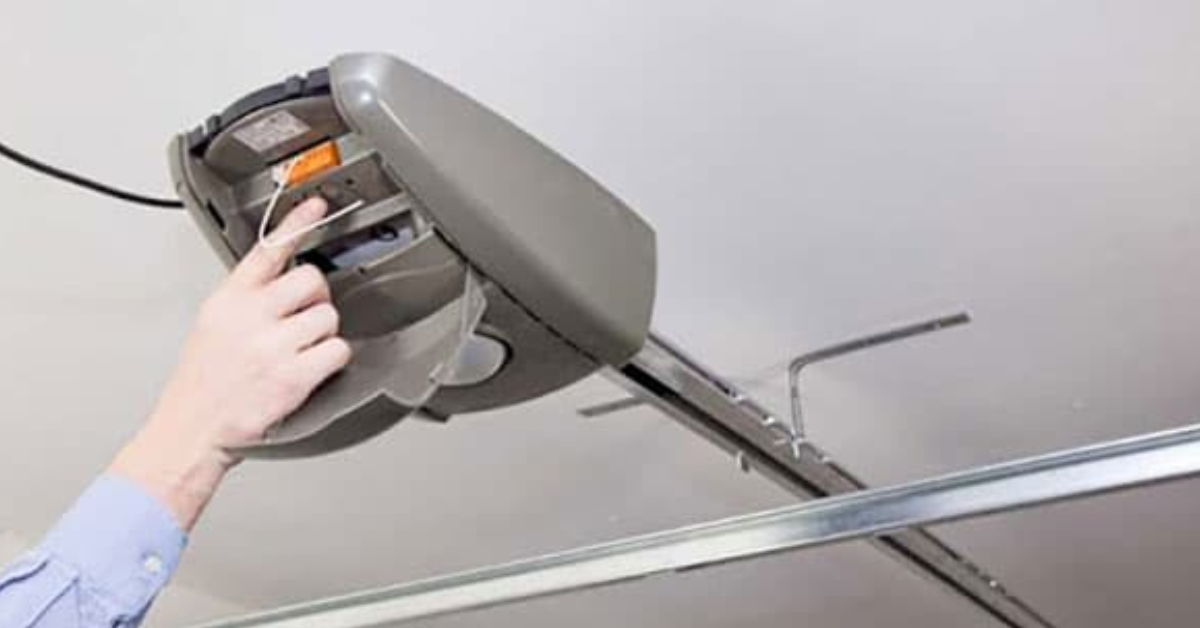
Common Issues with Garage Door Openers
Despite their importance, garage door openers are not immune to wear and tear, and like any mechanical device, they are prone to malfunction over time. Common issues that can arise include:
- Broken springs or cables
- Misaligned tracks
- Faulty sensors
- Malfunctioning remote controls or keypads
- Motor or gear problems
- Noisy operation
These issues can not only disrupt the smooth functioning of the garage door opener but also pose safety risks to users and potential damage to vehicles or property. Recognizing these common problems and addressing them promptly is essential to maintaining the reliability and longevity of your garage door opener.
Factors Affecting Garage Door Opener Repair Costs
Type of Garage Door Opener:
- The type of garage door opener you have significantly impacts repair costs. There are three main types: chain-drive, belt-drive, and screw-drive openers. Chain-drive openers are typically the most affordable but may require more frequent repairs due to their design. Belt-drive openers offer quieter operation but may incur higher repair costs due to the specialized components involved. Screw-drive openers fall somewhere in between in terms of cost and repair frequency.
Complexity of the Issue:
- The complexity of the problem affecting your garage door opener directly influences repair costs. Simple issues such as sensor misalignment or minor adjustments may incur lower repair expenses, while more complex problems like motor or gear replacements can be more costly due to the specialized expertise and labor involved.
Required Parts and Materials:
- The specific parts and materials needed for the repair also contribute to the overall cost. Replacement parts such as springs, sensors, gears, motors, remote controls, or tracks vary in price depending on their quality and compatibility with your garage door opener model. Also, if specialized tools or equipment are required for the repair, it may result in higher labor costs.
Labor Costs and Technician Fees:
- Labor costs and technician fees are another significant factor influencing repair expenses. The rates charged by garage door repair technicians vary based on factors such as their level of expertise, location, and the complexity of the repair job. Some technicians may charge a flat fee for diagnosis and labor, while others may bill hourly. Additionally, emergency repair services or repairs conducted outside of regular business hours may incur higher fees.
Average Cost Estimates for Garage Door Opener Repairs:
Broken Spring Replacement:
Broken springs are a common issue with garage door openers and typically require immediate attention. The cost of spring replacement varies depending on the type of spring (torsion or extension), size, and material. On average, homeowners can expect to pay between $150 to $300 for spring replacement, including parts and labor.
Sensor Adjustment or Replacement:
Sensors are essential safety features that prevent the garage door from closing on objects or people. If sensors become misaligned or malfunction, they may need adjustment or replacement. The average cost for sensor adjustment or replacement ranges from $50 to $150, depending on the severity of the issue and the type of sensors installed.
Gear or Motor Replacement:
Issues with the gear or motor of the garage door opener can result in noisy operation or failure to open or close properly. Replacing these components typically costs between $150 to $500, including parts and labor. The cost may vary based on the type and brand of the opener and the complexity of the repair.
Remote Control Programming or Replacement:
If your garage door
opener remote control malfunctions or gets lost, programming or replacement may be necessary. The average cost for remote control programming or replacement ranges from $50 to $150, depending on the type of remote and the technician's fees.
Track Alignment and Roller Replacement:
Misaligned tracks or
worn-out rollers can cause the garage door to operate unevenly or become stuck. Repairing track alignment and replacing rollers typically costs between $100 to $250, including parts and labor. The cost may vary depending on the number of tracks and rollers needing adjustment or replacement.
Understanding the factors influencing garage door opener repair costs and the average estimates for common repairs can help homeowners make informed decisions when addressing issues with their garage door openers. Prompt attention to repair needs and investing in quality repairs can ensure the continued functionality and safety of your garage door opener system.
Additional Considerations
Before proceeding with garage door opener repairs, homeowners should review any warranty coverage that may be applicable to their opener. Some manufacturers offer warranties that cover parts and labor for a certain period, potentially reducing or eliminating repair costs. It's important to understand the terms and conditions of the warranty, including any exclusions or requirements for maintenance or professional installation.
Homeowners may consider whether to attempt
DIY repairs or enlist the services of a professional garage door repair technician. DIY repairs can be cost-effective for minor issues and may offer a sense of satisfaction for those with handy skills. However, attempting complex repairs without the necessary expertise or tools can lead to further damage or safety hazards, ultimately resulting in higher repair costs. Professional repair services ensure proper diagnosis and repair, potentially saving time and money in the long run.
Timely repairs are crucial for maintaining the functionality and safety of your garage door opener. Ignoring minor issues or delaying repairs can lead to more significant problems down the line, resulting in higher repair costs and potential safety risks. Addressing repair needs promptly can prolong the lifespan of your garage door opener and prevent costly emergency repairs in the future.
Tips for Minimizing Repair Costs:
Regular Maintenance Practices:
Implementing regular maintenance practices can help prevent costly repairs by keeping your garage door opener in optimal condition. This includes lubricating moving parts, inspecting and tightening hardware, and testing the safety features regularly. Routine maintenance can identify potential issues early on, allowing for timely repairs before they escalate into major problems.
Promptly Addressing Minor Issues:
Don't ignore minor issues with your garage door opener, such as unusual noises, slow operation, or sensor misalignment. Addressing these issues promptly can prevent further damage and costly repairs. If you notice any abnormalities with your garage door opener, schedule a professional inspection and repair as soon as possible.
Seeking Multiple Quotes for Repairs:
When faced with repair needs for your garage door opener, it's advisable to obtain multiple quotes from reputable repair companies. Comparing quotes can help you identify the most cost-effective option without compromising on quality. Be sure to inquire about the scope of work included in each quote and any warranties or guarantees offered by the repair providers.
Conclusion
Understanding the various factors that influence garage door opener repair costs, such as the type of opener, complexity of the issue, and labor fees, is essential for homeowners seeking to maintain the functionality and safety of their garage systems. Moreover, prioritizing the investment in reliable repair services ensures not only timely and effective resolution of repair needs but also long-term peace of mind. By recognizing the significance of addressing repair needs promptly and entrusting the job to qualified professionals, homeowners can ensure the continued smooth operation of their garage door openers while minimizing unnecessary expenses and risks.
You might also like
Fix N Go Blog


