
How Can You Handle Bent Garage Door Tracks in Emergency Situations?
The functionality of a garage door relies heavily on the alignment and condition of its tracks. When faced with bent garage door tracks, it is crucial to comprehend the severity of the issue. Bent tracks not only hinder the smooth operation of the door but also pose potential safety risks. Whether caused by an impact, wear over time, or misalignment, the severity of bent tracks can vary. From slight misalignments to more pronounced bends, each instance requires a tailored approach for effective resolution. Recognizing the degree of severity is the first step in determining the appropriate emergency response to restore the garage door to optimal working conditions.
Importance of Immediate Action in Emergency Situations
In emergency situations involving bent garage door tracks, the importance of immediate action cannot be overstated. A malfunctioning garage door not only disrupts the daily routine but also exposes the property to security vulnerabilities. The longer a garage door operates with bent tracks, the greater the risk of further damage to the door itself, as well as other critical components like rollers and cables. Immediate action is essential to prevent exacerbation of the issue and to ensure the safety of individuals in the vicinity. This urgency underscores the need for homeowners to be equipped with the knowledge and skills to handle emergency repairs swiftly, restoring the garage door's functionality and safeguarding the overall security of the home.
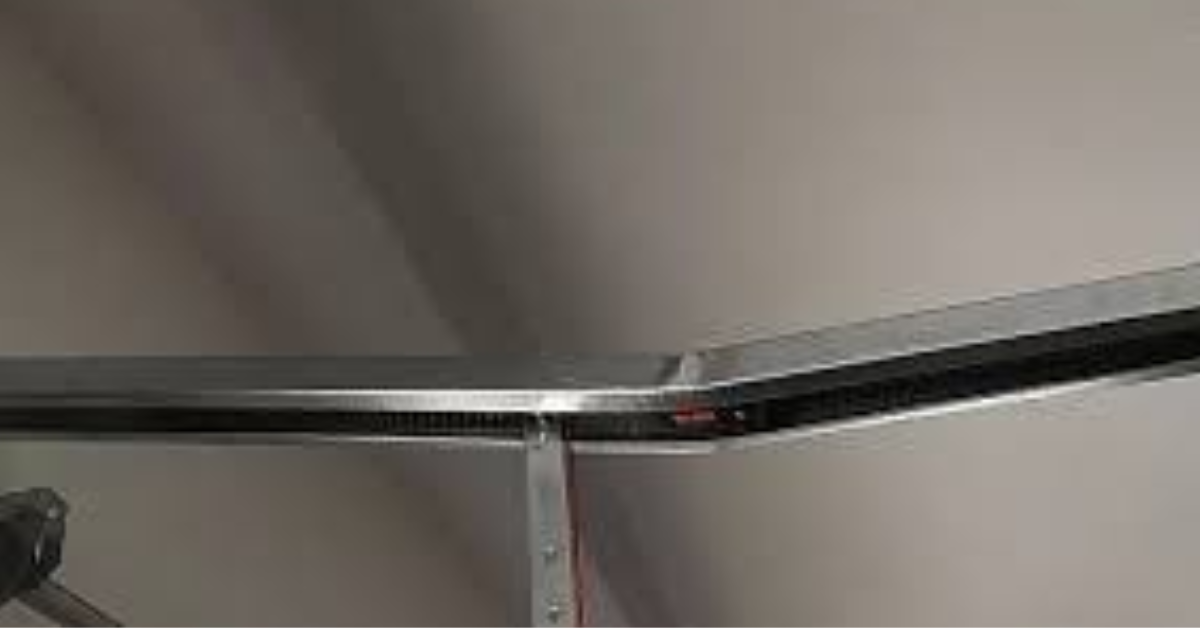
Identifying Bent Garage Door Tracks
Effective identification of bent garage door tracks begins with a thorough visual inspection, allowing homeowners to assess the extent of the damage and plan appropriate corrective measures. During this inspection, start by visually examining the entirety of the tracks, focusing on both horizontal and vertical sections. Look for irregularities, dents, or bends in the metal. Pay close attention to any sections where the tracks appear misaligned or twisted.
Inspect the tracks from both inside and outside the garage, as the angle of view can reveal subtle deformities. Run your hand along the tracks to feel for any deviations or bumps that may not be immediately visible. Additionally, inspect the mounting brackets and fasteners for signs of looseness or damage, as these can contribute to track misalignment.
Signs of Track Misalignment
Understanding the signs of track misalignment is crucial in identifying bent garage door tracks. Common indicators include
irregular noises during operation, such as scraping or grinding sounds, which may suggest friction between the door and misaligned tracks. Observe the garage door's movement – if it appears shaky, jerky, or if there's noticeable resistance, it could be indicative of track misalignment.
Visually inspect the door's position within the tracks when both open and closed. Misalignment may cause the door to sit unevenly or at an angle. Additionally,
examine the rollers for any wobbling or uneven wear, as these are often associated with track issues. Regular visual inspections and awareness of these signs empower homeowners to detect bent tracks early on, facilitating prompt and effective corrective actions to maintain the garage door's optimal performance.
Immediate Steps for Emergency Repairs
Ensuring Personal Safety First: Prioritizing personal safety is paramount when handling emergency repairs for bent garage door tracks. Before attempting any fixes, ensure the door is in a fully closed position, disconnect the automatic opener, and secure the door to prevent accidental movement. Wearing appropriate safety gear, such as gloves and safety glasses, is essential to protect against sharp edges and potential debris. Always exercise caution and be mindful of the potential risks associated with working on a malfunctioning garage door.
Gathering Necessary Tools and Materials:
Efficient emergency repairs require the gathering of necessary tools and materials. Basic tools like a rubber mallet, pliers, a level, and a wrench may be needed. Additionally, obtain appropriate replacement parts if the tracks or brackets are severely damaged. Having a sturdy ladder to safely access and inspect the tracks is also crucial. A flashlight can aid in better visibility, especially when working in dimly lit garage spaces. Gathering these tools in advance streamlines the repair process and ensures a more effective response to the emergency.
Temporary Fixes to Stabilize Bent Tracks:
Implementing temporary fixes is a key step in stabilizing bent garage door tracks during emergency situations. Using a rubber mallet, gently tap on the bent sections to straighten them, ensuring even alignment. Employ pliers or a wrench to adjust any misaligned brackets. For more severe bends, consider using a wooden block to provide leverage while applying gradual force to restore the tracks to their correct position. It's important to focus on stabilizing the tracks temporarily to allow the door to function until professional repairs can be conducted. Temporary fixes should be viewed as a short-term solution, and homeowners are encouraged to seek professional assistance for a more permanent resolution.
Temporary Fixes: Step-by-Step Guide
Straightening Bent Tracks
When faced with bent garage door tracks, a simple step-by-step guide can help homeowners address the issue temporarily. Using a rubber mallet or a wooden block, gently tap on the bent sections of the tracks to straighten them. Apply gradual force to ensure even alignment, working from the inside out. Exercise caution and avoid using excessive force to prevent further damage. This temporary straightening can stabilize the tracks, allowing the door to function until professional repairs are conducted.
Using Bracing Techniques
Bracing techniques can provide temporary stability to bent garage door tracks. Utilize a sturdy wooden block or a similar support structure to brace the tracks and maintain their alignment. Position the brace against the bent section and secure it in place. This technique helps prevent further misalignment and ensures the tracks stay in a functional position. While bracing is a short-term solution, it serves to stabilize the garage door until more comprehensive repairs can be carried out by professionals.
Securing the Door Temporarily
Securing the garage door temporarily is a crucial step in emergency situations. Use strong, adjustable clamps to secure the door to the tracks, preventing any unintended movement. This temporary measure ensures the door remains in a closed position, enhancing safety and preventing potential accidents. While securing the door, it's essential to exercise caution and avoid placing clamps directly on the door's panels to prevent additional damage. This temporary securing method allows homeowners to buy time until a professional technician can assess and conduct the necessary repairs.
When to Seek Professional Help
Knowing when to seek professional help for garage door issues is crucial for ensuring both safety and effective repairs. Recognizing the limitations of DIY emergency repairs is essential, especially when dealing with complex components like garage door cables. If issues persist despite initial attempts or if there's uncertainty about the extent of the problem, it's advisable to contact professionals. Signs indicating the need for professional intervention include persistent irregularities in door movement, unusual noises, or visible damage to critical components. The importance of timely professional assistance cannot be overstated, as it not only addresses the immediate concerns but also prevents potential long-term damage. If you need any garage door cable repair service, seek Fix N Go Garage Door Repair & Installation for reliable and efficient solutions to ensure the optimal functioning of your garage door system.
Preventive Measures and Regular Maintenance
To
prevent garage door track bending, consider avoiding impacts or collisions with the door. Ensure sufficient clearance for the door's movement, and instruct family members to exercise caution during operation. Additionally, be mindful of objects near the tracks that could potentially interfere with the door's path, and address any potential obstructions promptly.
Routine inspections play a crucial role in maintaining a functional garage door system. Regularly examine the tracks, rollers, and other components for signs of wear, misalignment, or damage. A quick visual inspection can identify issues early, allowing for timely repairs and preventing minor problems from developing into more significant concerns.
Implementing
regular lubrication and maintenance practices is essential for the longevity of your garage door. Apply a recommended lubricant to moving parts such as rollers, hinges, and springs to reduce friction and enhance smooth operation. Periodically tighten loose hardware and address any unusual sounds during door movement promptly. Consistent lubrication and maintenance contribute to the overall efficiency and reliability of your garage door system.
Conclusion
Navigating emergency situations involving bent garage door tracks requires a swift and informed approach. Understanding the severity of the issue, prioritizing immediate action for safety, and implementing temporary fixes are key components of effectively handling such emergencies. While these steps provide temporary relief, seeking professional assistance for a thorough evaluation and long-term solutions is crucial to ensuring the continued functionality and safety of your garage door. Acting promptly in emergencies sets the foundation for a well-maintained and secure garage door system in the long run.
You might also like
Fix N Go Blog


